Choosing the right slicer software changes more about your print quality than any hardware upgrade under $200. The slicer translates your 3D model into the toolpaths your printer actually executes — bad slicer choices produce stringing, weak parts, and failed supports even on a perfectly tuned machine. This guide compares the four slicers that matter in 2026 (Cura, PrusaSlicer, Bambu Studio, and OrcaSlicer), shows you which one to use for which printer, and walks through the settings that move the needle on real print quality.
Most beginners pick a slicer because it came with their printer. That works for the first month. By print number 50 — when you start printing functional parts, multi-material models, or fine miniatures — slicer differences become the difference between a print that succeeds and one that fails on the bed. The four slicers covered here represent 95% of all desktop FDM slicing in 2026, and each excels at a different workflow.
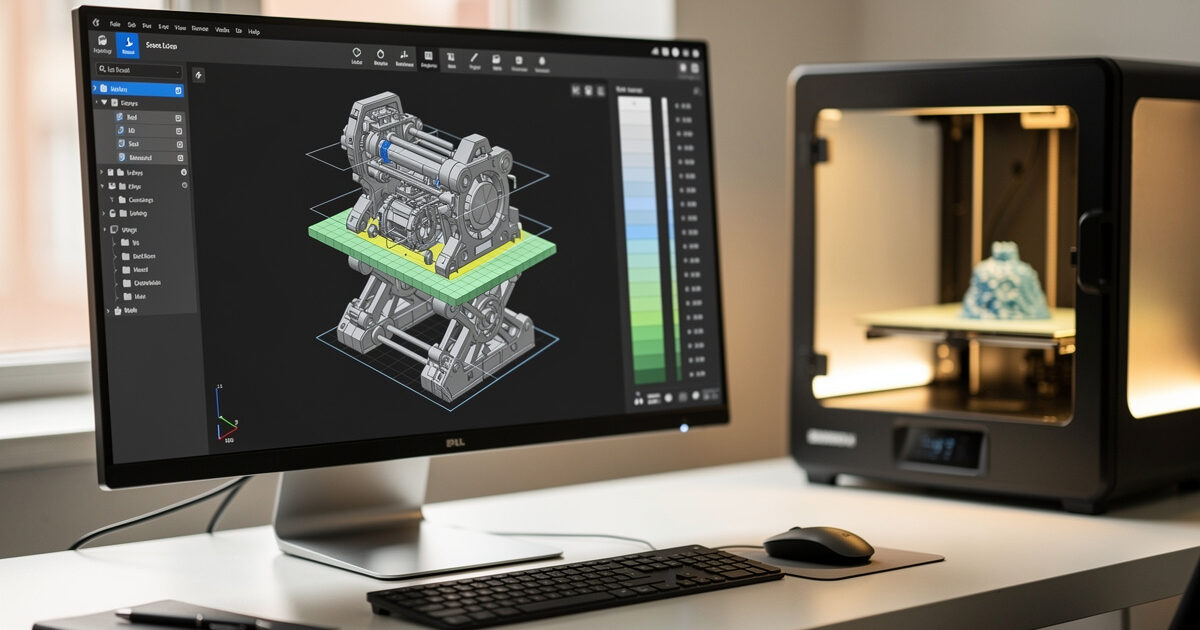
What a 3D Printer Slicer Actually Does
A slicer converts a 3D model (.STL, .3MF, .OBJ) into G-code: the line-by-line instructions your printer follows to lay down filament. In ~40 words: the slicer decides every layer height, every infill move, every support placement, every retraction event, and every temperature change. Hardware can’t fix what slicer settings get wrong.
Modern slicers handle three classes of decision: geometry (slicing the model into layers), motion (planning toolpaths that minimize travel and stringing), and physics (managing temperature, pressure advance, and cooling per material). The differences between Cura, PrusaSlicer, Bambu Studio, and OrcaSlicer come down to how aggressive each one is at automating those decisions, and how much manual control they expose for users who want to tune by hand.
If you’re new to slicing entirely, start with our complete beginner guide to 3D printing technology for context on how G-code, layer heights, and extrusion work before diving into slicer-specific settings below.
Cura vs PrusaSlicer vs Bambu Studio vs OrcaSlicer (2026 Comparison)
The four slicers cover overlapping territory but serve different users. Cura is the universal default. PrusaSlicer is the precision-engineering choice. Bambu Studio is purpose-built for Bambu Lab printers. OrcaSlicer is the open-source fork of Bambu Studio that works with everything. For a head-to-head deep dive on the first three, see our Cura vs PrusaSlicer vs Bambu Studio comparison.
| Feature | Cura 5.8 | PrusaSlicer 2.8 | Bambu Studio 1.10 | OrcaSlicer 2.2 |
|---|---|---|---|---|
| Best for | Any FDM printer | Prusa + tuned bedslingers | Bambu Lab series only | Any FDM, especially Klipper |
| License | LGPL 3.0 (free) | AGPL 3.0 (free) | AGPL 3.0 (free) | AGPL 3.0 (free) |
| Supports auto-tuning | Limited | Strong (organic supports) | Strong (tree + paint) | Strong (tree + paint) |
| Multi-color / AMS | Plug-in only | Native MMU3 | Native AMS / AMS Lite | Native AMS + manual |
| Print profile library | Largest (300+ printers) | Strong (Prusa + community) | Bambu only | Largest open profile set |
| Calibration tools | Manual | PA + flow built-in | Auto-cal on Bambu | Built-in PA, flow, temp towers |
| Klipper / input shaper | Plug-in | Limited | N/A (Bambu firmware) | Strong native support |
| Cloud / remote print | UltiMaker Digital Factory | PrusaConnect | Bambu Handy app | OrcaSlicer + Moonraker |
| Learning curve | Moderate | Moderate | Easy (defaults work) | Steep (more options exposed) |
The single most important factor: which slicer matches your printer. A Bambu Lab P1S owner gets dramatically better results from Bambu Studio than from Cura, because the manufacturer’s profiles include calibrated pressure advance, input shaping, and flow values you’d otherwise have to dial in yourself. A Voron 2.4 or Sovol SV08 user sees the inverse — OrcaSlicer’s deep Klipper integration and exposed advanced settings produce sharper prints than Cura can match.
Cura: The Universal Default
Cura ships from UltiMaker and supports more printers out of the box than any other slicer — over 300 machine profiles in 2026, plus a community marketplace for niche printers. For someone with a Creality Ender 3, an Anycubic Kobra, or any older bedslinger, Cura’s built-in profile is usually the fastest path to a working first layer.
Cura’s strength is breadth. Its weakness is that automation lags behind PrusaSlicer and Bambu Studio. Tree supports in Cura are competent but not as conformal as PrusaSlicer’s organic supports — see our tree vs normal supports comparison for when each is the right choice. Multi-material printing requires the Mosaic Palette plug-in or manual filament swaps. Calibration utilities like pressure advance and flow towers exist as community plug-ins, not as native features.
The Cura settings that matter most for beginners are layer height (0.2mm for almost everything), wall count (3 walls is the right answer for functional parts), infill density (15% gyroid for most prints, 50%+ only for load-bearing parts), and print speed (50mm/s on a stock Ender, 100mm/s+ on a Klipper-modded machine). For PLA specifically, our tested Cura PLA profile walks through every setting with measured rationale. Resist the urge to enable every “ironing” and “fuzzy skin” option — they slow prints dramatically and rarely change the outcome.
For a complete walk-through of dialing in Cura on a beginner printer, see our 3D printing materials guide — it covers the temperature, bed adhesion, and cooling settings that vary by filament type.
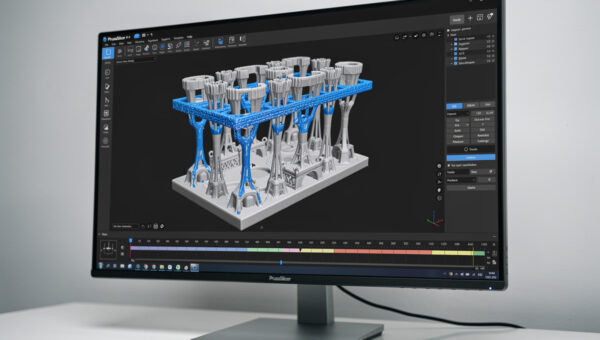
PrusaSlicer: The Precision Choice
PrusaSlicer is the engineering-first slicer. Developed by Prusa Research and used by every Prusa printer since the original i3 MK2, it now supports over 80 third-party printers including Voron, Bambu, Creality, and Sovol machines. The interface is denser than Cura’s but exposes more meaningful controls.
PrusaSlicer’s killer features in 2026 are organic supports (introduced in 2.6, refined through 2.8) and the modifier system. We cover the full custom-support workflow in our PrusaSlicer custom supports guide. Organic supports look like tree supports but trace a more efficient curve and detach with much less effort, leaving cleaner support-touching surfaces. The modifier system lets you apply different settings to specific regions of a model — denser infill in a stress zone, finer layer heights on a curved face — without manually splitting the STL.
For functional parts — brackets, jigs, fixtures, replacement gears — PrusaSlicer’s calibration toolset is hard to beat. Pressure advance, linear advance, flow rate calibration, and first-layer compensation are all built-in tests, not third-party plug-ins. The wizard walks you through one-time calibration prints that dial in the printer for your specific filament batch, and the results carry across all future prints with that material.
The trade-off: PrusaSlicer does not natively support Bambu Lab printers’ AMS or Klipper’s input shaping in a polished way. If you have a Bambu, use Bambu Studio. If you have a Klipper machine, OrcaSlicer is the better choice. Everyone else — Prusa owners, Voron builders, Creality K1 users running stock firmware — should default to PrusaSlicer.
Bambu Studio: Built for Bambu Hardware
Bambu Studio is the slicer Bambu Lab ships with every X1 Carbon, P1S, P1P, A1, and A1 Mini. It is a fork of PrusaSlicer with deep modifications for the Bambu printer ecosystem: AMS multi-color management, Bambu’s Lidar-based first-layer scanning, automatic flow calibration, and tight integration with the Bambu Handy mobile app.
If you own a Bambu Lab printer, Bambu Studio is the correct slicer 95% of the time. The factory profiles are calibrated against the actual hardware, including the high-flow hotend on the X1 Carbon (32mm³/s), the input shaper acceleration profiles, and the closed-loop chamber temperature on the P1S. Replicating that calibration manually in another slicer takes hours per material and rarely fully matches Bambu Studio’s defaults.
Bambu Studio’s weak point is non-Bambu printers. The slicer technically supports a few third-party machines, but the workflow is awkward and the profiles are spotty. For non-Bambu hardware, OrcaSlicer (described below) is the same engine with broader support.
The single Bambu Studio feature that consistently surprises new users is the filament-mapping panel in multi-color prints. Rather than hard-coding which AMS slot loads which color, you can re-map after slicing — useful when you realize halfway through a 12-hour print that you loaded teal instead of cyan. See our filament guide for which filament types pair well with the AMS feeder.
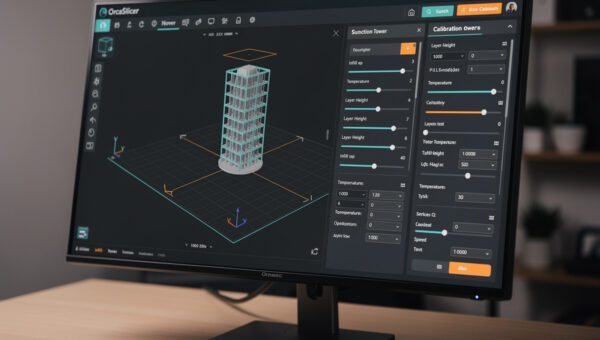
OrcaSlicer: The Power-User Fork
If you’ve decided OrcaSlicer is right for your setup, our OrcaSlicer setup tutorial walks through installation through first calibrated print. OrcaSlicer started as a fork of Bambu Studio in 2023 to add features Bambu didn’t ship — most notably, native support for non-Bambu printers and Klipper-specific tooling. By 2026 it has grown into the dominant slicer for the homebrew Klipper community and anyone running a high-performance third-party printer.
OrcaSlicer exposes more settings than any other slicer in this comparison. Pressure advance, retraction tower, temperature tower, max volumetric speed, flow rate, and input shaping are all built-in calibration tests with one-click G-code generation. For a Voron, a Sovol SV08, a Creality K1 running OpenK1, or a homebuilt Klipper machine, OrcaSlicer’s calibration suite shortens the dial-in process from a weekend of trial-and-error to about three hours of structured testing.
The cost of that power is complexity. OrcaSlicer’s settings panel can overwhelm someone who just wants to print a benchy — there are over 400 exposed parameters versus Cura’s ~180. For new users on a beginner printer, OrcaSlicer is the wrong starting point. For users who have outgrown Cura and want sharper corners, faster prints, and tighter tolerances, OrcaSlicer is where the gains are.
How to Choose: Decision Framework
The choice almost always reduces to printer-driven defaults plus one upgrade path. If you haven’t bought a printer yet, slicer compatibility should factor into your hardware decision — our decision framework for choosing a first 3D printer walks through how the Bambu / Prusa / Klipper ecosystems each pair with their respective slicers.
Bambu Lab P1S, X1 Carbon, A1, A1 Mini: Bambu Studio. Don’t switch unless you have a specific feature need (e.g., advanced multi-color routing) — the factory profiles are too good to leave on the table.
Prusa MK4, MK4S, XL, Mini+: PrusaSlicer. Same logic — the factory profiles include MMU3 multi-material handling, organic supports, and load-cell first-layer calibration that PrusaSlicer is built around.
Voron 2.4, Voron Trident, Sovol SV08, Creality K1 / K2 (Klipper): OrcaSlicer. The Klipper integration is unmatched, and the calibration suite is essential for getting a high-speed printer to actually print at high speed without ghosting or under-extrusion.
Ender 3 / Ender 3 V3, Anycubic Kobra, generic bedslingers (Marlin firmware): Cura is the safe default; PrusaSlicer is the upgrade once you’ve tuned the printer. Cura’s stock profile gets you printing in 30 minutes; PrusaSlicer’s modifier system and organic supports are worth the switch once you’re printing functional parts daily.
Anyone wanting multi-color but not buying a Bambu: PrusaSlicer with an MMU3 or a Mosaic Palette 3, or OrcaSlicer with a manual filament-swap workflow. Multi-color outside the Bambu ecosystem requires more setup work but achieves equivalent results once dialed in.
The Slicer Settings That Actually Matter
Across all four slicers, the same handful of settings drive 80% of print quality. Tuning these well in any slicer beats running another slicer with defaults.
Layer height (0.1mm to 0.28mm): 0.2mm is the right answer for most prints. Drop to 0.12mm for miniatures and curved surfaces; raise to 0.28mm for bulk parts where speed matters more than top-surface quality. Our layer height comparison guide shows the measured time-vs-quality trade-offs. See our deep-dive on layer height effects on print strength for the full breakdown.
Wall count (perimeters): 3 walls is the answer for functional parts; 2 walls for cosmetic prints; 4-5 walls when print strength matters more than infill density. Walls contribute more strength per gram than infill above ~30%, so increasing walls is usually better than cranking infill.
Infill density and pattern: 15% gyroid is the most efficient default — strong enough for most prints, fast enough not to dominate print time, and isotropic so it resists force in all directions equally. See our infill patterns guide for when honeycomb, cubic, or lightning beat gyroid. Crank to 30-50% only for load-bearing parts, and switch to cubic or honeycomb only when you specifically need anisotropic strength.
Print speed: The factory profile speed for your printer is almost always the right starting point. Going faster requires retuning pressure advance and input shaping; going slower mostly hurts cooling on small overhangs. Resist the urge to “improve” speed without first running a calibration tower.
Retraction: 0.8mm at 35mm/s for direct-drive extruders; 5mm at 45mm/s for Bowden setups, as a starting point. Run a retraction tower in your slicer’s calibration menu (PrusaSlicer, Bambu Studio, and OrcaSlicer have built-in tests) to dial in the actual values for your specific filament batch.
First-layer settings: 0.2mm first-layer height, 20mm/s first-layer speed, 5°C above the rest of the print’s bed temperature. The first layer determines whether the print sticks; it’s worth slowing down for. Our troubleshooting guide walks through fixing common first-layer failures, and the workspace setup guide covers how room temperature and ventilation affect first-layer adhesion on enclosed printers.
Slicer choice also interacts with what happens after the print finishes. Heavily over-sliced supports save print time but make support removal painful — see our post-processing guide for which slicer-side decisions affect sanding and finishing time. And if you’ve never followed a print all the way from STL through to finished part, our complete workflow guide walks through the entire chain in order.
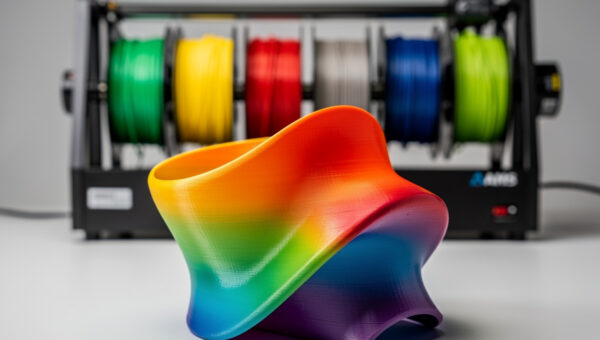
Multi-Color and Multi-Material Slicing
Multi-color printing in 2026 splits into two camps: integrated systems (Bambu AMS, Prusa MMU3, Anycubic ACE Pro) and palette-based systems (Mosaic Palette 3, Co Print). Slicer support varies dramatically.
Our multi-color slicing guide covers AMS, MMU3, and manual M600 workflows in depth. Bambu Studio handles AMS and AMS 2 Pro natively with one-click color assignment, automatic prime tower placement, and the filament-mapping feature that lets you re-route colors after slicing. Wipe waste per color change averages 1.5g on the AMS Lite, 0.8g on the AMS 2 Pro — significantly better than competitors when you do the math across a 100g multi-color print.
PrusaSlicer’s MMU3 support is mature and includes “smart wipe tower” placement that nests the prime tower inside otherwise-wasted areas of the bed. Multi-material projects expand what you can build dramatically — see our practical projects guide for examples of designs that benefit from multi-color slicing. Filament splice waste per color change is comparable to Bambu’s AMS, and PrusaSlicer’s support for non-Prusa multi-material hardware is improving each release.
OrcaSlicer supports both Bambu’s AMS and manual filament swaps, but its AMS implementation lags Bambu Studio by 6-12 months on new features. For Bambu hardware doing multi-color, stay on Bambu Studio. For everything else, OrcaSlicer’s manual swap mode plus a Mosaic Palette 3 is the most flexible setup.
Frequently Asked Questions
Which slicer is best for beginners in 2026?
Cura for non-Bambu printers and Bambu Studio for Bambu Lab printers. Cura supports 300+ machines with one-click profiles and gets new users printing in under an hour. Bambu Studio is preinstalled on Bambu hardware and uses calibrated factory profiles that beginners cannot easily replicate manually.
Is OrcaSlicer better than Bambu Studio?
OrcaSlicer is better for non-Bambu printers and for Klipper machines because it exposes 400+ tunable parameters and includes built-in calibration tests. On actual Bambu hardware, Bambu Studio still wins because its profiles include manufacturer-specific input shaping and Lidar-based first-layer values OrcaSlicer cannot match.
Can I use the same slicer for resin and FDM printing?
No. Cura, PrusaSlicer, Bambu Studio, and OrcaSlicer are FDM-only slicers. Resin printing requires a dedicated MSLA slicer like Lychee Slicer, Chitubox, or PrusaSlicer’s separate SLA edition. The slicing math for resin is fundamentally different — pixel masking versus toolpath generation.
What layer height should I use for 3D printing?
Use 0.2mm for almost all prints. Drop to 0.12mm for miniatures or curved surfaces where layer lines are visible; raise to 0.28mm for bulk prints where speed matters more than top-surface quality. Layer height under 0.08mm rarely improves visual quality and roughly doubles print time.
Are the free slicers actually free or do they upsell features?
Cura, PrusaSlicer, Bambu Studio, and OrcaSlicer are all fully free with no paid tiers, no feature unlocks, and no usage limits. All four are open-source under permissive licenses. Cura sells optional cloud features through UltiMaker Digital Factory but the slicer itself remains free.
Do I need different slicer settings for PETG versus PLA?
Yes. PETG prints 25-30°C hotter than PLA (240°C versus 210°C nozzle), uses less retraction (1mm versus 0.8mm on direct drive), prints slower (40mm/s versus 60mm/s), and benefits from cooler bed temps. Most slicers ship separate filament profiles for PLA, PETG, ABS, TPU, and ASA.
How do I switch slicers without losing my calibration?
You can’t directly transfer profiles between slicers — the parameter naming and behavior differ. What does transfer: your filament’s optimal nozzle temperature, bed temperature, retraction distance, and pressure advance value. Note these from your current slicer, run a one-time calibration tower in the new slicer, and rebuild the filament profile from those baseline values.
Related Articles
- The Complete Beginner Guide to 3D Printing Technology
- How to Choose Your First 3D Printer — A Decision Framework
- 3D Printing Materials Guide — PLA, PETG, ABS, TPU, and Resin Compared
- Your First Print to Your 50th — A Complete 3D Printing Workflow Guide
- Troubleshooting the 10 Most Common 3D Printing Failures