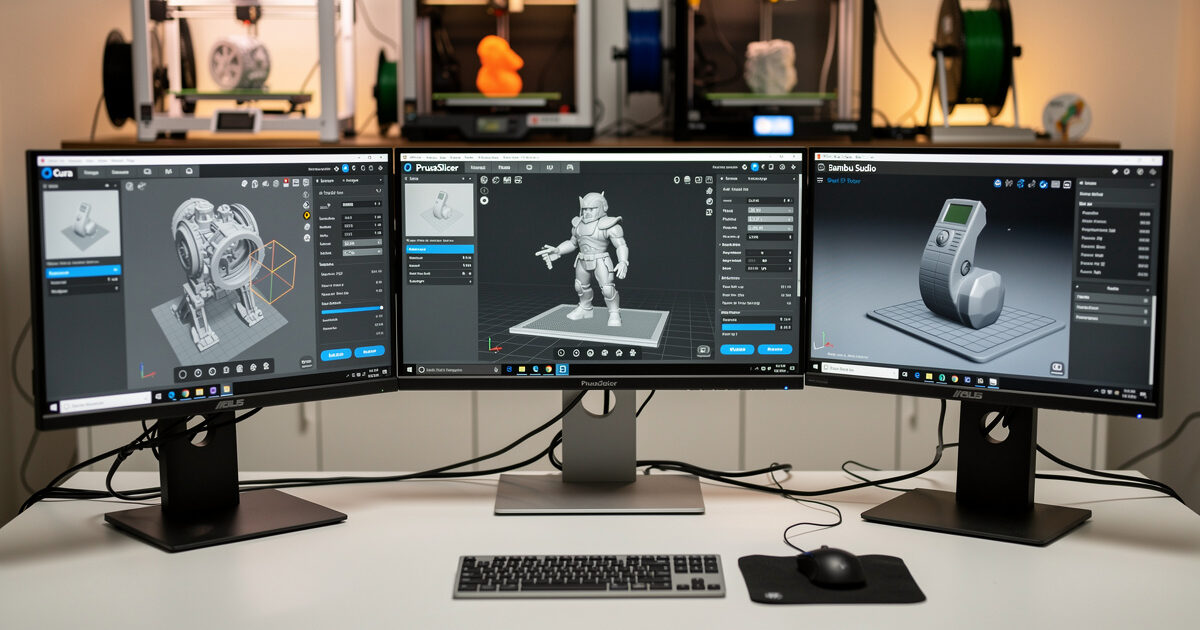
The Cura vs PrusaSlicer vs Bambu Studio question gets asked daily on every 3D printing forum, and the answer is almost always determined by your hardware. In ~40 words: Cura wins for generic Marlin printers (Ender, Anycubic, Sovol stock), PrusaSlicer wins for Prusa hardware and tuned bedslingers, and Bambu Studio wins on Bambu Lab printers — choosing against your printer’s matching slicer costs measurable print quality.
This article goes deeper than the “which is best” headline. It compares the three slicers head-to-head on five dimensions that show up in real prints: profile quality, support generation, calibration tools, multi-material handling, and the tuning ceiling. By the end you’ll have a clear answer for your specific printer plus a few cases where switching the default makes sense.
Print Profile Quality (Out-of-Box Defaults)
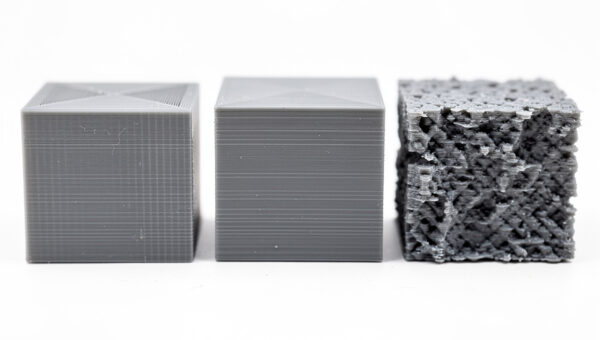
Print profile quality is the single biggest differentiator between these slicers in 2026. A “profile” bundles every setting — temperatures, retraction, pressure advance, jerk, acceleration — for a specific printer-and-filament combination. Better profiles mean less manual tuning.
Bambu Studio ships factory-calibrated profiles for every Bambu Lab printer and every officially supported filament. These profiles include hardware-specific values like the X1 Carbon’s 32mm³/s max flow, the P1S’s chamber thermistor compensation, and per-machine input shaping coefficients measured at the factory. Print a benchy with stock Bambu Studio settings and you get near-publication-quality results without any user calibration.
PrusaSlicer’s profiles are nearly as good for Prusa printers and competitive on supported third-party machines. The MK4 profile includes load-cell-based first-layer compensation values; the XL profile handles the multi-extruder choreography for tool changes. Profiles for Voron, Sovol, and Creality machines come from community contributors and vary in quality — verify before printing critical parts.
Cura’s profiles are the broadest collection (300+ machines) but the most generic. The stock Ender 3 profile in Cura is conservative and safe; it gets the print to come out, but on a tuned Ender 3 with input shaping and a hardened nozzle it will visibly underperform a custom profile. Treat Cura’s defaults as a starting point, not a finished tuning.
For context on how slicer profiles translate into actual print speed and quality, see the broader slicer comparison guide.
Support Generation
Support handling is where slicer differences become visible. All three slicers do “normal” supports adequately. The differences emerge with tree supports, organic supports, and paint-on supports — the modes that distinguish “support that prints” from “support that prints and detaches cleanly.”
PrusaSlicer’s organic supports (introduced in 2.6, refined through 2.8) are the current state of the art for FDM. The branching algorithm follows a more efficient curve than Cura’s tree supports, uses ~30% less filament for equivalent overhang coverage, and detaches with noticeably less effort. Support-touching surfaces come off smoother because the branch tips are more conical.
Bambu Studio’s tree supports are competitive with PrusaSlicer’s organic supports — same idea, slightly different math, similar results. Bambu Studio’s killer feature is the support paint mode: directly clicking on the model to designate where supports go (and where they don’t), avoiding the algorithmic guesswork entirely. For miniatures with selective overhangs, paint-on supports save filament and cleanup time.
Cura’s tree supports work but are visibly behind. The tips are bulkier, the branches are denser, and the support-touching surface needs more sanding. Cura’s normal supports are fine for prints with simple geometry; tree supports in Cura should be your fallback only when normal won’t reach the overhang.
Calibration and Tuning Tools
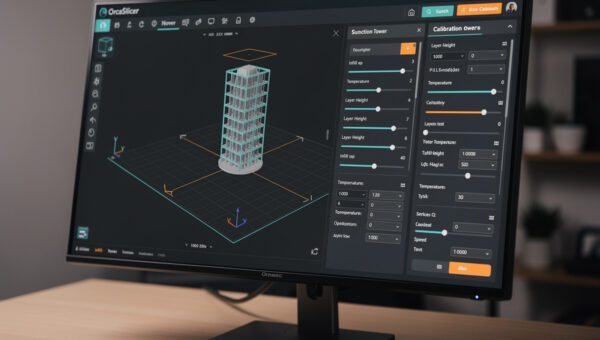
Calibration is where PrusaSlicer and OrcaSlicer (PrusaSlicer’s grandchild via Bambu Studio) shine compared to Cura. The built-in calibration tests are the difference between dialing a printer in over a weekend versus over an afternoon.
PrusaSlicer ships pressure advance, linear advance, flow rate, and first-layer-compensation calibration prints in its menu. Each runs a specific test pattern, you measure the result, you enter the optimal value, and the slicer applies it to all subsequent prints. The MK4-specific load-cell calibration is one click and updates the printer’s first-layer offset directly.
Bambu Studio’s calibration is largely automated on Bambu hardware. The X1 Carbon’s Lidar scans the first layer and adjusts flow per-print. Pressure advance is tuned at the factory and rarely needs user adjustment. For Bambu users, the lack of exposed calibration tools isn’t a missing feature — it’s because the hardware handles it. On non-Bambu printers, Bambu Studio’s calibration lacks the depth PrusaSlicer offers.
Cura’s calibration story is the weakest of the three. Pressure advance, flow towers, and retraction towers exist as community plug-ins, not as native features. The plug-in workflow works but is more friction than PrusaSlicer’s built-in equivalent. For users on tuned high-speed printers, this calibration gap is the main reason to switch off Cura. Our troubleshooting guide covers when symptoms point to a calibration problem versus a hardware problem.
Multi-Material and Multi-Color
Multi-material printing splits the three slicers cleanly: Bambu Studio for Bambu AMS, PrusaSlicer for Prusa MMU3, Cura for everyone else (with caveats).
Bambu Studio’s AMS workflow is the smoothest in the industry. Drag a color onto a model region, set the slot mapping, and the slicer handles prime tower placement, purge waste minimization, and the filament-mapping panel that lets you re-route slot assignments after slicing. AMS purge waste averages 1.5g per color change on the AMS Lite, 0.8g on the AMS 2 Pro.
PrusaSlicer’s MMU3 support is the second-most-mature multi-material implementation. Filament splice waste is comparable to Bambu’s AMS, and the smart wipe tower places the prime infrastructure inside otherwise-wasted print bed real estate. PrusaSlicer also supports manual color changes with M600 pause-and-swap commands — useful for two-color prints without buying a multi-material unit.
Cura’s multi-color support requires the Mosaic Palette plug-in or manual M600 pauses. The plug-in workflow is functional but feels grafted-on. For occasional two-color prints on a single-extruder printer, Cura’s “filament change” post-processing script is the simplest path. For serious multi-material work, Cura is the wrong slicer.
Tuning Ceiling: How Far Can You Push Each Slicer?
The “tuning ceiling” is how far each slicer lets you go when chasing peak print quality. This matters less for casual printing and more for users who eventually want to crank speeds, dial in tight tolerances, or print exotic materials.
OrcaSlicer (a fork of Bambu Studio with broad printer support) currently has the highest tuning ceiling — over 400 exposed parameters versus Cura’s ~180. PrusaSlicer sits in the middle with about 280 parameters, including the most useful ones (modifiers, custom G-code per object, pressure advance per filament). Cura intentionally hides advanced settings behind a visibility filter, which is friendly to beginners but limiting once you outgrow defaults.
For users who plan to keep their printer for 3+ years and grow into power-user territory, PrusaSlicer or OrcaSlicer raise the ceiling Cura can’t reach. For users who just want the printer to work reliably for stock prints, Cura’s lower ceiling is genuinely fine — and its plug-in marketplace covers most edge cases.
When to Switch Slicers (And When Not To)
The decision-tree for switching slicers comes down to whether you’re outgrowing your current one. Most users should NOT switch.
Stay with Cura if: You print PLA on a stock Ender 3 / Kobra / generic bedslinger, the prints come out fine, and you have no specific quality complaint. Switching slicers won’t make stock prints noticeably better — the bottleneck is the printer, not the software.
Stay with Bambu Studio if: You own a Bambu Lab printer. The factory calibration is too good to leave behind unless you’re hitting a specific limitation OrcaSlicer addresses (e.g., advanced multi-color routing for non-AMS hardware).
Stay with PrusaSlicer if: You own a Prusa printer or a printer Prusa officially supports, and you’ve already tuned it. The integration is too tight to leave.
Switch from Cura to PrusaSlicer if: You print PETG, ABS, or TPU regularly and want better calibration tools; you’re tired of plug-in hunting for basic features like flow towers; or you’ve started printing functional parts where modifiers (different settings per region) matter. See our filament guide for which materials reward better calibration most.
Switch from Cura to OrcaSlicer if: You’ve installed Klipper firmware on your printer and want tight integration; you want every advanced setting exposed; you’re cranking print speeds past 200mm/s and need input shaping support. Don’t switch to OrcaSlicer if you’re new — the settings panel is overwhelming.
Learning Curve and Documentation
Setup time and learning curve favor Bambu Studio first, Cura second, PrusaSlicer third.
Bambu Studio’s curve is the gentlest because the defaults work. New users can install, click “Slice,” and print successfully on day one. The downside is that when something does go wrong, the abstracted controls make troubleshooting harder.
Cura is moderately friendly because the visibility filter hides advanced settings until you’re ready for them. The official documentation is comprehensive, the YouTube tutorial volume is the largest of any slicer, and the marketplace plug-ins are well-maintained. Most beginners get to print success within an hour.
PrusaSlicer’s interface is denser by default and exposes more controls. The documentation (Prusa’s printables.com guides, the PrusaSlicer manual on GitHub) is thorough but assumes you know basic 3D printing terminology. Plan to spend a couple of hours reading before printing functional parts. Our complete workflow guide covers the cross-slicer concepts that translate between all three.
Frequently Asked Questions
Can PrusaSlicer slice for a Bambu Lab printer?
Technically yes, but you’ll lose AMS multi-color, Bambu Lidar first-layer scanning, and the factory-calibrated input shaping. For Bambu hardware stick with Bambu Studio. The single exception is if you specifically want PrusaSlicer’s organic supports — even then, OrcaSlicer is a better fork to use.
Is Cura still relevant in 2026?
Yes, especially for the long tail of Marlin-based printers Cura supports out of the box. Cura is the right default for new owners of Ender 3, Anycubic Kobra, Sovol SV06 stock, and dozens of other budget machines. It loses to PrusaSlicer and OrcaSlicer once users outgrow defaults, but for stock-printer beginners it remains the lowest-friction starting point.
Which slicer produces the strongest parts?
All three produce equivalently strong parts when settings match — strength comes from wall count, infill density, and material choice, not from the slicer. Where slicers differ is how easily they let you set those parameters per-region using modifiers, where PrusaSlicer leads. For pure isotropic strength on simple parts, output is identical across all three.
Do I need to recalibrate my printer when switching slicers?
Partially. Filament temperature and bed temperature transfer directly. Pressure advance values translate but use slightly different units (linear advance K-factor in Marlin/Cura, pressure advance in seconds for Klipper/OrcaSlicer). Plan to run a one-time calibration tower in the new slicer to rebuild the filament profile, but you don’t need to redo hardware-level calibration.
Can OrcaSlicer replace all three?
Effectively yes — OrcaSlicer is a fork of Bambu Studio that supports Bambu hardware, Klipper machines, and most printers Cura covers. The trade-off is complexity: OrcaSlicer exposes far more settings and has a steeper learning curve. For users who want one slicer for everything and don’t mind the depth, OrcaSlicer is the consolidated answer.
Why is Bambu Studio free if Bambu makes printers?
Bambu makes money on hardware and AMS filament; the slicer is a customer-acquisition tool. Like PrusaSlicer for Prusa, Bambu Studio is open-source under AGPL 3.0 — the source code is on GitHub and forks (notably OrcaSlicer) are legal and active. Bambu’s incentive is to keep the slicer good so customers stay in their hardware ecosystem.
Which slicer handles thin-walled vase prints best?
PrusaSlicer’s spiral-vase mode handles 0.4mm-wall vases most reliably across the three slicers — the seam-hiding algorithm is more sophisticated. Cura and Bambu Studio also support spiral-vase mode but show more visible Z-seams on tall thin-walled prints. For decorative vases the difference is visible at arm’s length.