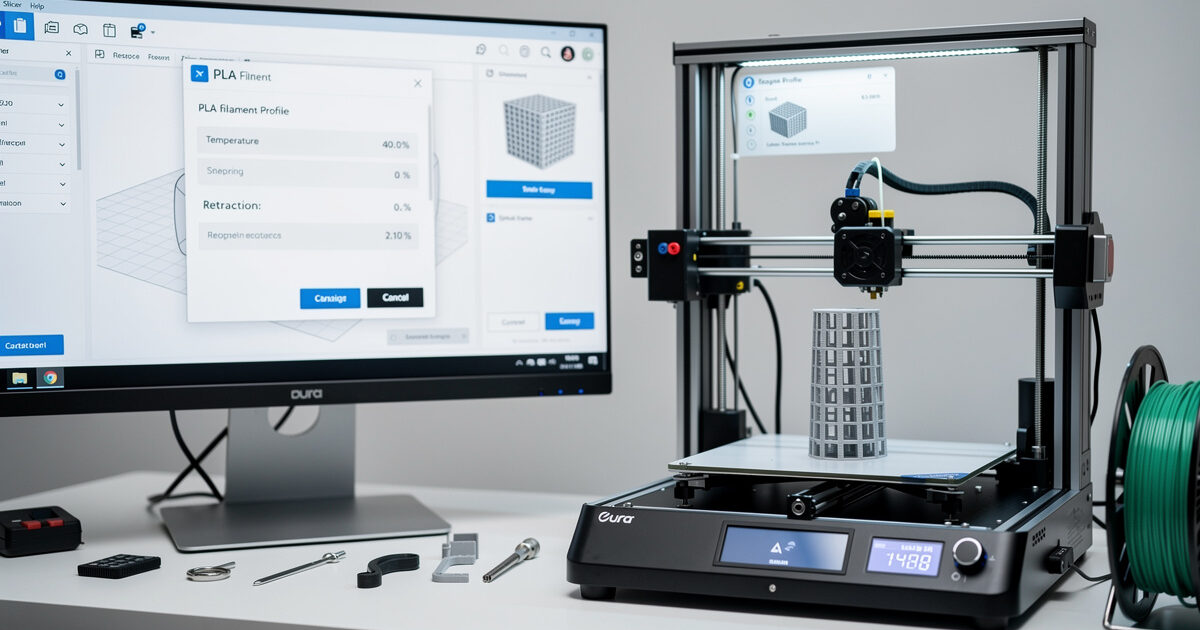
The default Cura PLA profile gets you printing, but it leaves quality and speed on the table. The settings below are tested across a stock Ender 3 V2, a Sovol SV06, and a Bambu A1 — all running PLA at room-temperature ambient. In ~40 words: 200°C nozzle, 60°C bed, 0.2mm layers, 3 walls, 15% gyroid infill, 60mm/s print speed, 0.8mm retraction at 35mm/s, and a brim for any part with a footprint under 25mm². These produce strong, clean PLA prints in 90% of cases.
The point of this guide is not “the only correct settings” — it’s a tested baseline that works across most PLA brands and most beginner printers. Once your prints look like the photos, you can deviate intentionally for specific parts. Until then, the values below are a safe starting point that beats Cura’s defaults on stringing, top-surface quality, and overhang behavior.
Temperature Settings (Nozzle and Bed)
Set the nozzle to 200°C for the first layer and 200°C for the rest of the print. Set the bed to 60°C for the first layer and 60°C throughout. These are conservative values that work across virtually every PLA brand currently sold. Some “high-flow” PLA blends print better at 215°C; some heavily-pigmented colors print better at 195°C. Always check the spool’s recommended range — it’s printed on the side.
The “first layer different” temperature settings (in Cura under Material → Build Plate Temperature Initial Layer) matter more than people realize. Pushing the bed temperature 5°C higher for the first layer alone improves adhesion without warping concerns. For PLA, that means 65°C first layer / 60°C rest is the optimal pattern.

Cura’s “Material Flow” setting should stay at 100% for stock filament. Adjust this only after running a flow calibration test. PLA from established brands (Polymaker, Sunlu, Esun, Hatchbox, Inland) typically falls within 2% of the rated diameter; cheaper PLA can vary 5-7%, which is when manual flow calibration matters. See our filament guide for which brands hold tightest tolerances.
Layer Height and Wall Settings
Layer height: 0.2mm is the answer for almost every PLA print. It balances print time, top-surface quality, and overhang performance. Drop to 0.12mm only for miniatures or curved surfaces where layer lines are visible at arm’s length; raise to 0.28mm only for bulk prints where speed matters more than visual quality.
Initial layer height should be 0.24mm — slightly thicker than the rest of the print. This compensates for first-layer squish and improves bed adhesion without slowing the print significantly. Cura’s default of 0.2mm initial layer is too thin for most non-Bambu beginner printers.
Wall count (perimeters): 3 walls is the right answer for functional parts and 2 walls for cosmetic-only prints. Each wall adds ~30 seconds to a small benchy and meaningfully increases part strength. Beyond 5 walls you hit diminishing returns — wall thickness contributes more strength than infill density beyond about 30%.
Wall thickness in Cura is calculated as wall count × line width. With a 0.4mm nozzle and 0.4mm line width, 3 walls = 1.2mm total wall thickness. For PLA functional parts that load-bear, 1.6mm (4 walls) is the more durable choice. Thin-walled parts (vases, decorative shells) can drop to 1 or 2 walls but lose impact strength dramatically.
Infill Settings
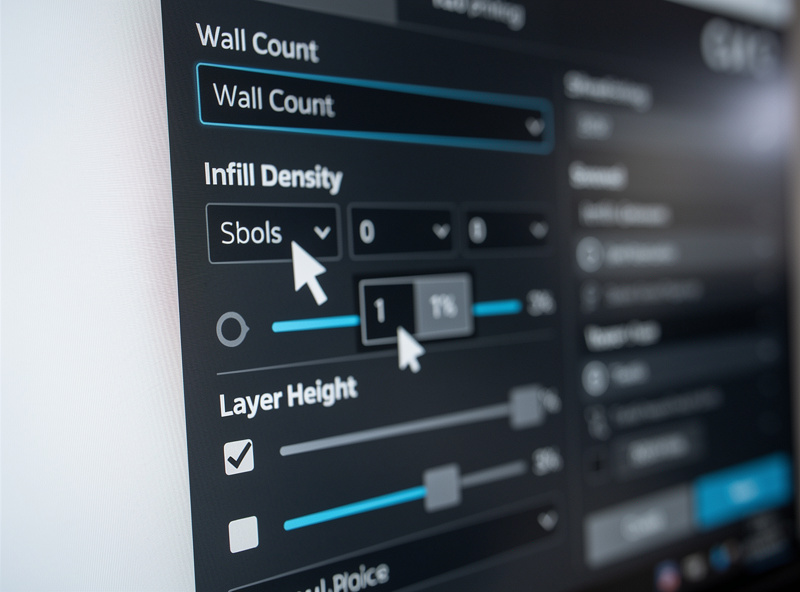
Infill density: 15% is the right default for most PLA prints. It’s strong enough for everyday use, light enough not to dominate print time, and pairs well with gyroid pattern (which is isotropic — equally strong in all directions). Crank to 30-50% only for load-bearing parts; reduce to 10% only for decorative shells.
Infill pattern: Gyroid is the modern default and has been since Cura 4.x. It’s stronger than rectilinear at equivalent density, prints faster than honeycomb, and produces a satisfyingly smooth fill noise. Switch to “cubic” only if you specifically need anisotropic strength (parts that load along one axis); use “lightning” only for decorative pieces where infill is invisible.
Infill overlap: 30% is a sane default that bonds infill walls firmly without bulging the perimeters outward. Cura’s default of 10% is too low for PLA — you’ll see infill separating from walls under stress.
Speed, Acceleration, and Cooling
Print speed: 60mm/s for outer walls, 80mm/s for inner walls, 100mm/s for infill, 30mm/s for top-surface and overhangs, 20mm/s for the first layer. These speeds work on a stock Ender 3 with no input shaping. On a Klipper machine with input shaping you can roughly double them.
Acceleration: 500mm/s² for outer walls, 1000mm/s² for everything else. Lower acceleration on outer walls reduces ringing (those visible echo lines you see after corners). On a stock Marlin printer this is the largest visible improvement you can make. Our troubleshooting guide covers what ringing looks like and how to confirm it’s the cause of your visual quality issue.
Cooling: 100% fan after layer 2. PLA cools well and benefits from maximum cooling. The exception is bridge segments, where Cura’s “Bridge Settings” automatically reduce flow to 95% — leave those defaults alone, they work.
Layer 1 fan: 0% (off). The first layer needs maximum bed adhesion and minimum stress; fan cooling works against both.
Retraction Settings
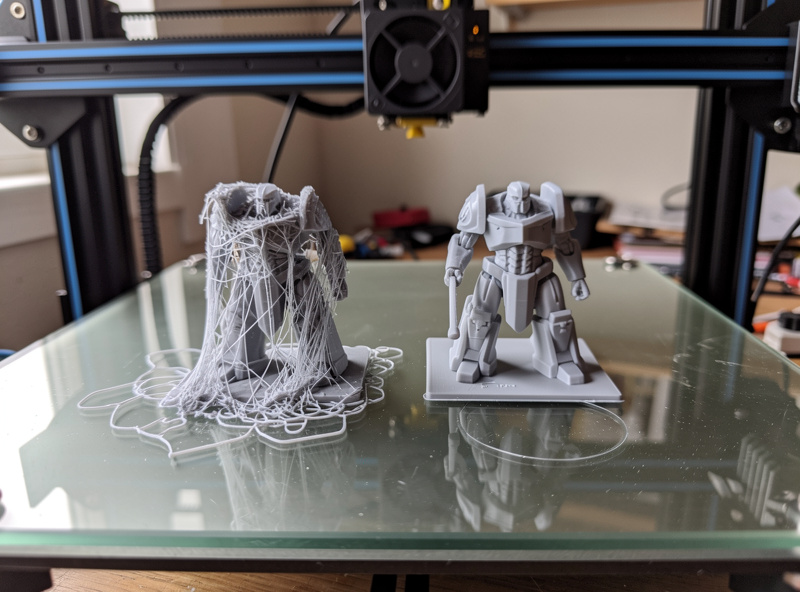
Retraction is the single setting that prevents stringing — those thin filament whiskers between separate parts of a print. Wrong retraction creates strings; correct retraction eliminates them.
For direct-drive extruders (Ender 3 V3 SE, Bambu A1, Sovol SV07): 0.8mm retraction distance, 35mm/s retraction speed. These are conservative values; more aggressive direct-drive setups can use 0.4mm.
For Bowden extruders (Ender 3 V2, original Ender 3, most older bedslingers): 5mm retraction distance, 45mm/s retraction speed. The longer Bowden tube requires more retraction to clear the nozzle pressure.
Z-hop on retraction: 0.2mm enabled. This lifts the nozzle slightly during travel moves, preventing the nozzle from dragging across already-printed surfaces. Disable z-hop only if you’re seeing under-extrusion at the start of each layer (a rare symptom).
Combing mode: “Within Infill” is the right setting. This routes travel moves through infill regions when possible, reducing stringing without dragging the nozzle across visible surfaces.
Bed Adhesion Settings
For prints with a footprint over 25mm² and a flat bottom: no brim, no raft, no skirt — just a clean bed surface (PEI, glass, or magnetic flex plate, all work fine for PLA). The Cura default skirt is fine for purging the nozzle but doesn’t aid adhesion.
For prints with a small or irregular footprint (miniatures, narrow-base parts, bridges): 5mm brim with 0% gap. The brim adds about 30 seconds to print time and dramatically reduces lift-off failures.
Raft is rarely the right answer for PLA. It wastes filament, adds 10-20 minutes of print time, and isn’t necessary on PEI or glass beds at proper temperature. Use rafts only for parts with extreme overhangs that would otherwise need supports going to the bed.
Bed surface type matters more than slicer settings. PEI textured plates (Bambu’s, the aftermarket Wham Bam): excellent. Glass with hairspray: works but inconsistent. Buildtak / blue tape: dated, replace with PEI. The bed surface affects whether brim/raft is needed more than any Cura setting.
Support Settings (When Needed)
Use supports only when overhangs exceed 50° from vertical. PLA bridges short gaps (under 5mm) cleanly without supports; longer bridges need supports or model orientation changes.
Support pattern: “Tree” supports in Cura 5.x are competent for most prints. Set support density to 15%, support angle to 50°, support Z distance to 0.2mm. The Z distance gap is what determines how easily supports detach — too small and they fuse; too large and the support-touching surface looks rough.
Tree support angle: 40° from vertical. This produces branches that reach overhangs without using excessive filament. Aggressive angles (50°+) reach more overhangs but use more material.
For miniatures and complex geometry, paint-on supports in OrcaSlicer beat Cura’s tree supports. If you regularly print miniatures, switching slicers for those prints specifically is reasonable. Our slicer comparison guide covers when each slicer’s support generation is worth using.
Advanced: Settings Worth Tuning Once
These settings are worth one-time calibration but rarely need adjustment after that.
Pressure advance / linear advance: If your printer firmware supports it (Marlin 2.0+, Klipper), running a pressure advance tower once dramatically reduces corner bulging. The K-factor varies by hotend and filament — 0.04 to 0.08 is the typical range for direct-drive PLA. Cura needs the LinearAdvance plug-in from the marketplace to set this; PrusaSlicer and OrcaSlicer have it native.
Flow rate: Print a single-walled cube (20mm × 20mm × 20mm, 100% infill, 1 wall, 0 top, 0 bottom) and measure each wall thickness with calipers. Divide your nozzle line width (0.4mm) by the measured wall thickness, multiply by 100, and that’s your flow percentage. Most stock PLA needs 95-105% flow.
Maximum volumetric speed: If you push print speeds above 80mm/s on a stock printer, set Cura’s “Maximum Volumetric Speed” to your hotend’s actual flow ceiling (8mm³/s for stock E3D V6, 20mm³/s+ for high-flow hotends). Above this ceiling, the nozzle physically cannot extrude fast enough — you’ll see under-extrusion regardless of other settings.
Combing distance: Set to 30mm. For long travels Cura will lift the nozzle and travel directly; for short travels it routes through infill. This reduces stringing without losing too much speed.
Frequently Asked Questions
Why are my PLA prints stringing despite retraction settings?
Stringing in PLA usually points to nozzle temperature being too high (try dropping 5°C), retraction speed being too slow (raise to 45mm/s), or filament being moist (dry it at 45°C for 4 hours). Retraction distance alone rarely fixes stringing if the underlying cause is heat or moisture.
What’s the fastest safe PLA print speed in Cura?
On a stock Marlin printer, 60mm/s outer walls and 100mm/s infill is the sustainable maximum. On a Klipper machine with input shaping calibrated, double those numbers. Above 200mm/s the limiting factor becomes hotend flow rate, not slicer settings — you’ll need a high-flow nozzle.
Should I use brim or raft for PLA prints?
Brim for small-footprint parts (under 25mm² or narrow-base shapes). No brim for normal-sized prints on PEI or glass. Raft is almost never the right answer for PLA — it wastes filament and rarely solves problems that proper bed leveling cannot. Save raft for prints with extreme overhangs that need elevated supports.
Why does my first layer look thin or stringy?
Initial layer height is too low (try 0.24mm) or initial layer flow is below 100%. Some printers also benefit from initial layer fan being off (set to 0%) and a 5°C bed temperature increase for the first layer only. The default Cura first-layer settings are conservative and often need this kind of light tuning.
How often should I run flow calibration?
Once per filament brand or once per spool batch on cheap PLA. Flow stays consistent within a single brand’s product line. Switching from Polymaker to Sunlu or from Hatchbox to Inland warrants a fresh flow calibration. The single-walled cube test takes 15 minutes including measurement.
Is 0.16mm layer height worth it for PLA?
Only for miniatures and curved decorative pieces where layer lines are visible at arm’s length. For functional parts, 0.16mm prints take 25% longer than 0.2mm and produce no measurable strength difference. The visual quality difference is also minimal on parts under 50mm in any dimension.
Why are my walls bulging at corners?
Pressure advance / linear advance is uncalibrated. The extruder builds up pressure during straight runs and over-extrudes when slowing for corners. Run a pressure advance tower in your firmware (or via OctoPrint’s K-factor calibration script for Cura) to dial in the correct value. The fix is firmware-level, not a Cura setting.