PrusaSlicer offers four ways to add supports — automatic, paint-on, modifier-based, and tree (organic) — and each suits a different problem. In ~40 words: use paint-on supports for selective overhangs (especially miniatures), automatic supports for general use, modifier supports for surgical control over a single feature, and organic tree supports for tall complex geometry. Mixing methods on the same print is normal and expected.
Most beginners default to “Generate supports everywhere” and accept whatever PrusaSlicer produces. That works, but it wastes filament, lengthens print time, and leaves rough support-touching surfaces where supports weren’t actually needed. Custom supports — the techniques below — typically reduce support filament by 40-60% on a typical print and dramatically improve the surface finish on parts that show.
When You Actually Need Supports
Supports are needed when overhangs exceed about 50° from vertical, or for bridges longer than ~5mm. PLA bridges short gaps cleanly without supports; PETG and ABS bridge less well and need supports earlier. In ~40 words: the 50° rule covers most cases, with the exception that prints with very small overhanging features (under 3mm) often print fine without supports because the layer cooling time is brief enough.
Always orient the model first. Many parts that “need supports” actually need to be rotated. A pyramid printed flat-side-down needs no supports; printed point-up it needs heavy supports. PrusaSlicer’s automatic orientation tool (in the right-click menu on a model) often finds an orientation that eliminates supports entirely.
For context on which orientations work best for different part types, see our complete 3D printing workflow guide.
Automatic Supports (Default Behavior)
PrusaSlicer’s automatic supports are turned on by setting “Generate Supports” to “On build plate only” or “Everywhere” in the Print Settings panel. The slicer analyzes the model and adds supports where the overhang angle exceeds your support threshold (default 55°).
“On build plate only” generates supports only from the print bed up to the overhang — never resting on the model itself. This is the safer choice; it produces less complex support structures but uses more filament for tall prints. “Everywhere” allows supports to rest on top of the model, which uses less filament but can scar the model surface where supports touch.
The default support threshold of 55° is conservative. Drop it to 50° if your printer struggles with overhangs (typical for older bedslingers); raise to 60° if you have a well-tuned printer with strong cooling. Lower threshold = more supports added; higher threshold = fewer supports added.
Support density (in Print Settings → Supports → Support Material → Pattern Spacing) defaults to 2.5mm. Drop to 2mm for delicate overhangs; raise to 3mm for general use to save filament. Below 2mm supports become difficult to remove cleanly.
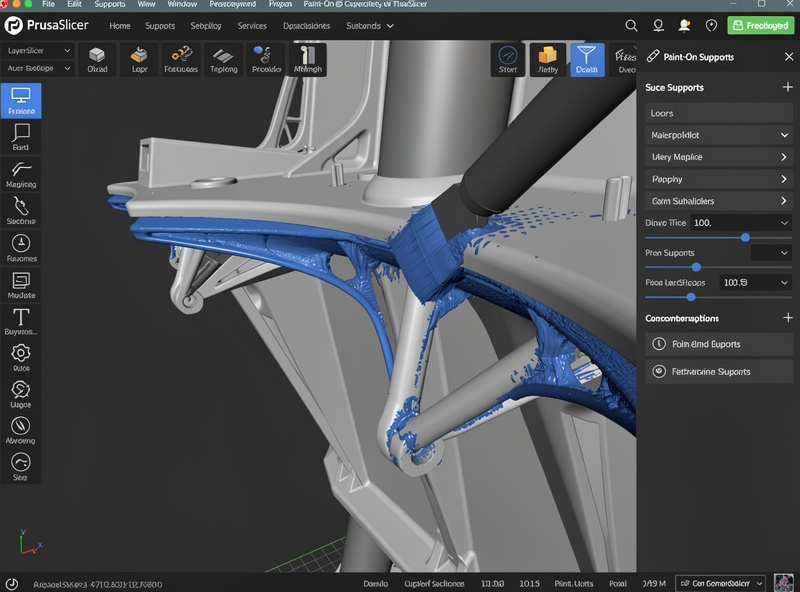
Paint-On Supports (The Most-Used Custom Method)
Paint-on supports are the single most useful PrusaSlicer feature for users who care about print quality. Activate the tool by selecting your model and pressing L (or clicking the paintbrush icon in the toolbar). You’ll see two paint colors: blue (Enforcer — force support here) and white (Blocker — prevent support here).
The workflow: Set “Generate Supports” to “For support enforcers only” in Print Settings. Then paint blue Enforcers on every overhang you want supported. PrusaSlicer will generate supports ONLY where you painted, ignoring its automatic algorithm entirely. This gives you complete control.
For most miniatures, this is the only support method that produces clean prints. Automatic supports add tower scaffolding to areas that don’t need it (under arms, behind capes); paint-on supports add scaffolding only where you’ve explicitly designated. Filament savings of 50-70% on a complex miniature are typical.
Brush size and depth matter. Larger brushes paint faster but apply Enforcers to surfaces you didn’t mean to mark. Reduce brush size for fine geometry. The “depth” setting in the paint-on tool determines how far through the model the brush penetrates — set to 0 for surface-only painting, higher values for marking through walls.
Modifier-Based Supports
Modifiers in PrusaSlicer let you apply different settings to specific regions of a model. For supports, this means designating a specific volume where supports behave differently than the rest of the print — a powerful technique for tricky geometry.
To add a modifier: right-click your model → Add Modifier → choose a primitive shape (cube, cylinder, sphere) or load a custom STL. Position and size the modifier to enclose the region you want different settings for. Then click the modifier in the object tree and adjust support settings just for that region.
Common uses: forcing extra dense supports under a single fragile overhang while keeping the rest of the print’s supports normal. Or disabling supports entirely in a region where automatic supports keep adding unnecessary material.
Modifiers feel intimidating at first but become second-nature after a few prints. They’re particularly valuable for functional parts where one specific overhang needs perfect bridging while the rest of the part doesn’t care.
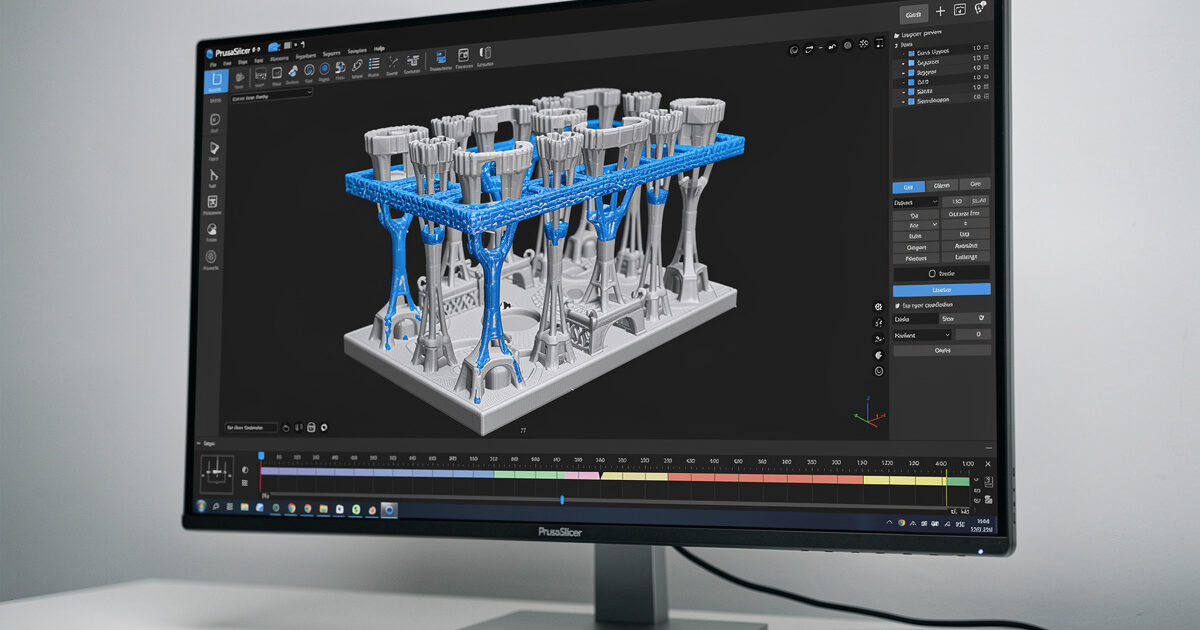
Tree and Organic Supports
PrusaSlicer’s organic supports (introduced in 2.6, refined through 2.8) are a separate support type — not “tree” in the older sense, but branching supports that follow more efficient curves. Switch to them by changing “Style” from “Grid” to “Organic” in the Supports panel.
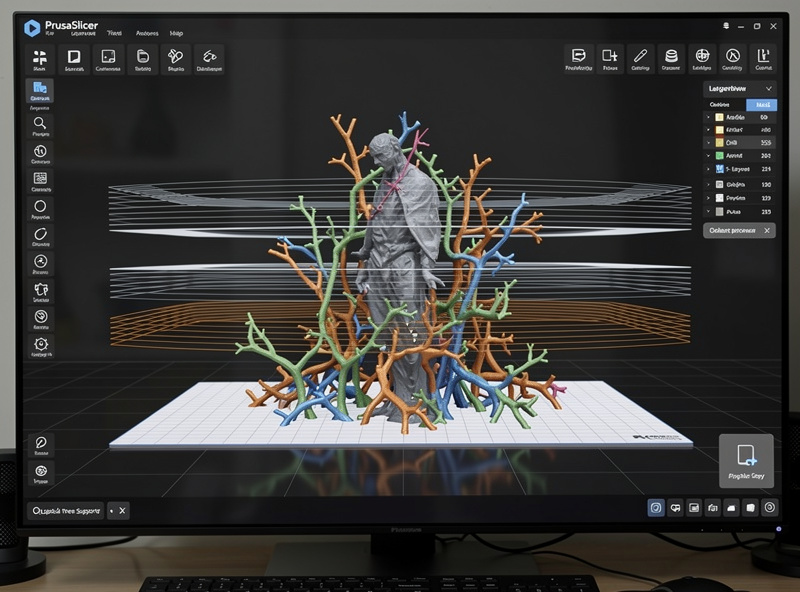
Organic supports excel at tall prints with multiple separate overhangs. The branching algorithm finds shared support paths, using less filament than grid supports and printing faster. Support-touching surfaces also come off cleaner because the contact tip is a thin branch rather than a flat support raft.
The trade-offs: organic supports take longer to generate in PrusaSlicer (10-30 seconds extra slicing time on complex models) and occasionally fail to support a specific overhang the algorithm misjudged. Always preview before printing — check that every overhang has a branch reaching it.
Organic supports work poorly on overhangs near the print bed (under 20mm height). For those, switch back to grid supports — the branches don’t have room to develop their efficient form. Mix-and-match by combining organic supports with paint-on Blockers on specific regions.
Support Material Settings That Matter
Support Z-distance: The vertical gap between the top of a support and the model’s overhang. 0.2mm is the default and works for PLA. Smaller values (0.1mm) hold the overhang surface flatter but make supports harder to remove. Larger values (0.3mm) detach more easily but leave a rougher surface.
Support pattern spacing: How dense the support fill is. 2.5mm is default. For overhangs at 60° (mild), 3mm spacing prints faster and removes easier. For severe overhangs (50°), drop to 2mm spacing.
Support interface layers: The dense topmost layer of the support that contacts the overhang. Default is 2 layers; increasing to 3 produces better surface finish but uses more material. Setting interface to 0 produces poor overhang surfaces — leave it at 2 unless you have a specific reason.
Support material XY distance: Horizontal gap between supports and model walls. 0.3mm is default; tighten to 0.2mm for sharper detail; loosen to 0.5mm for prints where you’ll need to pry supports out.
Post-Processing After Support Removal
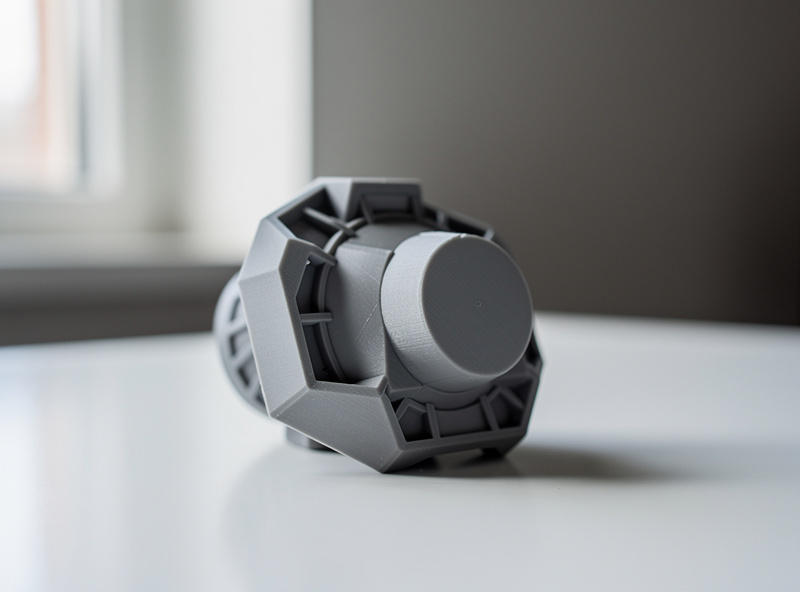
Even with optimal support settings, support-touching surfaces need light cleanup. Use side-cutters to nip off most of the support remnants, then a hobby knife or deburring tool to remove the small interface fragments. Hot water (60°C) softens PLA enough to peel stubborn fragments off without damaging the print.
For show surfaces, light sanding (220-grit, then 400-grit) eliminates the witness marks left by the support interface layer. PETG sands more easily than PLA; ABS sands like wood. Our post-processing guide covers sanding, painting, and acetone smoothing techniques in depth.
For PLA prints where the support-touching surface won’t be visible (functional parts, internal cavities, hidden faces), skip cleanup entirely. The witness marks don’t affect strength.
Frequently Asked Questions
Can I combine paint-on supports with organic supports?
Yes — set the support style to Organic and use paint-on Enforcers and Blockers as usual. The slicer generates organic-style supports only where Enforcers are placed and avoids Blocker regions. This combination is the most efficient support workflow for complex prints.
Why won’t PrusaSlicer generate supports where I painted?
Check that ‘Generate Supports’ is set to ‘For support enforcers only’ (or ‘Everywhere’ with manual paint additions). With this setting off, PrusaSlicer ignores Enforcers entirely. Also confirm the painted area is on a downward-facing surface — Enforcers on vertical walls do nothing.
How do I prevent supports from scarring my model surface?
Increase support Z-distance to 0.25mm and ensure interface layers are set to 2. Switch to organic supports for tall prints — the thin branch tips leave less surface damage. For show-surface prints, use Blockers to keep supports off any face that will be visible.
Are organic supports better than tree supports in Cura?
Generally yes for filament efficiency and removal cleanliness. PrusaSlicer’s organic supports use about 30% less filament than Cura’s tree supports for equivalent overhang coverage and detach more easily. Cura tree supports are still functional, just less refined as of 2026.
Should I use raft with custom supports?
Rarely. Rafts add a flat printed sheet under the entire print and are most useful for ABS or for prints where the bed surface won’t hold the model. Custom supports work fine without a raft on PEI or glass beds. Use a brim instead if first-layer adhesion is the concern.
Can I save paint-on support patterns to reuse them?
Yes — save the project as a .3mf file (not .stl). The .3mf format preserves Enforcers, Blockers, modifiers, and all paint-on support data. Reopening the .3mf restores everything; opening the original .stl loses all custom support work. Always save .3mf for prints you may re-print.
What’s the maximum overhang angle PLA can print without supports?
60° from vertical is reliable on a tuned printer with strong part cooling. Up to 65° is possible on small overhangs (under 5mm) where the bridging is brief. Beyond 65° you need supports or you’ll see drooping and surface degradation. PETG and ABS limits are 5-10° lower because their cooling is slower.