Infill pattern matters less than infill density for strength, but it matters a lot for print time, weight, and certain edge cases. In ~40 words: gyroid is the best default at 15-20% density for almost any print. Switch to honeycomb only for heavy load-bearing parts; switch to lightning only for decorative pieces; cubic only when you specifically need anisotropic strength along one axis.
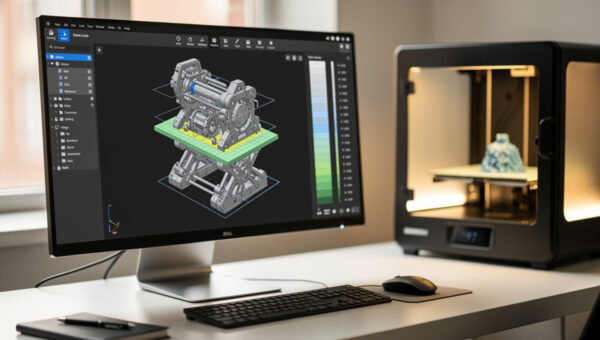
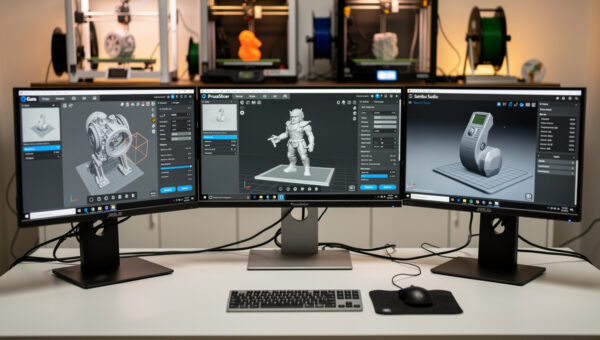
This guide covers the seven infill patterns you’ll find in modern slicers (Cura, PrusaSlicer, OrcaSlicer, Bambu Studio) and walks through the tested trade-offs. The conclusions hold across PLA, PETG, and ABS. Resin and TPU don’t use infill in the same way and aren’t covered here.
What Infill Actually Does
Infill is the internal structure inside the walls of a 3D print. In ~40 words: it provides compressive support so the top layers don’t sag, adds weight and strength, and absorbs impact energy. The pattern determines HOW the infill achieves these — efficient patterns use less filament for the same strength.
Infill density (the percentage of internal volume filled with material) matters more than pattern for most strength-related decisions. A 30% gyroid print is stronger than a 15% honeycomb print, even though honeycomb has a slightly higher strength-per-gram ratio. The rule: pick the right density first, then pick a pattern that suits the print type.
For background on how infill interacts with wall count and layer height for total part strength, see our slicer comparison guide — slicer choice determines which infill patterns are available.
Gyroid: The Modern Default
Gyroid infill is the default recommendation for almost every print in 2026. The pattern is mathematically defined as a “triply periodic minimal surface” — a smooth wave-like structure that’s equally strong in all directions (isotropic). Practical implications: a gyroid-filled part holds its shape against forces from any direction, which most prints experience in real use.
Gyroid prints faster than honeycomb at equivalent density and stronger than rectilinear at equivalent density. The strength-to-weight ratio is excellent. The only downside is a slightly more complex toolpath that adds 5-10% print time over rectilinear at the same density — usually worth it for the strength gain.
Optimal density for gyroid is 15-20% for most prints. Functional parts holding mechanical loads can crank to 30-50% gyroid. Above 50% density the gyroid pattern starts to look almost solid; you’re not getting much benefit from the pattern at that density and would be better off increasing wall count.
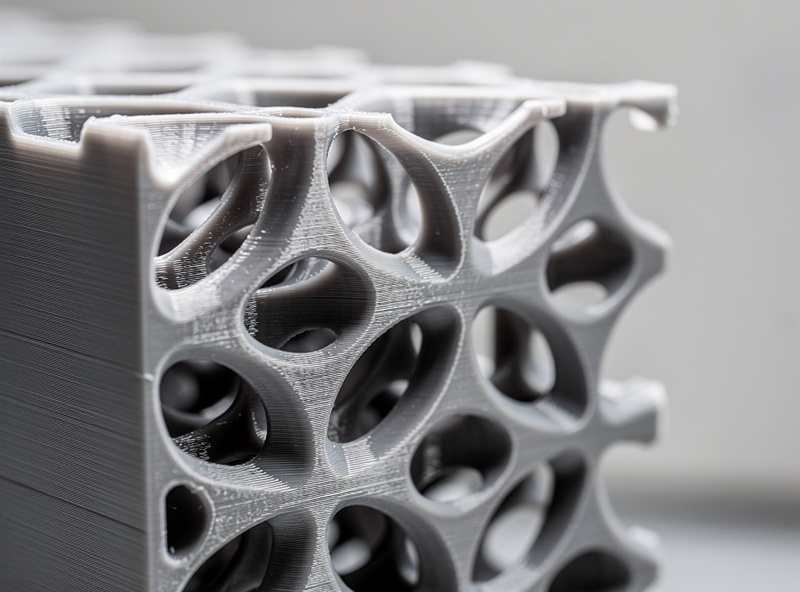
Honeycomb (Hexagonal): The Strength King
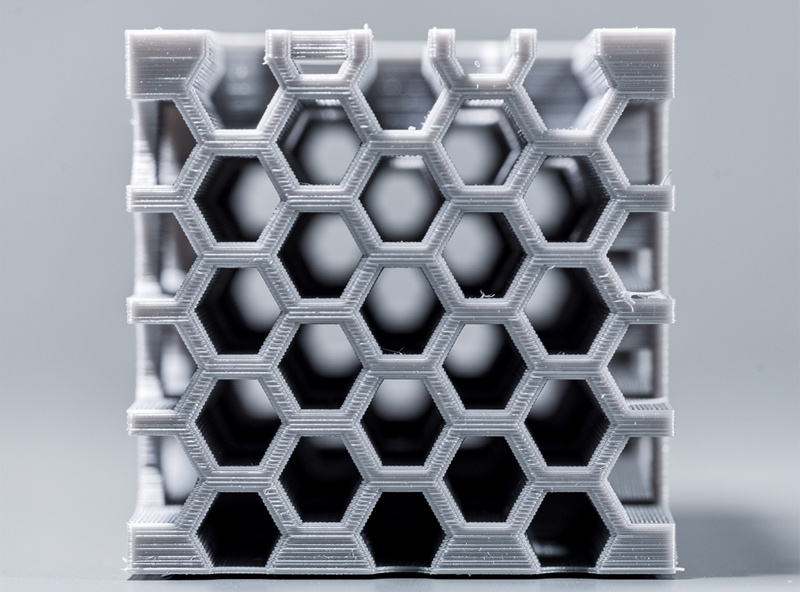
Honeycomb infill (hexagonal cells, like a beehive) has the highest strength-per-gram of any common pattern in compression and shear. The hexagonal geometry distributes load efficiently, and tested results consistently show honeycomb prints handle 10-15% more force than gyroid at the same density before deformation.
The cost: print time. Honeycomb prints 20-30% slower than gyroid at the same density because the hexagonal pattern requires more travel moves and direction changes. For functional parts where weight savings matter (drone parts, robot arm components, tool jigs), the time cost is worth it. For everyday prints, gyroid wins.
Honeycomb is anisotropic in a useful way: strongest in the directions parallel to the hex cell walls, slightly weaker perpendicular. For parts that load along a known axis (e.g., a bracket holding a hanging load downward), align the honeycomb cells perpendicular to the load direction for maximum benefit.
Cubic / Cubic Subdivision: Multi-Axis Strength
Cubic infill is a 3D pattern (cubes rotated 45° to every axis) that provides equal strength across the X, Y, and Z axes. It’s the right answer when a part loads on multiple axes simultaneously — gear cases, structural brackets, or any part where the load direction varies during use.
At equivalent density, cubic is slightly weaker than gyroid in any single direction but more consistent across all three axes. For most prints this consistency doesn’t matter; for prints where it does, cubic is the right choice.
Cubic subdivision (a Cura-specific variant) adds smaller cubic infill near the model walls and larger cubes in the center, optimizing print time without losing too much strength. It’s a niche choice — useful for tall thin prints where the time savings compound, otherwise unnecessary.
Lightning Infill: When Strength Doesn’t Matter
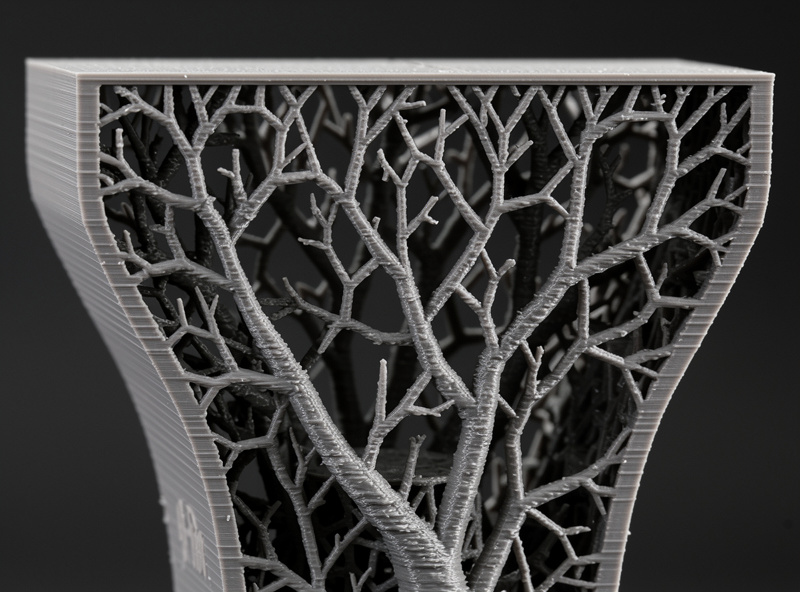
Lightning infill is a tree-like sparse pattern that uses minimum filament — only just enough to support the top layers from sagging. It’s not load-bearing infill in any meaningful sense; the goal is purely supporting the topmost ~3 layers without wasting material on the rest of the volume.
Lightning is the right choice for: decorative prints that won’t be handled (display models, art pieces), vases and ornamental shapes, any print where you want minimum filament use and don’t care about strength. Time savings versus gyroid at the same density are 30-50%; filament savings are similar.
Avoid lightning for any print that loads forces, gets handled regularly, or needs to last. The internal structure is too sparse — even mild compression collapses the print. For functional parts, lightning is the wrong choice.
Rectilinear and Grid: The Old Defaults
Rectilinear infill (parallel lines alternating direction each layer) was the default in older slicers. It’s still available everywhere but gyroid has largely replaced it. Rectilinear prints fastest of any common pattern (5-10% faster than gyroid) but is significantly weaker — only ~70% of gyroid’s strength at the same density.
Grid infill (perpendicular crossing lines on every layer, basically two perpendicular rectilinear patterns combined) is stronger than rectilinear but slower. At equivalent density it sits between rectilinear and gyroid. Few users choose grid in 2026 because gyroid covers the same use case better.
Use rectilinear only when print speed is the dominant concern and you’ll accept the strength loss. For example: rapid prototypes that will be remade in higher quality, or batch prints where individual part strength doesn’t matter.
Triangular, Stars, and Decorative Patterns
Triangular infill (triangles on each layer) provides good strength along two of three axes — useful for parts loading in those directions. It prints slower than rectilinear but faster than honeycomb. Most users skip triangular in favor of gyroid or honeycomb, which cover the same ground better.
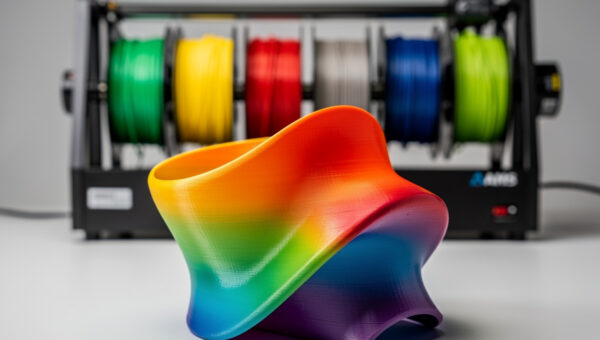
“Stars,” “Crosses,” and various ornamental patterns exist mostly as visual choices. They’re strong-enough for non-functional parts and produce interesting visible patterns when the model has transparent or thin-walled sections. Decorative — choose them when you want the print to look interesting through a translucent shell.
For functional 3D printing, ignore the decorative patterns. Pick gyroid as the default and switch to honeycomb or cubic only when there’s a specific strength reason. Our troubleshooting guide covers what underperforming prints look like — exotic infill patterns are sometimes the cause.
Why Density Matters More Than Pattern
The biggest infill mistake beginners make is over-optimizing pattern selection while under-optimizing density. A 30% rectilinear print is stronger than a 15% gyroid print, even though gyroid has the better strength-per-gram ratio.
Density rules of thumb: 15% is the universal default. Decorative prints can drop to 10%. Functional parts holding loads should be 30-50%. Truly load-bearing parts (mechanical components, gears, brackets) deserve 50%+ AND additional walls. Above 70% density, increase wall count and reduce infill — walls contribute more strength per gram than infill at high densities.
For PETG and ABS, increase density 5-10% versus PLA defaults — these materials are slightly less stiff per unit volume. For TPU, infill density rarely exceeds 15% because flexible parts don’t benefit from dense internal structure. See our 3D printing materials guide for material-specific tuning.
Frequently Asked Questions
What infill density should I use for functional parts?
30% gyroid for most functional parts, 50% gyroid or honeycomb for heavy load-bearing parts (gear housings, structural brackets), 70%+ for parts under continuous mechanical stress. Below 30% density, increase wall count instead — walls contribute more strength per gram at low infill levels.
Is gyroid really the best infill pattern?
For most prints, yes. Gyroid offers the best balance of isotropic strength, print time, and filament efficiency. It loses to honeycomb in pure strength tests by 10-15% but wins on every other practical metric. Switch from gyroid only when you have a specific reason — directional load, decorative purpose, or speed priority.
Why does my high-infill print weigh less than expected?
Slicer infill density is volume-based, but high-density patterns also overlap with walls and bottom layers, which the percentage doesn’t account for. A 50% infill print’s actual weight is typically 5-10% less than a linear extrapolation predicts. This is normal and doesn’t indicate a problem with your slicer or printer.
Can I change infill pattern partway through a print?
Not natively in any current slicer. You can split the model in CAD into upper and lower halves, slice each with a different pattern, and combine the G-code manually — but this is rarely worth the effort. Use modifiers (in PrusaSlicer) to apply different settings to specific regions of the same print, which achieves similar results without G-code editing.
Should I use 100% infill?
Almost never. 100% infill takes 3-5x longer to print than 30% and provides only marginal strength gains over 70-80% infill. Use 100% only for tiny parts (under 10mm) where infill calculation overhead exceeds the time savings, or for parts where transparency requires solid material. For everything else, 30-50% wins on strength-per-time.
What infill is best for printing tools?
Honeycomb at 50-70% density. Tools loaded mechanically need consistent strength under stress, and honeycomb’s hexagonal structure handles compression and shear best. Wall count of 4-5 also matters — for printed wrenches, screwdriver handles, and similar tools, walls contribute as much strength as infill.
Does infill pattern affect first-layer adhesion?
No — first-layer adhesion is determined by the bottom solid layers (always 100% infill regardless of body infill setting). Infill pattern matters only above the bottom layers. If first-layer adhesion is failing, the issue is bed temperature, leveling, or surface — not infill pattern.