Once you have run a few kilos of PLA and PETG, the next question is always the same: what do I reach for when those two are not enough? A specialty filament is any engineering-grade material — polycarbonate, nylon, carbon-fiber composites, flexibles, or high-temperature plastics — that trades easy printing for real mechanical performance. The jump matters: a well-printed nylon part can survive impacts that shatter PLA outright, and that capability is why I keep half my shelf stocked with materials most beginners never touch.
This guide is the map I wish I had when I moved past the basics. It is deliberately about the advanced families only — if you are still choosing between PLA and PETG, start with my 3D printer filament guide and the broader materials overview first, then come back here when you need more than those two can give. Everything below is written from the bench where I run a Prusa MK4S as my reliability benchmark alongside a Bambu P1S, a Creality K1C, and an Anycubic Kobra 3, printing functional parts rather than display models.
What Actually Makes a Filament “Specialty”
A specialty filament is defined less by what it is and more by what it demands. PLA prints on a cold bed with a stock brass nozzle and no enclosure. Every material in this guide breaks at least one of those assumptions — most of them break all three. The practical dividing line I use on my bench is whether a material needs a hardened nozzle, an enclosure, or active drying to print reliably. If it ticks any of those boxes, treat it as a specialty material and respect the workflow.
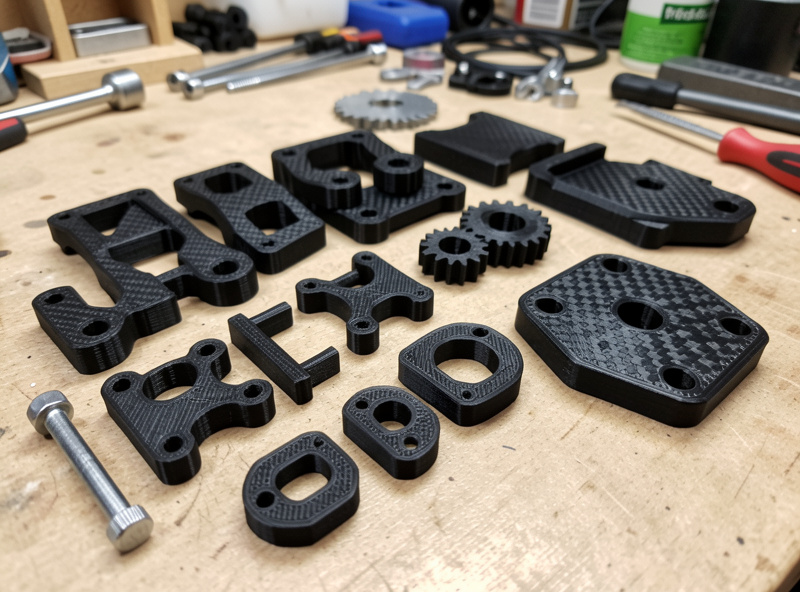
That matters because the failure modes change. With PLA a bad print is usually cosmetic. With polycarbonate or nylon a bad print is a warped, delaminated part that fails under the exact load you printed it for. The whole point of these materials is mechanical function, so “it looked fine” is not the bar — the part has to survive its job. I have printed reservoir lids, sensor housings, welder shop fixtures, and drone frames in these plastics, and every one of them was chosen because PLA would have failed in service.
The Hardware Tax: What Advanced Filaments Demand
Before you buy a single spool of anything in this guide, look at your printer honestly. Most specialty filaments require an all-metal hotend, because their print temperatures sit above the roughly 240°C ceiling where a PTFE-lined throat starts releasing fumes and degrading. Abrasive composites add a second requirement: a hardened steel or ruby nozzle, because carbon and glass fiber chew through a brass nozzle in surprisingly few hours.
The third piece is environment. ABS, ASA, polycarbonate, and most nylons warp badly in open air because they shrink as they cool, and uneven cooling pulls corners off the bed. An enclosure traps heat and keeps the chamber stable, which is the single biggest factor in whether a large engineering part survives to the last layer. My enclosed machines handle these materials without drama; my open-frame A1 stays on PLA, PETG, and TPU for exactly that reason. If your printer is open-frame with a PTFE-lined hotend and a brass nozzle, budget for upgrades before you budget for exotic filament.
The Engineering-Material Family Map
Here is how the major specialty families stack up on the numbers that decide whether they will print on your machine. These are the working ranges I dial in as starting points; specific brands vary, and you should always check the spool’s own spec, but the relationships hold. Note how the requirements escalate as you move down the table.
| Family | Nozzle Temp | Bed Temp | Enclosure | Hardened Nozzle | Dries Out Fast | Best For |
|---|---|---|---|---|---|---|
| PETG (baseline) | 230-250°C | 70-85°C | No | No | Slow | General functional parts |
| Polycarbonate (PC) | 260-290°C | 100-120°C | Yes | No | Very fast | Heat & impact resistance |
| Nylon / PA | 240-270°C | 70-90°C | Yes | No | Extreme | Gears, living hinges, wear parts |
| CF composites (PA-CF, PETG-CF) | 240-290°C | 70-110°C | Often | Yes | Fast | Stiff, lightweight brackets |
| TPU (flexible) | 220-240°C | 40-60°C | No | No | Moderate | Gaskets, bumpers, grips |
| High-temp (PC blends, PPS, PEI) | 280-360°C | 110-160°C | Heated/Yes | Sometimes | Fast | Under-hood, autoclave, jigs |
The table is the quick filter. If a material’s nozzle temperature exceeds what your hotend can hit, or it needs an enclosure you do not have, that is your answer before you have spent a krona. Each of these families gets its own deep-dive linked at the bottom of this guide.
Moisture Is the Hidden Variable
If there is one thing that ruins more specialty prints than any setting, it is water. Nylon, polycarbonate, and the support material PVA are all strongly hygroscopic — they pull moisture out of the air, and a wet spool prints with popping, stringing, foaming, and a catastrophic loss of layer strength. I have watched a nylon part lose most of its toughness simply because the filament sat open on the shelf for a week in a Swedish autumn.
The fix is not optional with these materials. Every hygroscopic filament in this guide lives in a sealed dry box with indicating desiccant, and most of them go through a dryer before a serious print. My full process is in the filament moisture guide, with safe temperatures in the drying temperature chart and storage details in the desiccant guide. Treat drying as part of the print, not an afterthought, and these materials become predictable.
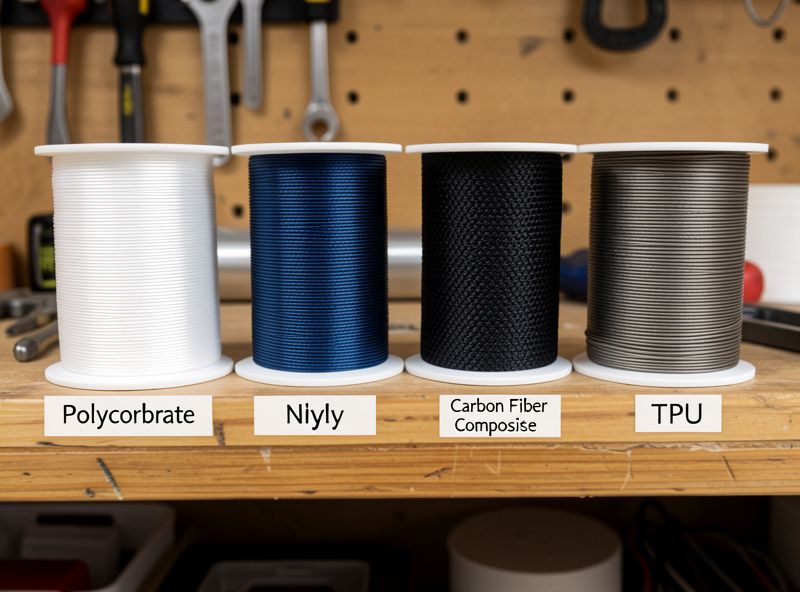
Reinforced Composites: Stiffness Without the Weight
Carbon-fiber and glass-fiber filaments are the family people ask about most, usually because they have seen the matte-black finish and assumed it means strength. The honest version: chopped-fiber composites make a part stiffer and more dimensionally stable, not necessarily stronger in every direction. PA-CF is the one I reach for when I need a bracket that will not flex; PETG-CF is the easier-printing entry point. Both are abrasive and will destroy a brass nozzle, so a hardened nozzle is mandatory, not optional.
I keep this distinct from my older carbon fiber filament comparison, which lines up PLA-CF, PETG-CF, and PA-CF as products. The dedicated carbon fiber printing guide in this cluster covers the actual process — nozzle choice, flow tuning, and why these parts behave the way they do under load. If you only remember one thing: buy the hardened nozzle before the filament.
Support Materials Are Specialty Filaments Too
The last family most people overlook is dedicated support material. PVA dissolves in plain water; HIPS dissolves in limonene and pairs with ABS. On a multi-material machine they let you print complex internal geometry and overhangs that no break-away support can reach cleanly. They are finicky — PVA is as hygroscopic as nylon, and HIPS wants the same enclosure as ABS — but for functional assemblies with captured cavities, nothing else compares. If you run an AMS, MMU, or ERCF, my multi-material guide and the Bambu AMS guide cover the hardware side; the support-filament spoke below covers when each dissolvable is worth the slot.
How I Actually Choose: The Functional-Parts Lens
I do not pick a filament by reading the marketing — I pick it by the job the part has to do. Will it sit in a hot car or near a heated bed? Polycarbonate or a high-temp blend. Does it need to flex thousands of times without cracking, like a living hinge or a clip? Nylon. Does it take impact and abrasion in a shop? Nylon or PC. Does it need to seal, grip, or absorb vibration? TPU. Does it need to be stiff and light and hold tolerance, like a camera mount or drone arm? A carbon-fiber composite. Once you frame the part by its load case, the material almost chooses itself.
The mistake I see most often is reaching for the strongest, most exotic material when a cheaper one would do — paying the hardware tax and the printing headache for a part that PETG would have handled. The reverse mistake is worse: using PLA for a load-bearing part because it printed easily, then watching it creep and fail. Match the material to the job, calibrate properly with a temperature tower, and these filaments stop being intimidating and start being tools. The seven guides below take each family as far as it goes.
Strength Is Directional: Orientation Beats Material Choice
Here is the lesson that took me the longest to internalize, and it matters more than which exotic spool you buy: a 3D printed part is weakest along the layer lines, where one layer bonds to the next. Pull a part apart across the layers and it can fail at a fraction of the strength it shows when loaded along them. This anisotropy means a nylon part printed in the wrong orientation can be weaker than a PETG part printed in the right one. The material sets the ceiling; the orientation decides whether you reach it.
Before I choose a specialty filament, I think about how the part will be loaded and orient it so the main stress runs along the layers, not across them. For a bracket that takes a bending load, that often means printing it on its side or redesigning the part so the thin, weak axis never sees the force. Sometimes the right answer is not a stronger material at all but a smarter orientation or a fillet that spreads the load. The functional-parts mindset starts here: spend five minutes on orientation and you can often drop down a material grade, save the hardware tax, and still get a part that survives. No filament in this guide can rescue a part oriented to fail.
First Layer and Bed Adhesion Change With Every Material
The single skill that separates people who print these materials from people who fight them is bed adhesion, and every family wants something different. PLA is forgiving on almost any surface; specialty materials are not. Polycarbonate sticks so aggressively to smooth PEI that it can pull chunks of the sheet off, so I run it on a textured plate or a sheet of garolite with a thin barrier of glue stick acting as a release agent as much as an adhesive. Nylon is the opposite problem — it barely wants to stick to anything, and a glue stick or a dedicated nylon adhesive is mandatory or the part lets go mid-print.
The general rules I work from: hotter bed than PLA across the board, a brim on anything tall or with a small footprint, and a clean plate degreased with isopropyl alcohol before every specialty print because finger oils that PLA ignores will cause warping with PC and ABS. For carbon-fiber composites the fiber actually helps dimensional stability, so warping is less of an issue than with their unfilled base resin. The pattern is always the same: more heat, more surface prep, and a release strategy for the materials that grip too hard. Get the first layer right and most of the rest of the print follows.
Slicer Settings That Shift for Specialty Filaments
In my slicer, moving from PLA to an engineering material means re-thinking four things, not just bumping the temperature. First, speed: most specialty materials print better slow. I drop to a fraction of my PLA speed for polycarbonate and nylon because layer adhesion depends on the previous layer still being hot when the next one lands, and racing through cools things too fast. Second, cooling: PLA loves full part-cooling fan, but ABS, ASA, PC, and nylon want little or none, because aggressive cooling causes layer splitting and warping. Getting fan settings backwards is the most common reason a first engineering print delaminates.
Third, retraction and flow. Composites and flexibles need their own retraction tuning — too much and a flexible filament jams, a fiber-filled one grinds. I calibrate extrusion multiplier and pressure advance per spool rather than trusting a generic profile. Fourth, temperature itself, which is best found with a temperature tower for each new brand rather than copied from a forum post. The same nominal “nylon” from two makers can want a 20-degree difference. Treat the manufacturer’s range as a starting point and let a calibration print find the real number for your machine.
Total Cost of Ownership: The Number Reviewers Skip
The filament price on the spool is the least interesting cost of running specialty materials, and it is the only one most reviews mention. The real budget includes the hardened nozzle you will replace on a schedule when running abrasives, the dryer or heated dry box that keeps nylon and PC usable, the enclosure that stops large parts warping, and — the big one — the failed prints while you are dialing a new material in. My first serious polycarbonate part was the fourth attempt; the three before it warped off the bed, and that wasted filament and machine time is a real cost.
This is why I push back when someone buys the cheapest printer and then wonders why specialty materials fight them. A capable enclosed machine with an all-metal hotend is cheaper over its life than an open-frame bargain printer plus the upgrades, adapters, and scrapped prints needed to drag it up to the same capability. The same logic applies to the filament itself: a wear part printed in the right material that lasts years is cheaper than the same part reprinted every few months in PLA because it crept under load. I frame every functional print this way — cost per part that survives its job, not cost per kilo on the shelf.
Fumes, Ventilation, and Working Safely
Specialty materials change the air in your workspace, and this is the part the unboxing videos never cover. ABS and ASA release styrene, polycarbonate and nylon emit their own fumes at the high temperatures they need, and all of them produce ultrafine particles during printing. I run an enclosed machine with a ducted exhaust pulling chamber air outside, a digital hygrometer to watch humidity, and a Class-C extinguisher within reach — the same shop setup I use for the welder and CNC. None of this is about fear; it is about the same basic respect for the process that any workshop tool deserves.
The practical minimum: never run these materials in a small unventilated room you sit in for hours. An enclosure with even passive venting to a window is a meaningful improvement over open-air printing on the kitchen table. If you are scaling up to regular engineering-material printing, treat ventilation as core infrastructure rather than an upgrade you will get to later. Your prints will be better for the stable chamber temperature, and your lungs will thank you for the airflow.
A Sensible Path Into Specialty Materials
You do not have to jump straight to the hardest material. The progression I recommend, and the one I followed on my own bench, climbs the difficulty curve one rung at a time. Start with PETG-CF: it prints close to PETG temperatures, adds real stiffness, and teaches you to run a hardened nozzle without the warping headaches of polycarbonate. From there, move to ABS or ASA in an enclosure to learn warp management and fan control. Those skills transfer directly to the harder materials.
Once you are comfortable keeping a chamber hot and a part stuck down, polycarbonate and nylon are the next step, and they are where moisture discipline becomes non-negotiable. Save the high-temperature exotics and dissolvable supports for when you have a specific part that needs them — they are tools for a job, not a place to start. By the time you reach them, the dry box, the enclosure, and the calibration habits are second nature, and the material that looked intimidating from the PLA side of the fence just becomes another spool on the shelf. The deep-dive guides below follow this same order of difficulty.
Where These Materials Earn Their Keep on My Bench
The reason I keep this many specialty spools on the shelf is that the printer is the connective tissue of my whole workshop — almost every other project has a part that came off this bed. The hydroponic reservoir lids I print live in constant humidity, so they go in PETG or ASA, not PLA, which would creep and craze. Sensor mounts for the smart-home gear get nylon when they need to flex into a clip and PC when they sit somewhere warm. The welder’s shop fixtures and tool holders are nylon or a carbon-fiber blend because they take impact and abrasion that would shatter a brittle material.
Even leatherwork edge slickers and CNC hold-down jigs come off this printer, each in whatever material suits the load. That cross-disciplinary view is exactly what a single-niche filament reviewer cannot give you: I am not choosing materials in the abstract, I am choosing them because a specific part in a specific project failed in PLA and needed something better. When you read the deep-dive guides below, that is the lens to keep in mind — not “which filament is best,” but “which filament makes this part survive the job I need it to do.” That reframing is the whole point of moving past PLA and PETG in the first place.
The Specialty Filament Cluster: Deep Dives
Each family in this guide has a full walkthrough — settings, hardware, failure modes, and the functional parts I actually print with it:
- Polycarbonate (PC) printing guide — the heat-and-impact king, and how to tame its warping.
- Nylon and PA filament guide — the toughest common engineering plastic, and why it lives in a dry box.
- Carbon fiber filament printing guide — stiffness, hardened nozzles, and what the fiber really does.
- Wood and metal fill filaments — the aesthetic composites, and the nozzle wear they cause.
- PVA and HIPS support materials — dissolvable supports for geometry you cannot otherwise print.
- Flexible TPU filament guide — durometer, retraction, and choosing the right softness.
- High-temperature filaments — when you need parts that survive heat PLA cannot.
Frequently Asked Questions
What is the difference between standard and specialty filament?
Standard filaments like PLA and PETG print on a stock printer with no enclosure. Specialty filaments require at least one of an all-metal hotend, a hardened nozzle, an enclosure, or active drying. They trade easy printing for real mechanical performance such as heat, impact, or fatigue resistance.
Do I need an enclosure for specialty filaments?
For polycarbonate, nylon, ABS-based composites, and most high-temperature blends, yes. These materials shrink as they cool and warp badly in open air. TPU and many carbon-fiber PETG blends print fine open-frame, so the answer depends on the specific family.
Why do carbon fiber filaments need a hardened nozzle?
Chopped carbon and glass fiber are abrasive and grind away a soft brass nozzle in a matter of hours, opening up the orifice and ruining dimensional accuracy. A hardened steel or ruby-tipped nozzle is mandatory for any fiber-filled filament, including wood and metal fill.
Which specialty filament is the strongest?
It depends on the load case. Polycarbonate offers the best heat and impact resistance, nylon offers the best fatigue and wear resistance, and carbon-fiber composites offer the best stiffness-to-weight. No single material wins every category, which is why matching the material to the job matters more than chasing a strength number.
Why does moisture matter so much for these materials?
Nylon, polycarbonate, and PVA are strongly hygroscopic and absorb water from the air within hours. Wet filament prints with popping, stringing, surface foaming, and a major loss of layer strength. Drying before printing and storing in a sealed box with desiccant is essential, not optional.
Can a cheap printer use specialty filaments?
Some can with upgrades. You need an all-metal hotend to reach the temperatures, a hardened nozzle for abrasives, and ideally an enclosure for warping materials. A budget open-frame printer can usually handle TPU and PETG-CF, but polycarbonate and high-temperature blends need a capable, enclosed machine.