Resin 3D printing trades the forgiving, hands-off nature of FDM for a process that rewards precision and punishes carelessness. An MSLA printer cures liquid photopolymer layer by layer with a UV LCD, and on a sub-$300 machine it resolves detail an FDM printer simply cannot touch — but it asks for gloves, ventilation, a wash-and-cure routine, and respect for chemistry that filament never demanded.
I run an FDM-first bench — a Prusa MK4S as the daily driver with a stable of Bambu, Creality, and Anycubic machines beside it — so I am honest up front: resin is my second discipline, not my first. What follows is the framework I built when I cross-trained into MSLA, cross-checked against what experienced resin operators consistently report. The engineering reasoning transfers cleanly; the wet-process habits are the part most FDM converts underestimate. This guide is the map for the whole cluster, and each section points to a deeper spoke when you need it.
How Resin (MSLA) Printing Actually Works
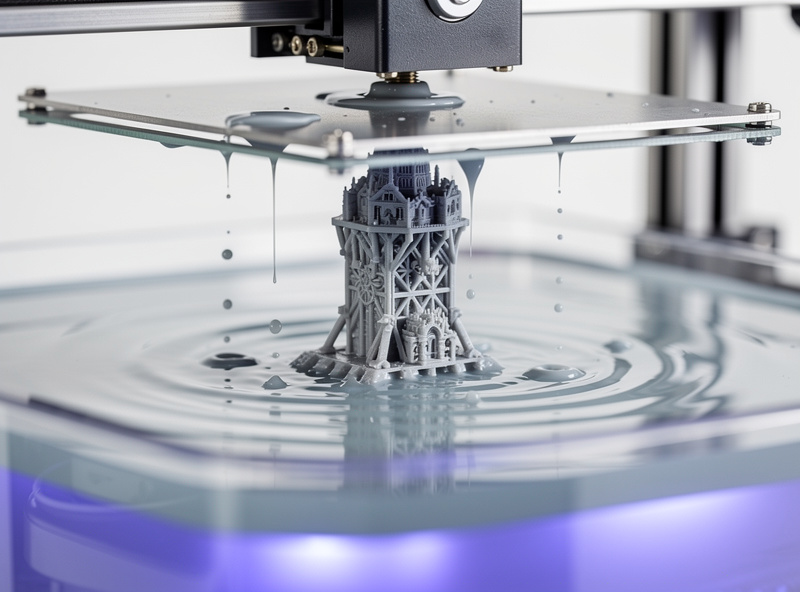
MSLA — masked stereolithography — flashes UV light through a monochrome LCD that masks every layer as a black-and-white image, curing a full layer of resin in one exposure of a few seconds. That parallel exposure is why a resin printer’s speed barely changes whether you print one model or fill the plate.
The build platform starts pressed almost against a transparent, flexible film at the bottom of the resin vat — the FEP or nFEP. The LCD masks the first layer, the UV array fires, that layer cures onto the plate, and the platform lifts, peeling the fresh layer off the film before dropping back down a layer height for the next exposure. Everything that goes wrong in resin printing traces back to one of those steps: a bad peel, an under-cured layer, or a film that has clouded and is scattering light. Understanding that loop is more useful than memorising any single setting, because it tells you where to look when a print fails.
Resin vs. FDM: Which Process Fits the Job
This is the question I get most from people who already own an FDM printer and are tempted by a cheap resin machine. The honest answer is that they are complementary tools, not competitors. Resin wins decisively on fine detail and surface finish; FDM wins on part size, material toughness, and how little it cares whether you babysit it.
I reach for resin when the part is small, intricate, and cosmetic — miniatures, jewellery masters, dental-style models, detailed scale parts. Tabletop miniatures are the classic case where resin wins so decisively that I’d point a miniatures-focused buyer at a resin machine over even the best FDM printer for miniatures, where fine FDM is impressive but still can’t match a $250 MSLA on facial detail. I reach for FDM when the part is functional and lives in my workshop: a hydroponic reservoir lid, a sensor mount, a welder fixture. Standard resins are comparatively brittle and degrade in UV over time, which rules them out for most load-bearing or outdoor parts unless you move to a tough or engineering resin and accept the cost.
| Factor | Resin (MSLA) | FDM (Filament) |
|---|---|---|
| Detail / surface finish | Excellent — sub-50-micron features | Visible layer lines, coarser detail |
| Part toughness | Brittle (standard); tough resins cost more | Strong, especially PETG/ABS/CF blends |
| Max practical part size | Limited by small vat/LCD | Large — bed-limited only |
| Mess / safety | Gloves, ventilation, IPA wash, UV cure | Minimal — spool and go |
| Post-processing | Mandatory wash + cure every print | Optional support removal |
| Running cost | Resin + IPA + gloves + FEP film | Filament only |
| Best for | Miniatures, masters, detailed cosmetic parts | Functional parts, large prints, prototypes |
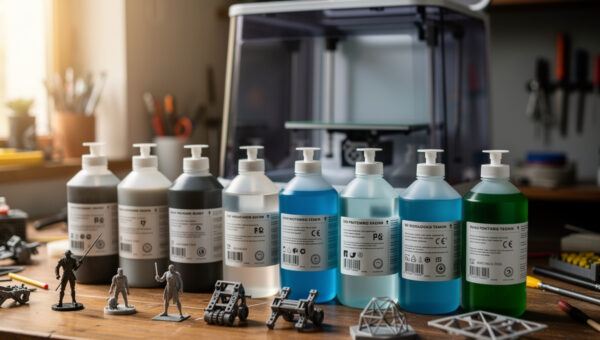
Choosing the Right Resin
Resin is not one material. The bottle labelled “standard” or “rapid” is a brittle, detail-focused photopolymer that prints fast and sands well but snaps under stress. Tough and ABS-like resins trade a little crispness for impact resistance; water-washable resins skip the isopropyl-alcohol bath in favour of a water rinse, which is convenient but tends to be more brittle and more sensitive to humidity. There are also flexible, castable, high-temp, and dental-style specialty resins, each with its own exposure quirks.
The mistake FDM converts make is treating resin like filament, where PLA is a safe default for almost everything. In resin, the resin you choose dictates your exposure settings, your part’s mechanical behaviour, and even how aggressively you ventilate. The full material map — standard vs. tough vs. ABS-like vs. water-washable and when each earns its place — is covered in the resin types comparison guide — because resin selection is the decision that drives everything downstream.
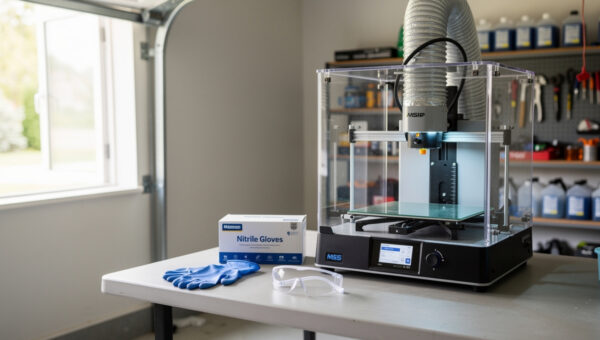
Safety, PPE, and Ventilation — Non-Negotiable
Liquid resin is a sensitiser. Repeated skin contact is how people develop a resin allergy that can end the hobby for them, and uncured resin and its vapours should never be treated casually. This is the single area where I tell FDM owners to slow down before buying: the printer is cheap, but doing it safely is a habit, not a one-time purchase.
The baseline is nitrile gloves every time you touch resin or a wet print, eye protection when handling the vat, and real ventilation — not a cracked window but actual air movement that carries vapour away from where you breathe. Many operators run their machine in an enclosure ducted outside or fit a carbon filter. Resin allergies are cumulative and often appear with no warning, which is exactly why the precautions are routine rather than reactive. The full protocol — glove choice, ventilation setups, spill handling, and safe disposal — is covered in the resin printing safety guide — the one I’d read before your first bottle arrives. The same ducted-exhaust logic I use when printing ABS and ASA in an enclosure applies here, just aimed at fumes instead of warping.
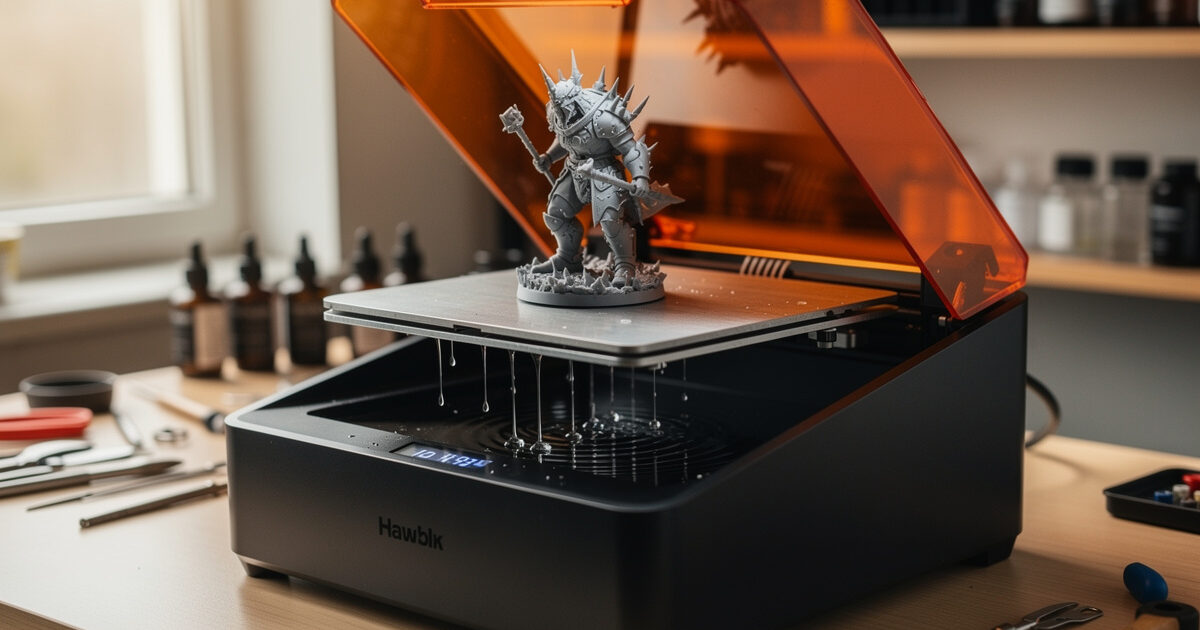
Washing and Curing Every Print
A resin print is not finished when it comes off the plate — it is a sticky, partially cured part covered in uncured resin that must be washed and then UV-cured to reach full strength. Skip the wash and you bake a tacky residue onto the surface; skip the cure and the part stays soft, weak, and chemically active.
Washing means agitating the part in isopropyl alcohol (or water, for water-washable resin) to strip the uncured layer, then drying it before a final UV cure. You can do this with two jars and a turntable in the sun, but a combined wash-and-cure station automates the agitation and gives you a controlled, repeatable cure — and over-curing is as real a failure mode as under-curing, since it makes parts brittle. Which station is worth buying, and how to build a budget setup that works just as well, gets its own breakdown in this cluster.
After curing, resin parts finish beautifully — they sand, prime, and paint far more readily than layer-lined FDM prints, which is part of why miniature painters love the process. The sanding, gap-filling, and priming logic carries straight over from how I post-process FDM prints, with the caveat that you handle the part with gloves until it is fully cured. Once cured, a resin print is inert and safe to sand, but sanding uncured resin spreads sensitiser dust you do not want airborne — another reason the cure step is not optional.
FEP Film: The Consumable That Ends Prints
The FEP film at the bottom of the vat is a wear part. Every layer peels off it, and over time it clouds, scratches, and loses tension — and a tired FEP is behind a huge share of “sudden” print failures: prints that stop sticking to the plate, layers that tear, or a permanent foggy patch that scatters UV and ruins detail in one spot. Most operators plan to replace it every few hundred print hours, sooner if they print large flat layers that generate strong suction.
Replacing FEP is a quiet skill — getting the tension even, torquing the frame screws in the right pattern, and not creasing the film — that pays for itself in saved prints. The full swap, including the tension test and the nFEP-vs-FEP decision, is its own walkthrough in this cluster.
Dialling In Exposure Settings
Exposure time is the master setting in resin printing, and it is specific to the exact resin, the printer’s LCD, and even the resin temperature. Too little exposure and layers under-cure, delaminate, and fail to stick; too much and fine details bloat, holes close up, and the part gets brittle. There is no universal number — the value printed on a bottle is a starting point for one specific machine.
The way to find your number is a calibration test like the validation matrix or a cones-of-calibration print, which exposes a single model at stepped settings so you can read the sweet spot directly off the part. Cold resin needs longer exposure than warm resin, which is why a chilly workshop quietly wrecks settings that worked last week. The full method — base layers, normal layers, lift speed, and how to read a failed calibration print — has its own dedicated guide in this cluster, since exposure is the setting that makes or breaks every print.
Supports and Orientation
Resin supports work differently from FDM supports, and the difference trips up converts. In FDM, supports fight gravity during printing; in resin, every layer is fully supported by the cured layer above it as the plate lifts, so resin supports exist to manage the peel force and to anchor overhangs and islands that would otherwise float away in the vat. Get them wrong and you find a tangle of half-cured spaghetti stuck to the FEP instead of a model.
Orientation matters as much as the supports themselves. Tilting a model reduces the cross-sectional area peeling off the film at once, which lowers suction, protects the FEP, and hides support marks on non-cosmetic faces. Light, medium, and heavy support densities each have a place, and so does the contact-point diameter that decides whether removal leaves a clean nub or a crater. The orientation-and-support workflow gets its own detailed resin print supports guide in this cluster — and the FDM instincts around tree versus normal supports only partly carry over, because resin supports manage suction rather than gravity.
When Prints Fail
Most resin failures fall into a short list with clear causes: prints that won’t stick to the plate (usually under-exposed base layers or a non-level plate), layers that delaminate (under-exposure, a clouded FEP, or a peel that’s too aggressive), a film that stays stuck to the bottom (the dreaded “cured layer on the FEP” that you must clean off before the next print), and fine detail that’s lost (over-exposure or light bleed). The diagnostic skill is matching the symptom to the step in the print loop where it originated.
Because the failure modes are so consistent, a methodical checklist beats guesswork every time. I keep a symptom-to-cause table — plate adhesion, delamination, suction failures, elephant-foot on the base, and incomplete cures — as its own resin printing troubleshooting guide in this cluster, which is the page I send people to when a print fails and they don’t yet know why. The diagnostic mindset is the same one I use for common FDM print failures: locate where it failed, then fix the single most likely cause.
The Real Cost of Running a Resin Printer
The headline price of a resin printer is the cheapest part of owning one, and this is the framing FDM owners miss because filament hides almost no recurring costs. With resin you are buying into a stream of consumables: the resin itself, isopropyl alcohol by the litre for washing, nitrile gloves you go through constantly, paper towels and filters, and FEP film every few hundred hours. None of these is expensive alone, but together they change the maths of whether a cheap machine is actually cheap.
It is the same total-cost-of-ownership logic I apply to FDM, where I argue the cheapest printer is rarely the cheapest to own once you count failed prints and upgrades. In resin the equivalent hidden costs are wasted resin from bad calibration and the time tax of post-processing every single print. A resin printer that prints unattended overnight still owes you fifteen minutes of washing, curing, and support removal in the morning. Budget for the routine, not just the box, and the hobby stays enjoyable instead of becoming a chore you resent.
Fitting Resin Into an FDM Workshop
Resin and FDM coexist well, but they want different corners of the shop. My FDM machines tolerate the open bench; the resin printer wants its own ventilated zone away from food, away from where I sit, and ideally inside an enclosure ducted outside — the same ducted-exhaust thinking I use for printing in an enclosure for ABS and ASA, just applied to fumes instead of warping. Keep a dedicated set of tools — scraper, gloves box, paper-towel roll, wash jars — that never migrate to the clean FDM side.
The crossover payoff is real. I still design every part in CAD the same way, slice it (in a resin slicer rather than my usual FDM workflow), and finish it on the same bench. A part that’s too detailed to print well in filament — a fine bracket, a textured master, a small geared mechanism — goes to the resin machine, and the rest of my functional work stays on FDM. Treating the two as one toolkit rather than rival machines is what makes the second printer earn its space.
Putting It Together: A Sane Starting Setup
If you’re coming from FDM and want the shortest path to good resin prints, the order of operations matters. Set up ventilation and PPE first — before the printer is even out of the box. Pick one standard resin and one project rather than buying five bottles. Run a calibration print on day one so your exposure is dialled before you waste resin on a real model. Build or buy a wash-and-cure workflow before your first print finishes, because a cured-on residue is much harder to fix than to prevent. And keep a spare FEP film on the shelf so a torn one doesn’t end your week.
For machine choice itself, I keep that recommendation separate and current in the best resin printer for beginners breakdown, so this guide can stay focused on the process rather than chasing model releases.
The thing I’d most want a new resin printer to internalise is that the failures are predictable and the fixes are known. Resin printing earned a reputation as finicky, but most of that reputation comes from people who skipped the calibration print, ran a tired FEP, or treated exposure as a number to copy rather than a setting to tune. Work through this cluster in order — types, then safety, then the wet-process routine, then exposure and supports, and finally troubleshooting — and you skip the frustrating months most operators spend learning the same lessons the hard way. The resin printer is a precision instrument that happens to be cheap; treat the chemistry and the routine with the same seriousness you’d give a new welder or a CNC, and it rewards you with detail nothing else on the bench can match.
A quick note: some links in this cluster are affiliate links — if you buy through them I may earn a small commission at no extra cost to you. I only point to gear I’d actually keep on my own bench. Details on my disclaimer page.
Frequently Asked Questions
Is resin 3D printing worth it if I already have an FDM printer?
Yes, if you need fine detail. Resin and FDM are complementary: resin excels at small, intricate, cosmetic parts like miniatures and masters, while FDM stays better for large, functional, and tough parts. Most serious makers eventually run both.
Is resin 3D printing dangerous?
Liquid resin is a skin sensitiser and its vapours need ventilation, but it is safe with routine precautions: nitrile gloves, eye protection, real airflow, and proper curing and disposal. Resin allergies are cumulative, so the precautions are habits, not one-time steps.
Do you have to wash and cure every resin print?
Yes. A fresh resin print is coated in uncured resin and is only partially cured. You must wash it in isopropyl alcohol or water to remove the residue, then UV-cure it to reach full strength. Skipping either step leaves a tacky, weak part.
How long does FEP film last?
Most operators replace FEP film every few hundred print hours, sooner with large flat prints that create strong suction. Replace it when you see clouding, scratches, or loss of tension, since a tired film causes failed adhesion, torn layers, and lost detail.
Why won’t my resin print stick to the build plate?
The usual causes are under-exposed base layers, an unlevelled plate, or a cured layer of resin stuck to the FEP from a previous failure. Increase bottom exposure, re-level the plate, and strain the vat to remove any cured debris before reprinting.
What resin should a beginner start with?
A standard or rapid resin in a neutral colour. It is forgiving, cures predictably, and sands well for finishing. Save tough, water-washable, flexible, and specialty resins until you understand how exposure settings change between materials.
Related Reading
The detailed spoke guides in this resin cluster — resin types, safety, wash-and-cure, FEP film, exposure, supports, and troubleshooting — are linked throughout the sections above as you reach each step. For the wider workshop context, these companion guides help: