Most resin print failures fall into a short, predictable list, and once you can match a symptom to the step in the print loop where it originated, the fixes are straightforward. Prints that won’t stick to the plate, layers that delaminate, a cured sheet stuck to the FEP, lost detail, elephant foot on the base — these aren’t random, and they aren’t a sign the hobby is too hard. They’re feedback, and each one points at a specific cause.
I came to resin from an FDM-first bench, where I keep a symptom-to-cause table for filament failures, and I built the same kind of diagnostic map for resin — cross-checked against what experienced resin operators report. What follows is that table plus the reasoning behind each fix, so you can diagnose rather than guess. It pairs with the wider workflow in the complete resin printing guide.
How to Diagnose a Resin Failure
The fastest diagnosis starts by asking where in the print the failure happened. A failure at the build plate points to base-layer exposure, plate levelling, or adhesion. A failure partway up points to delamination, suction, or a film problem. A whole-print failure — nothing on the plate, a cured layer on the FEP — points to the first layers never anchoring. Locating the failure in the print loop narrows the cause before you change a single setting.
The discipline that saves the most time is changing one variable at a time. Resin has enough interacting settings that shotgunning five changes at once means you never learn what fixed it. Diagnose the most likely single cause, change it, reprint a small test, and confirm. The table below is the shortlist I work through, ordered roughly by how common each cause is.
Symptom-to-Cause Table
This is the reference I reach for the moment a print fails. Start at the symptom that matches, work the most common cause first, and change one thing at a time.
| Symptom | Most Likely Cause | Fix |
|---|---|---|
| Print won’t stick to plate | Under-exposed base layers or unlevel plate | Increase bottom exposure / count; re-level the plate |
| Cured layer stuck to FEP | First layers anchored to film not plate | Strain vat, re-level, raise bottom exposure, check film |
| Layers delaminate / split | Under-exposure, worn FEP, or harsh peel | Raise exposure, replace film, slow lift speed |
| Lost / soft fine detail | Over-exposure or light bleed | Reduce normal exposure; recalibrate |
| Elephant foot on base | Excess base exposure or over-tight first layer | Reduce bottom exposure/count; add a small raft |
| Parts tear off mid-print | Suction on large flat layers | Tilt model, hollow with drain holes, slow lift |
| Warping / curling | Uneven cure or thin unsupported areas | Add supports, tilt, cure evenly after washing |
| Holes / pits in surface | Trapped resin or cupping suction | Add drain holes, reorient to drain, check FEP |
Prints That Won’t Stick to the Plate
This is the most common failure and almost always traces to the base layers. The first several layers use a much longer bottom exposure to weld the print to the plate; if that’s too short, or the plate isn’t level, the print never anchors and either fails entirely or leaves a cured layer stuck to the FEP. The fixes, in order: re-level the build plate carefully (most adhesion problems are levelling), increase bottom exposure time, and increase the bottom layer count.
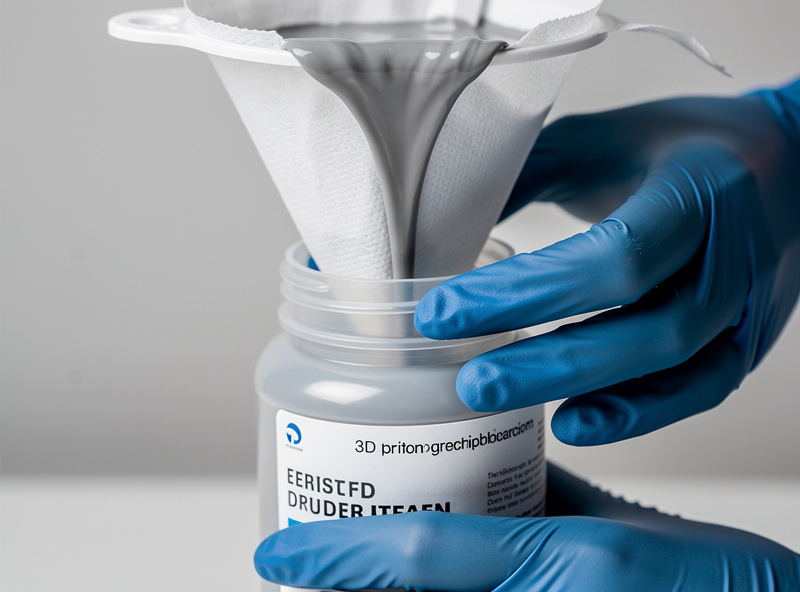
Before reprinting after any failure, always strain the resin to remove cured debris and check the FEP for a stuck cured layer. A bit of cured resin floating in the vat or stuck to the film will sabotage the next print no matter how good your settings are. A cheap resin filter funnel makes straining the vat a ten-second job and is one of the most useful small purchases in resin printing.
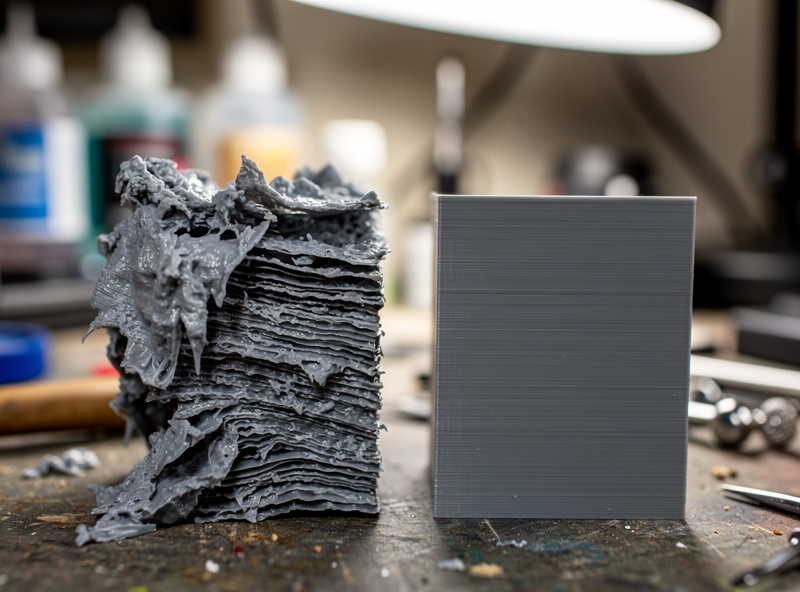
Delamination and Layer Splitting
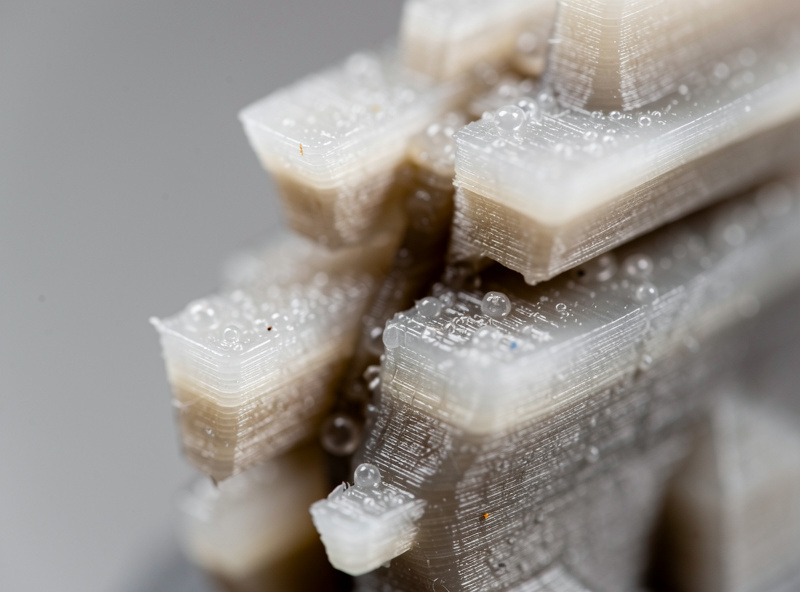
Delamination — layers separating partway up the print — has three usual causes, and you check them in order. First, under-exposure: layers that don’t fully cure don’t bond to the next, so raise the normal exposure. Second, a worn or clouded FEP: it scatters UV and under-cures locally, so inspect and replace the FEP film if it’s tired. Third, an overly aggressive peel: a fast lift speed or high suction can tear partially cured layers apart, so slow the lift speed and reduce suction with orientation. If the film is the culprit, a fresh sheet of FEP film often cures the delamination outright once the optical path is clear again.
Resin temperature ties into all three. Cold resin cures more slowly and is the silent cause behind delamination that appears when the weather turns — a profile that worked in summer under-cures in a cold winter workshop. If delamination starts suddenly with no setting change, check the room temperature and the film before assuming your settings went bad.
Lost Detail and Elephant Foot
Lost or mushy fine detail is usually over-exposure: too much cure time bloats features, closes small holes, and merges close elements. The fix is to reduce normal exposure and recalibrate with a test print. Light bleed through translucent resin can also soften detail, which is partly why grey and opaque resins hold detail better than clear ones during calibration.
Elephant foot — a flared, wider base on the first layers — comes from the long base exposure spreading the bottom layers, sometimes worsened by a plate set too tight. Reduce bottom exposure and bottom layer count, and consider printing on a small raft so the elephant foot lands on a sacrificial layer instead of your model. Both of these are exposure problems, which is why dialling in exposure settings with a calibration print prevents most detail issues before they happen.
Preventing Failures in the First Place
Most troubleshooting disappears when a few habits are in place: calibrate exposure per resin with a test print, keep resin at a consistent temperature, inspect and replace the FEP before it’s badly worn, strain the vat after every failure, and orient models to minimise suction. The single biggest lever is the calibration print — most “random” failures are an exposure that was never properly dialled in for that bottle.
When a print does fail, resist the urge to change everything. Locate where it failed, pick the single most likely cause from the table, fix that, and reprint a small test. That methodical loop turns resin printing from frustrating to reliable faster than any other approach. For the full process around all of this, the main resin guide connects troubleshooting to the rest of the workflow.
Note: a couple of links above are affiliate links — buy through them and I may earn a small commission at no extra cost to you. I only point to gear I’d run on my own bench. See my disclaimer page.
Frequently Asked Questions
Why won’t my resin print stick to the build plate?
Usually under-exposed base layers, an unlevelled plate, or a cured layer stuck to the FEP from a previous failure. Re-level the plate first, then increase the bottom exposure time and count, and strain the vat to remove any cured debris before reprinting.
Why do my resin layers delaminate?
Delamination comes from under-exposure, a worn or clouded FEP film, or too aggressive a peel. Raise the normal exposure, inspect and replace the film if it is tired, and slow the lift speed. Cold resin cures slower, so check temperature if it starts suddenly.
What causes elephant foot on resin prints?
Elephant foot is a flared base caused by the long bottom-layer exposure spreading the first layers, sometimes worsened by a plate set too tight. Reduce the bottom exposure and layer count, and print on a small raft so the flare lands on a sacrificial layer.
Why is my resin print losing fine detail?
Lost or mushy detail is usually over-exposure, which bloats features and closes small holes. Reduce the normal layer exposure and recalibrate with a test print. Light bleed through clear resin also softens detail, so opaque resins hold detail better.
Why do my resin prints tear off mid-print?
Large flat layers parallel to the plate create strong suction that tears parts off during the lift. Tilt the model 30 to 45 degrees, hollow solid models with drain holes to reduce trapped resin, and slow the lift speed to lower the peel force.
What should I do after a failed resin print?
Always strain the resin through a filter to remove cured debris, then check the FEP film for a stuck cured layer and remove it. Reprint only after the vat is clean, because leftover cured resin will sabotage the next print regardless of your settings.