A DIY 3D printer enclosure traps the printer’s own waste heat to hold the chamber at 40–55°C, which stops ABS, ASA, and PC-blends from warping and delaminating — and a vented one cuts the ultrafine particles those materials emit. You don’t need a branded box: my shop enclosure is a grow tent with a ducted carbon-filter exhaust, and it holds chamber temperature better than several injection-molded units I’ve tested.
An enclosure is the cheapest path to engineering filaments and one of the highest-value builds in the 3D printer upgrades guide. Here’s how I’d build one that actually works — the frame options, the ventilation that matters, and the fire-safety steps people skip — based on the enclosure I run every day in my Swedish workshop.
Why Enclose a Printer (and When Not To)
An enclosure solves three problems at once. First, warping: ABS and ASA shrink as they cool, and an enclosure’s stable 40–55°C ambient keeps the whole part warm so it doesn’t curl off the bed or split between layers. Second, layer adhesion: those same materials bond far better in a warm chamber, so parts come out genuinely strong instead of cracking along a layer line. Third, emissions — ABS releases styrene and fine particles you don’t want to breathe, and an enclosure lets you capture and vent them.
The crucial exception is PLA. PLA prints best in cool open air, and trapping heat around it causes heat creep that softens filament in the heatbreak and clogs the nozzle — the opposite of what you want. If you only print PLA and PETG, skip the enclosure entirely or leave the door open. Build the enclosure when you’re moving up to ABS, ASA, polycarbonate, or nylon, which is exactly the transition I cover in the ASA vs ABS guide.
Choosing the Frame
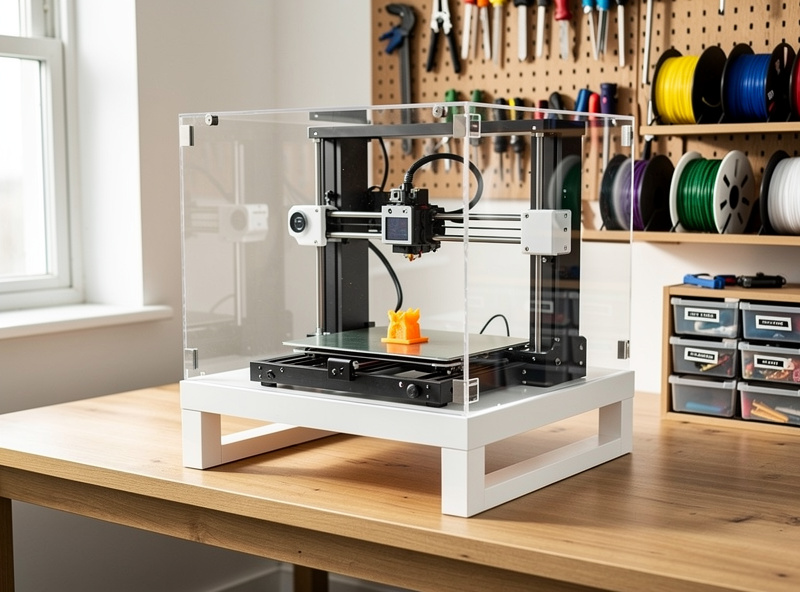
You have four sane routes. The IKEA Lack table enclosure — two stacked side tables with acrylic panels — is the classic budget build, cheap and rigid but tight on space. A grow tent is what I run: the reflective insulated walls hold heat well, it has built-in duct ports for exhaust, and it zips fully closed; a 2×2 or 2×4 foot tent swallows most bed-slingers with room for filament. An aluminum-extrusion and acrylic frame is the premium DIY route — fully custom, great-looking, more work and cost. And a photo/grow tent or a simple shelving unit wrapped in panels covers the in-between.
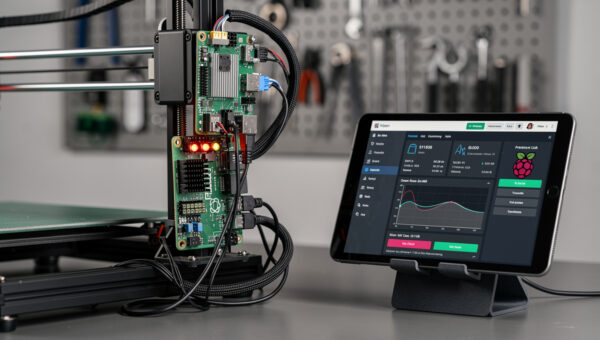
Whatever the frame, the rule is don’t use flammable foam insulation, and keep the printer’s power supply and mainboard either outside the hot zone or actively cooled — electronics baking in a 50°C chamber is a real failure mode. My grow tent keeps the PSU mounted outside the heated volume for exactly this reason, a layout that follows from the broader workspace setup.
DIY Enclosure Options Compared
Here’s how the common enclosure approaches compare on cost, heat retention, and effort.
| Enclosure Type | Approx Cost | Heat Retention | Ventilation Ports | Best For |
|---|---|---|---|---|
| IKEA Lack table | $40–80 | Good (with acrylic) | DIY drill | Budget, small bed-slingers |
| Grow tent | $30–90 | Excellent (insulated) | Built-in | Venting ABS, most printers |
| Aluminum extrusion + acrylic | $120–300 | Very good | Custom | Permanent custom builds |
| Shelf unit + panels | $20–60 | Fair | DIY | Cheapest stopgap |
| Commercial enclosure | $80–200 | Varies | Some | No-DIY convenience |
Ventilation: The Part People Skip
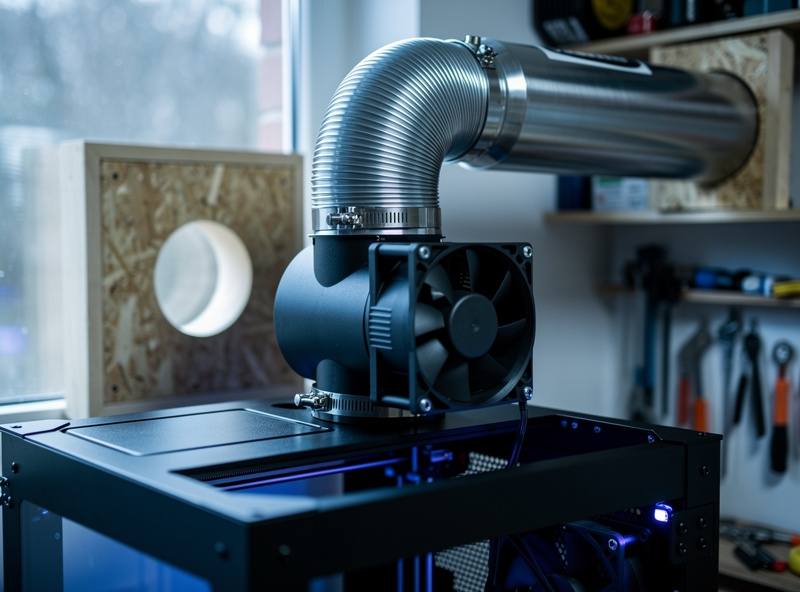
If you’re enclosing to print ABS or ASA, ventilation isn’t optional — it’s the whole point. The setup that works is an inline duct fan pulling chamber air through an activated-carbon filter and out through ducting, ideally to a window. The carbon captures VOCs and the fan creates slight negative pressure so fumes don’t leak into the room. I run mine on a timer so it ramps up only during and after a print, not constantly bleeding heat.
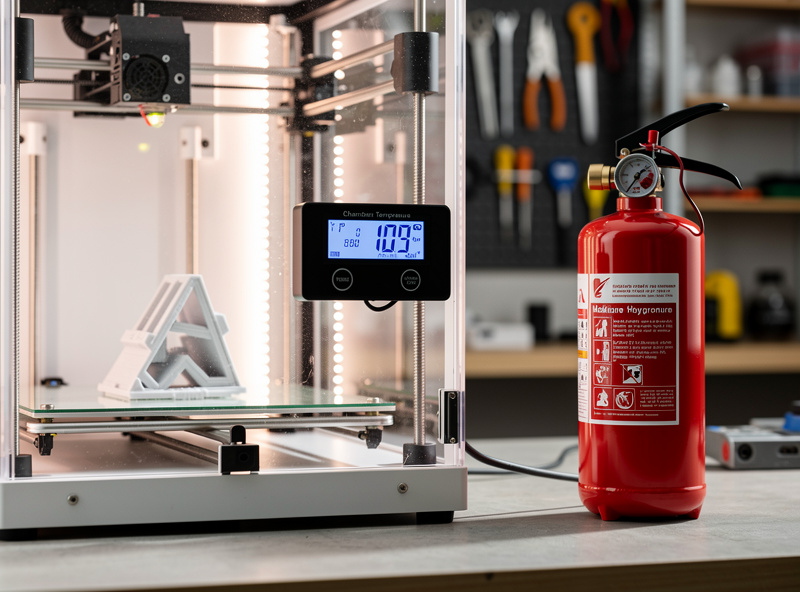
The balance to strike is heat versus air exchange: you want enough extraction to clear fumes and fine particles but not so much that you can’t hold chamber temperature. A variable-speed inline fan solves this — run it low during printing to maintain a gentle exchange, then high for a purge cycle after the print finishes. A digital hygrometer-thermometer inside the chamber tells you whether you’re actually holding the 40–55°C you need; guessing is how people end up with a warped part and no idea why.
Fire Safety Is Not Optional
An enclosure concentrates heat around electronics and a 250°C-plus hotend, so the fire-safety layer matters more, not less. The non-negotiables on my bench: a smoke alarm directly above the printer, a Class-C (electrical-rated) fire extinguisher within arm’s reach, and a hard rule that I don’t run prints fully unattended without a camera watching. A thermal runaway on an enclosed printer is a worse event than on an open one.
Use a quality PSU and inspect the heater and thermistor wiring before you trust a long enclosed print — the most common 3D printer fire causes are loose high-current connections and a thermistor that’s pulled out of the heater block. Verify your firmware has thermal-runaway protection enabled; modern Marlin and Klipper both do, but confirm it. Pair the enclosure with the monitoring upgrades — a camera and a runout sensor — from the upgrades guide, and you can trust the machine to run overnight. The point of an enclosure is to print more capable materials safely, not to add a hazard you stop watching.
Bringing It Together
For most people, a grow tent with a variable inline carbon-filter exhaust, a chamber thermometer, a smoke alarm, and a Class-C extinguisher is the build that gives you reliable ABS and ASA printing for under a hundred dollars. Keep the PSU and electronics ventilated, vent the fumes outside, and leave the door open whenever you go back to PLA. That single build is what turned my printers from PLA-and-PETG machines into ones that produce functional ABS shop fixtures and outdoor ASA parts.
If building isn’t your thing, a factory-enclosed machine like the ones in my best enclosed printer guide gives you the chamber without the project — though it costs more and you lose the easy fume-venting a DIY tent makes trivial. Either way, the enclosure pairs naturally with an all-metal hotend that can actually reach ABS temperatures, since the two upgrades unlock engineering filaments together.
A quick note: some links below are affiliate links — if you buy through them I may earn a small commission at no extra cost to you. I only point to gear I would actually run on my own bench. Details on my disclaimer page.
The enclosure parts I’d actually buy: a 2×2 grow tent as the frame, an inline duct fan and carbon filter kit for the exhaust, a digital hygrometer-thermometer to confirm chamber temperature, and a Class-C fire extinguisher within reach of the printer.
Frequently Asked Questions
Do I need an enclosure for 3D printing?
Only for ABS, ASA, polycarbonate, and nylon, which warp and delaminate without a warm, stable chamber around 40-55C. For PLA and PETG you do not need one, and PLA actually prints worse enclosed because trapped heat causes nozzle clogs.
What temperature should a 3D printer enclosure be?
For ABS and ASA, aim for 40-55C chamber temperature, reached passively from the printer’s own waste heat. You rarely need active heating. A chamber thermometer confirms you are holding the range, which is what prevents warping and layer splitting.
Is a grow tent good for a 3D printer enclosure?
Yes. A grow tent has reflective insulated walls that hold heat well, built-in duct ports for venting fumes, and a full zip closure. It is my own enclosure and holds chamber temperature better than several molded commercial units I have tested.
How do I vent 3D printer fumes?
Use an inline duct fan to pull chamber air through an activated-carbon filter and out through ducting to a window. Run it at low speed during printing and high for a purge cycle after, creating slight negative pressure so fumes do not leak into the room.
Can I enclose a printer that prints PLA?
You can, but leave the door open for PLA. Trapping heat around PLA causes heat creep that softens filament in the heatbreak and clogs the nozzle. Build the enclosure for engineering filaments and ventilate or open it when you switch back to PLA.
Are 3D printer enclosures a fire risk?
They concentrate heat, so treat fire safety seriously. Use a smoke alarm above the printer, a Class-C extinguisher within reach, a quality PSU, and firmware thermal-runaway protection. Inspect heater and thermistor wiring before trusting long enclosed prints.