How you remove supports decides how much finishing work you’ve signed up for. Pull them while the part is still warm and they release with a scar you can barely see; let it cool brittle and tear them by hand and you’ve signed up for an hour of sanding. After thousands of prints, the difference comes down to patience and the right cutter.
Here’s the routine I use to get them off without leaving damage. For where support removal sits in the broader sequence, the post-processing guide has the full workflow; this is the deep dive on getting supports off cleanly.
The cleanest removal starts in the slicer
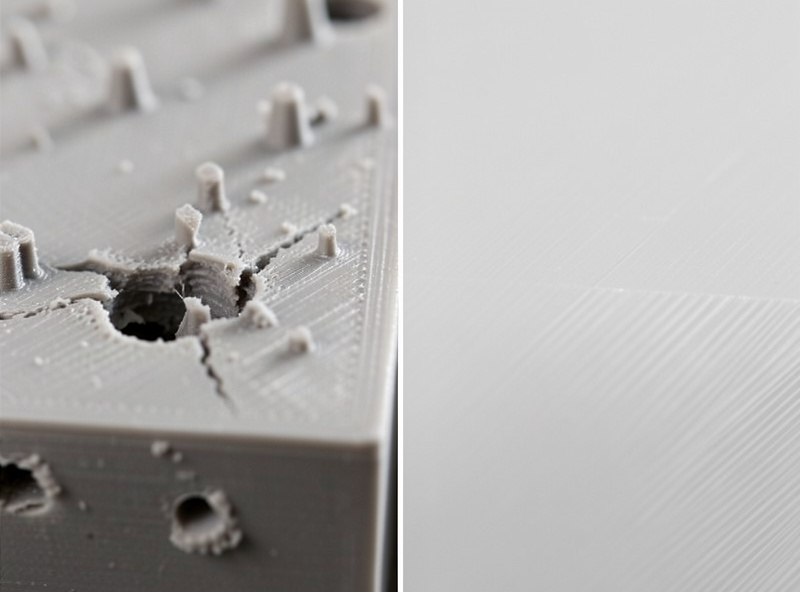
Before any cutter touches the part, the single biggest factor in clean removal already happened: how the supports were generated. The support interface — the gap and density where support meets part — controls how much the supports are fused to the surface. Too tight and they weld on and tear the surface coming off; too loose and the part sags onto poorly-supported overhangs. Dialing that interface in is what makes supports snap off cleanly with a scar you can barely see.
Support type matters too. My notes on tree supports versus normal supports cover when each removes more cleanly, and placing custom supports in PrusaSlicer by hand means you only support what truly needs it — far less material to remove and far less scarring. The honest truth is that the best support removal technique is needing to remove fewer supports. Orient the part to minimize overhangs, support only what must be supported, and tune the interface, and the physical removal becomes easy.
Pull supports while the part is warm
A trick that genuinely helps: remove supports soon after the print finishes, while the part is still slightly warm. Warm plastic is a little more flexible, and supports tend to release more cleanly and tear the surface less than they do once the part has fully cooled and gone brittle. This is especially noticeable on PLA, which gets harder and more brittle as it cools. If I’m going to hand-remove supports, I try to do it within the first while after the print completes, not days later.
That said, don’t burn yourself or rush a part that’s still hot enough to deform — slightly warm is the window, not fresh-off-a-hot-bed. If the part has already cooled, it’s not a disaster; you just work a bit more carefully with the cutters.
Use the right tool, not your fingers
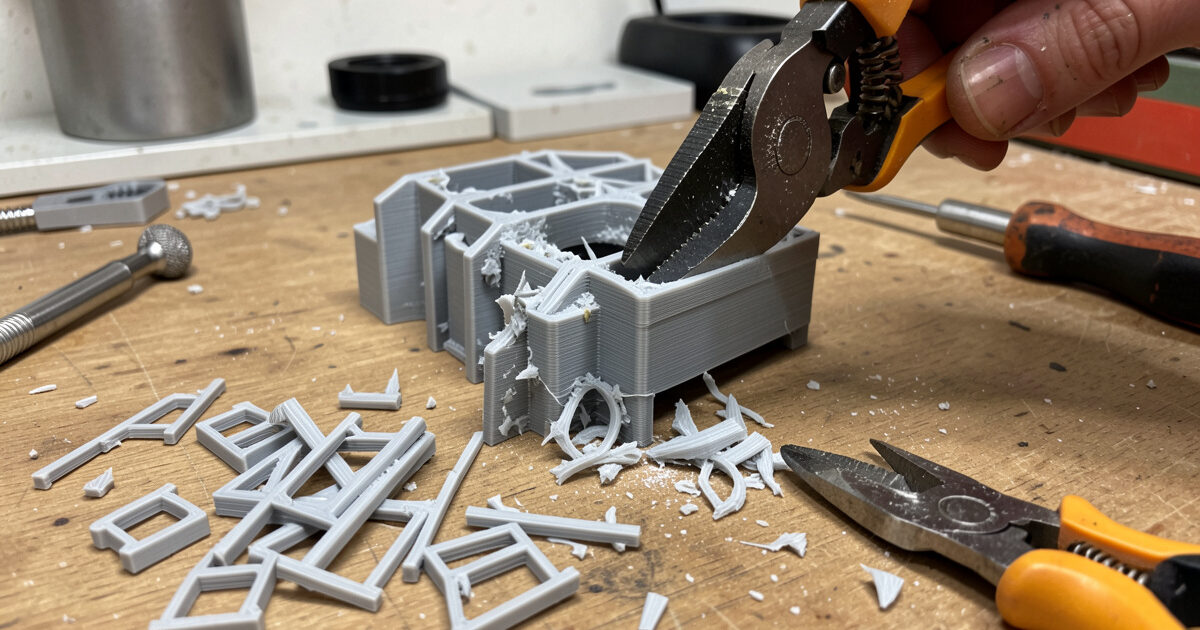
The most common cause of support scars is pulling supports off by hand. Fingers can’t get into tight interfaces, so they rip — tearing chunks of the actual part away with the support instead of separating cleanly at the interface. The tools that prevent this:
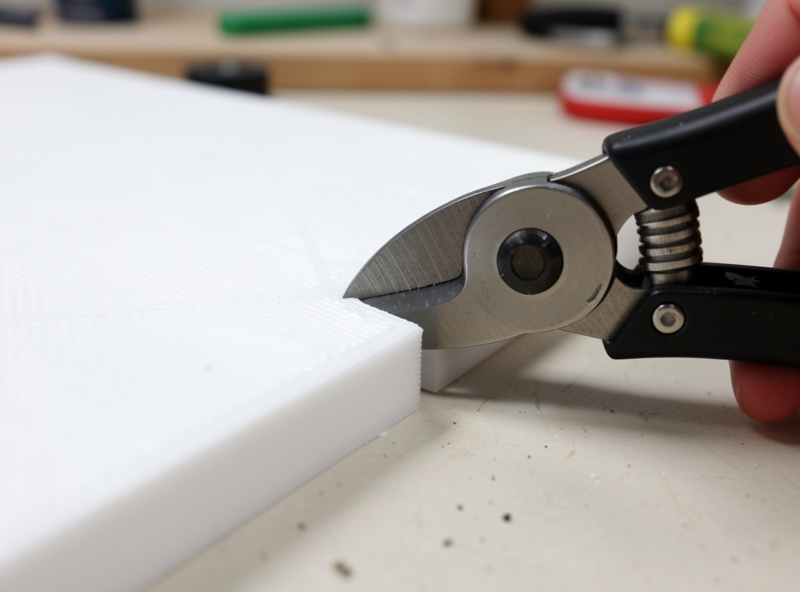
Flush cutters are the workhorse. Flat on one side, they let you snip support interfaces right at the surface instead of yanking them. Get the flat side against the part and cut, and the support separates at the line you chose rather than wherever it happens to tear. For the bulk of support removal, good flush cutters do most of the work cleanly — I’ve run a pair of Hakko CHP-170 cutters for years and they still snip flush.
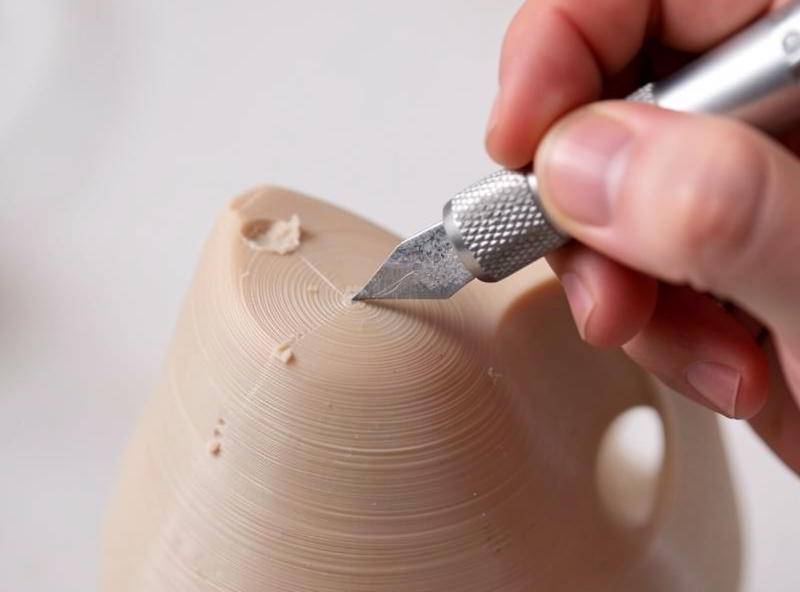
Pliers or fingers are fine for the big, loosely-attached support rafts and towers that aren’t touching the surface — strip those off first to get them out of the way. A deburring tool, hobby knife, or small pick handles the leftovers: the small nubs at the interface points where the support actually met the part. Scrape or pare those flush, and the surface is clean.
| Tool | Best for | Tight interfaces | Risk of surface damage |
|---|---|---|---|
| Flush cutters | The bulk of interface cuts, flush at the surface | Good | Low when the flat side is against the part |
| Pliers / fingers | Big loose rafts and towers off the surface | Poor | High if used on interfaces — they tear |
| Deburring tool / hobby knife | Paring leftover nubs flush after cutting | Good | Low with light, controlled passes |
The order of operations
There’s a sequence that keeps the job clean. Start by stripping away the bulk support — the rafts, towers, and loose structures that aren’t directly touching the part surface. Get them off and out of the way so you can see the interfaces clearly. Then work the interface points with flush cutters, snipping each one flush at the surface rather than tearing. Finally, go over the remaining nubs and marks with a deburring tool or knife, paring them flush.
Working in that order — bulk first, interfaces second, cleanup third — means you’re never fighting a tangle of support while trying to make a precise cut, and you can see exactly what you’re doing at each interface. Rushing all three at once is how you slip and gouge the part. Slow down at the interfaces specifically; that’s where the visible surface is.
Dealing with what’s left
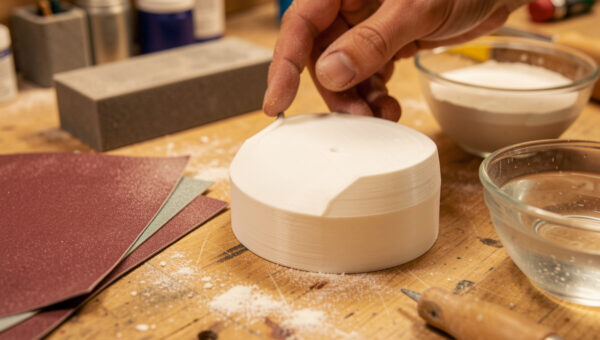
Even with clean removal, you’ll usually have faint witness marks where supports met the part — small rough patches at the interface points. These are minor and feed straight into the next finishing stage: a quick pass with sandpaper knocks them flush. If the part is headed for paint, those marks disappear under sanding and filler primer and the later priming and painting stages with no extra effort. If it’s a functional part, a quick scrape or sand and it’s done.
The marks to worry about are the deep ones — actual gouges where a support tore into the surface. Those are harder to fix and are exactly what clean removal exists to prevent. If you’re getting deep tear-outs regularly, the fix isn’t a better cutter, it’s going back to the slicer and loosening the support interface so they stop welding to the part in the first place. Clean removal is mostly prevention; the cutter just executes what the slicer set up. Get both right and supports stop being a finishing problem at all.
The kit
As an Amazon Associate I earn from qualifying purchases.
- Flush cutters — the workhorse; flat-side-down snips support interfaces clean at the surface.
- Deburring tool and hobby knife set — for paring the leftover interface nubs flush.
Frequently asked questions
How do I remove 3D print supports without leaving marks?
Use flush cutters to snip support interfaces flush at the surface rather than pulling supports off by hand, which tears the part. Work in order: strip bulk support first, snip interfaces with flush cutters, then pare leftover nubs with a deburring tool. The biggest factor, though, is the slicer: a properly tuned support interface gap lets supports release with almost no scarring.
Should I remove supports while the print is warm?
Yes, it usually helps. Removing supports soon after printing, while the part is still slightly warm, makes the plastic a little more flexible so supports release more cleanly and tear the surface less, especially on PLA which gets brittle as it cools. Just do not handle a part that is still hot enough to deform; slightly warm is the window, not fresh off a hot bed.
What tools do I need to remove 3D print supports?
A pair of flush cutters does most of the work, snipping interfaces flush at the surface. Pliers or fingers handle the bulky loose support rafts and towers. A deburring tool, hobby knife, or small pick cleans up the leftover nubs at the interface points. That small kit covers nearly all support removal cleanly without tearing the part.
Why do my supports leave deep gouges in the print?
Almost always because the support interface is too tight, so the supports fuse to the part and tear into the surface coming off, or because they are being pulled by hand instead of cut. The fix is mostly in the slicer: loosen the support interface gap so supports release cleanly. Then snip interfaces with flush cutters rather than yanking them.
Do I need to sand after removing supports?
Usually a little. Even clean removal leaves faint witness marks at the interface points, and a quick pass with sandpaper knocks them flush. For a part going to paint, those marks disappear under normal sanding and filler primer with no extra effort. For a functional part, a quick scrape or light sand is enough. Deep gouges are the exception and are better prevented than sanded out.