If there’s one product that separates a print that looks molded from a print that looks printed, it’s filler primer. Not paint. Not sandpaper grit you climbed to 2000. Filler primer. Two or three spray-and-sand cycles erase layer lines that wet-sanding to 2000 leaves behind — it’s the step beginners skip, then wonder why their painted part still shows lines under the gloss.
Below I break down that one product and the spray-and-sand cycle it lives in. For how it slots into the whole sequence — support removal, sanding, paint, clear coat — the post-processing guide has the map.
Filler primer versus regular primer
The confusion that costs people good finishes is treating “primer” as one thing. There are two different products doing two different jobs.
| Product | Thickness | Job | Sandable? |
|---|---|---|---|
| Standard primer | Thin | Promote paint adhesion, even base color | Lightly |
| Filler / high-build primer | Thick | Fill layer lines and sanding scratches | Yes — built to be sanded back |
| Spot / glazing putty | Paste | Fill deep gouges and gaps primer can’t | Yes |
Standard primer is thin. Its only job is to give paint something uniform to grip and an even base tone. It does nothing for layer lines — it’s far too thin to fill them. Filler primer, sold as high-build or sandable primer, is the thick one. It’s specifically formulated to lay down a heavy coat that you then sand back, filling the fine valleys between layer lines in the process. That’s the entire point of it, and it’s why I keep it separate from my paint primer.
For the occasional deep gouge or gap that even filler primer can’t bridge — a bad support scar, a layer split — there’s spot putty, a thicker paste you dab into the defect and sand flush before priming. But for the everyday job of erasing layer lines, filler primer is the tool.
The spray-and-sand cycle
Filler primer works in a loop, and the loop is the whole technique. Here’s exactly how I run it:
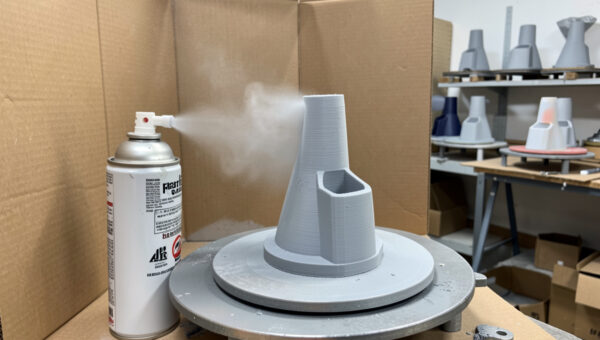
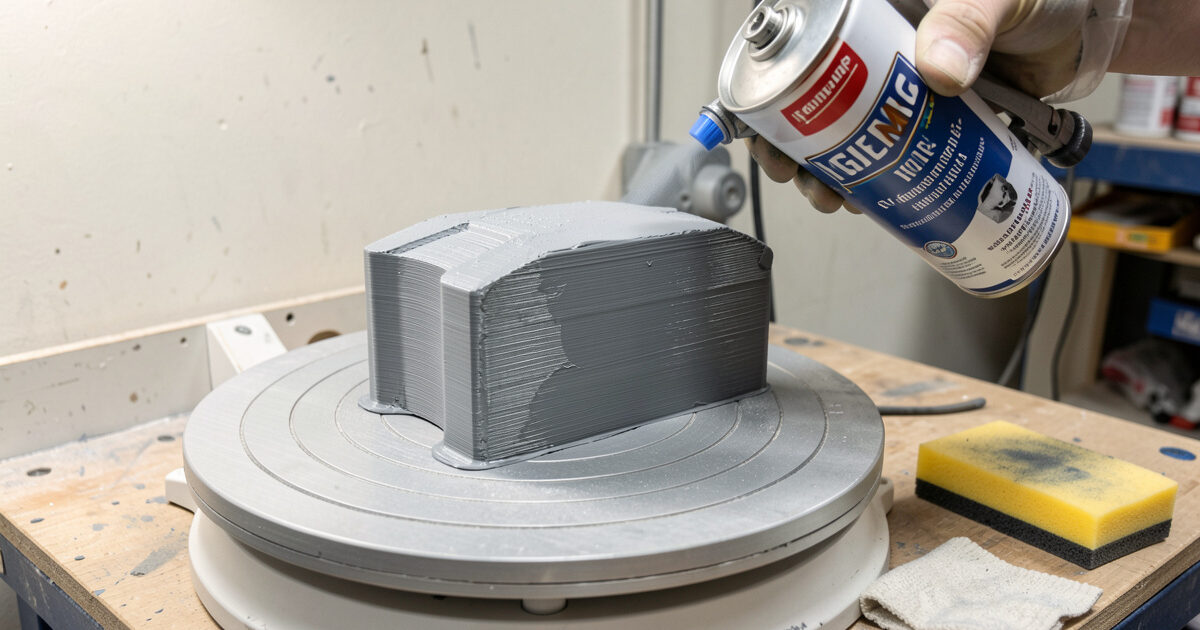
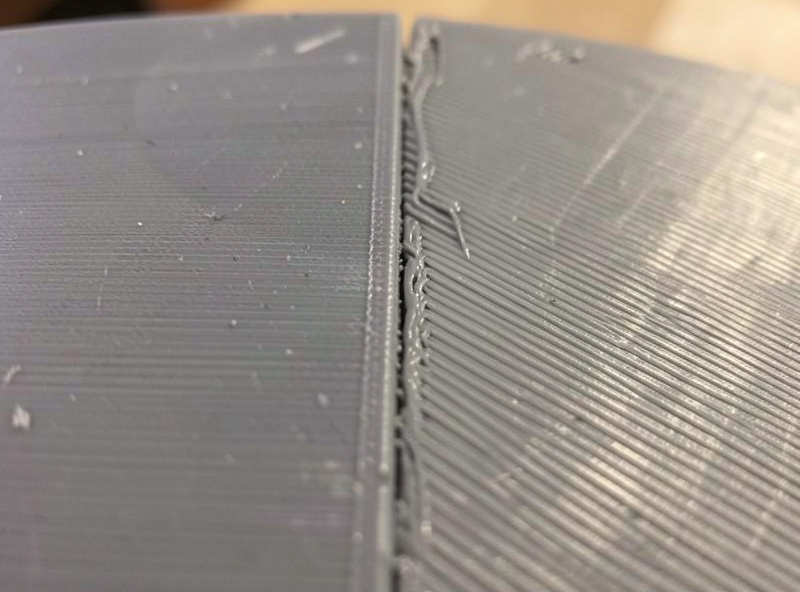
Spray a medium coat onto the sanded part — enough to build a layer, not so much that it runs. Let it cure fully; this matters, because sanding a half-cured filler primer gives a gummy, clogging mess instead of a clean powder. Once hard, sand it back with around 320 to 400 grit. You’re not stripping the primer off — you’re cutting down the high spots so the surface goes flat. The primer that sat in the layer-line valleys stays; the primer on the peaks comes off. Then check under raking light: hold the part so a lamp grazes the surface at a low angle, and any remaining lines show as shadows. Lines still there? Spray, cure, sand again.
Two cycles handle most prints. A really lined surface might need three. Each cycle the surface gets flatter, because you keep depositing primer in the low spots and cutting it off the high spots until there’s no height difference left. When the part reads as one continuous plane under raking light, the layer lines are gone — for good, under whatever you put on top.
Why it beats sanding bare plastic
You could, in theory, sand bare plastic flat enough to erase layer lines. In practice it’s miserable and slow, because you’re removing solid plastic from the peaks down to the depth of the valleys across the whole surface — a huge amount of material to take off by hand, and easy to dish or round edges doing it. Filler primer flips the problem: instead of grinding the peaks down to the valleys, you fill the valleys up to the peaks. Adding material to the low spots is far faster than removing it from the high spots.
That’s why I rarely sand bare plastic past 320 before priming. There’s no point chasing a fine finish on the plastic when the filler primer is about to do the real leveling. Sand enough to remove support scars and knock the worst of the lines down, then let filler primer carry the part the rest of the way. It’s less work and a better result.
Getting good results
A few things make the difference between filler primer working and filler primer frustrating you. Thin-to-medium coats, fully cured. A thick coat sprayed to “save a cycle” runs and stays soft underneath, and sanding it is a gummy mess. Patience on cure time is the whole game. Tack-cloth between coats. Wipe the sanding dust off before the next spray — primer traps whatever’s on the surface, so dust left on becomes grit cured into the finish. Raking light to judge progress, not a flat overhead light that hides the valleys you’re trying to find. And a sanding block or sponge, not bare fingers, so you flatten the surface evenly instead of following its contours and leaving the valleys untouched.
There’s also a question of when to stop priming. The temptation, once you see how well it works, is to keep adding cycles chasing perfection. But every extra coat is build you’ll partly sand away, and on a part with crisp detail, thick primer slowly softens edges and fills shallow recesses you wanted to keep. So I stop the moment the surface reads flat under raking light at the detail level the part needs — a chunky functional housing tolerates more primer build than a part with fine engraved features. Match the number of cycles to the part, not to a fixed recipe.
Get those right and filler primer is close to foolproof. After the final cycle, the part is ready for color — you can paint straight over the sanded filler primer, treating that last flat coat as your base. The layer lines you fought are simply gone, and they stay gone under the paint and clear coat. It’s the least glamorous product on the finishing shelf and the one I’d give up last.
Choosing a filler primer that actually builds
Not every can labeled “primer” fills, and the marketing doesn’t always make it obvious. What you’re after is explicitly a high-build, sandable, or filler primer — those three words are the signal that it’s formulated to lay down a thick coat meant to be sanded. Rust-Oleum’s automotive filler primer is the can I default to; it builds fast and sands back cleanly. A thin “primer-sealer” or a “primer in one” paint product won’t build; it’s closer to the standard thin primer and won’t fill layer lines no matter how many coats you spray.
Grey is the most useful color to keep on the shelf, because it shows your sanding progress clearly — as you sand back, the high spots lighten where the block cuts and the valleys stay darker, giving you a built-in map of where the surface still isn’t flat. White and black filler primers exist and have their uses under specific topcoat colors, but grey is the one I reach for by default precisely because it reads progress so well under raking light.
One thing to check on the can: cure and recoat times. Some filler primers want a recoat within a window or after full cure, and getting that wrong can cause the next coat to wrinkle the one below. Read the label once, follow it, and the product behaves. The differences between brands are real but smaller than the difference between using filler primer correctly and not using it at all.
When filler primer isn’t the answer
For all its usefulness, filler primer has limits worth knowing so you don’t waste cycles fighting the wrong problem. It fills fine valleys — the texture of layer lines and sanding scratches. It will not bridge a real gap: a wide seam between two glued halves, a deep gouge, a missing chunk from a support tear-out. Throw coat after coat at a deep defect and you’ll just build a soft, thick wall of primer around it that sands away to reveal the gap still there. For those, fill the defect first with spot putty or a two-part filler, sand it flush, and then bring in filler primer to handle the fine surface texture.
It also can’t fix a part that printed badly. Bad stringing, blobs and zits, a layer shift — those are height changes too large and too irregular for primer to level, and you’ll sand through the primer trying. The honest move there is upstream: fix the print. My notes on troubleshooting common print failures cover the defects that belong in the slicer, not under a rattle can. Filler primer is for turning a good print into a flawless surface, not for rescuing a bad one. Used inside those limits, it’s the most reliable trick on the finishing bench.
The kit
As an Amazon Associate I earn from qualifying purchases.
- High-build sandable filler primer — the thick, sandable kind; this is the layer-line killer.
- Sanding block set — keeps the sand-back flat instead of following the contours.
- Tack cloths — wipe between coats so you don’t cure your own sanding dust into the finish.