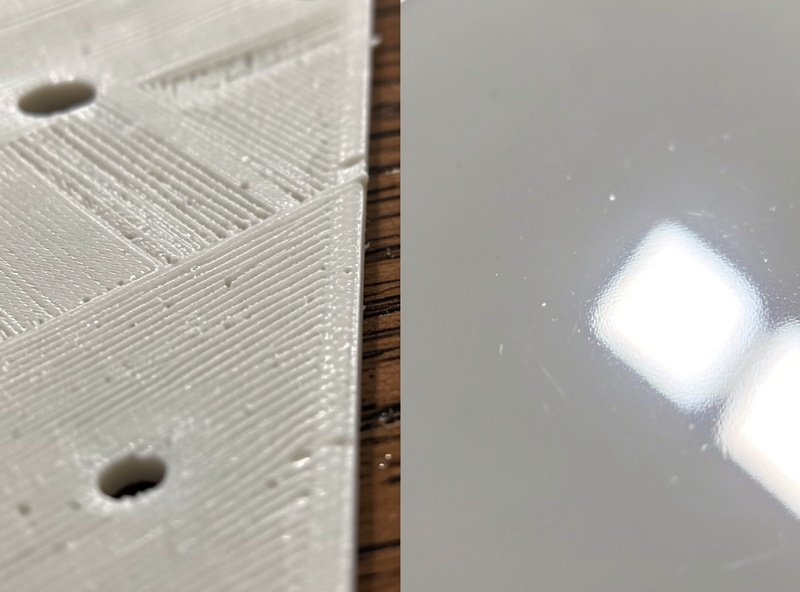
Acetone vapor smoothing is the closest thing FDM has to a magic button — but only for ABS and ASA. Tens of minutes in cold vapor re-flows the outer surface into a glossy, almost injection-molded skin, the layer lines melted into one continuous gloss. On PLA it does nothing at all, because acetone barely touches PLA.
It’s also the one finishing process I treat with real respect, because acetone vapor is flammable and you’re concentrating it on purpose. Done with sensible precautions it’s safe and repeatable. Done carelessly it’s a fire risk. This is exactly how I run it on my bench, including the safety setup I won’t skip. For where smoothing fits among the other finishing options, see the post-processing guide.
How it works, and why only ABS and ASA
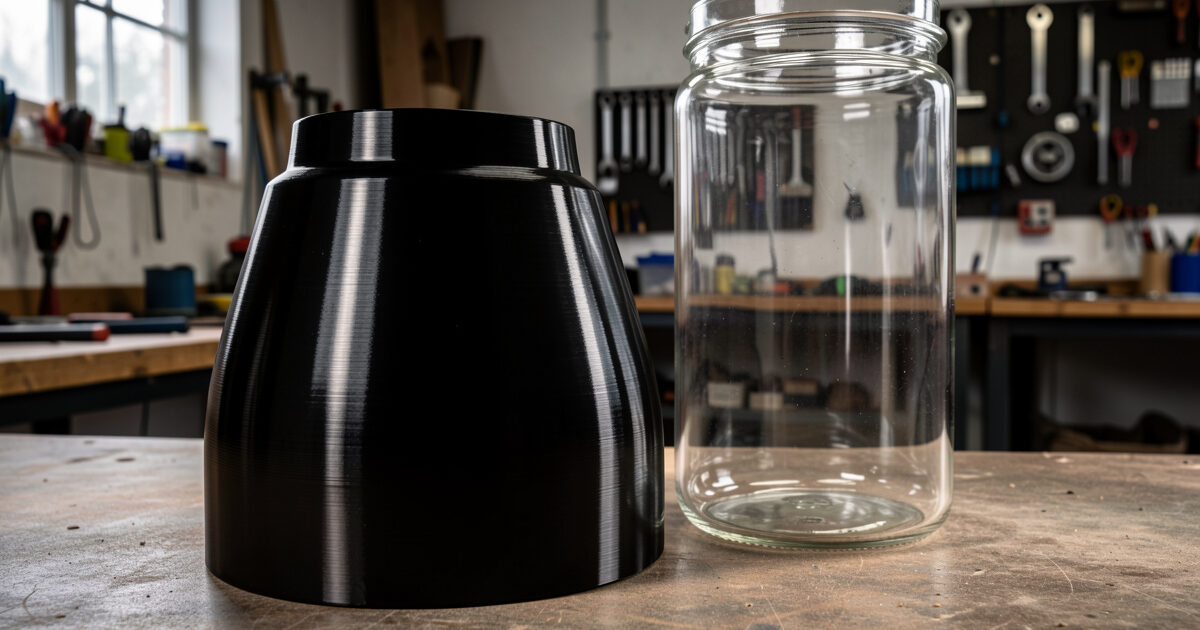
Acetone is a solvent for ABS and ASA. Expose the part to acetone vapor and the solvent very slightly dissolves the outer skin of the plastic, which then re-flows under surface tension and self-levels as it re-solidifies. Layer lines, which are just ridges and valleys, soften and blend into a smooth glossy surface. The effect is on the surface only — the inside of the part is untouched — so you get gloss without dissolving the part, as long as you don’t overdo it.
PLA, the most common FDM material, is essentially immune to acetone. So is PETG. If your part is PLA or PETG and you want smooth, this is not your route — you’re on the sand and filler-primer path instead. Vapor smoothing is specifically an ABS and ASA technique, which is one more reason material choice is a finishing decision. If you know a part will be vapor-smoothed, you print it in ABS or ASA from the start — I reach for Polymaker ASA for outdoor parts that will then get smoothed. My notes on ASA versus ABS cover which of the two to reach for.
Safety first — this part is not optional
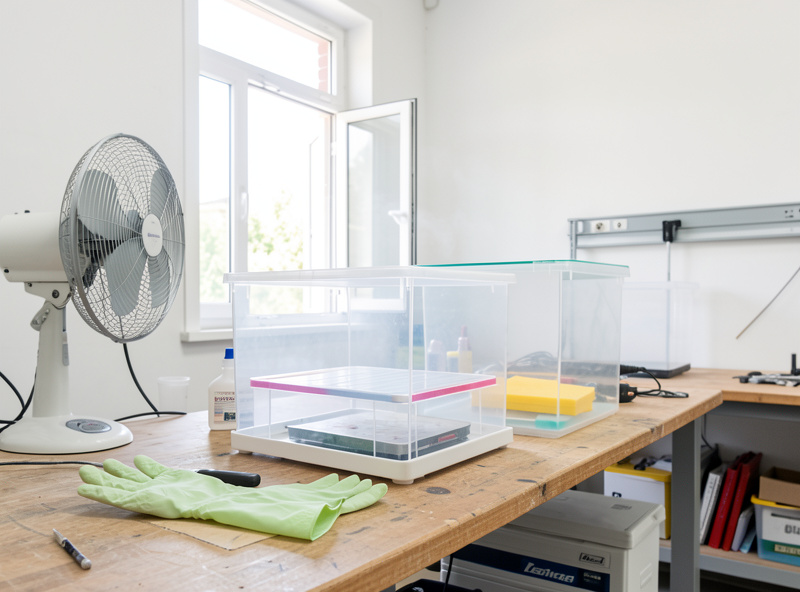
Acetone vapor is flammable and its fumes shouldn’t be breathed in concentration. The non-negotiables on my bench: do it in a well-ventilated space, ideally with airflow carrying fumes away — I use the same ducted exhaust setup I run for printing ABS in an enclosed machine. Keep it far from any open flame, spark, or heat source, which rules out anything with a pilot light or a heating element nearby. No smoking, obviously. And use an organic-vapor respirator, not a dust mask, if you’re working near it for any length of time.
Use only as much acetone as the method needs — you’re making vapor, not a bath. Keep a lid on the container so the vapor stays contained and doesn’t fill the room. And never apply heat to acetone with an open element or flame to speed things up; if a method calls for gentle warmth, it means warm water or a controlled low heat source, never a torch or a hotplate under solvent. Treat the whole process with the same caution you’d give any flammable solvent, because that’s what it is. For reference, OSHA sets the permissible exposure limit for acetone at 1000 ppm over an eight-hour day — ventilation and keeping the chamber sealed are what keep you well under it.
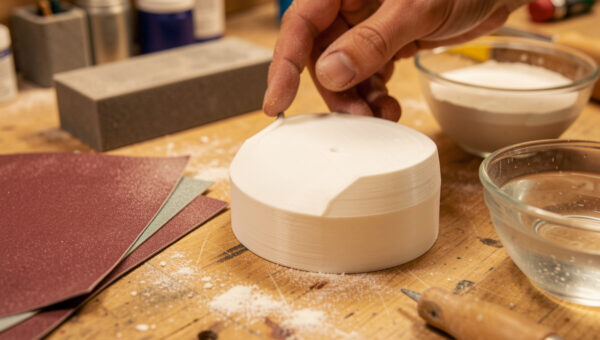
The cold-vapor method (the one I recommend starting with)
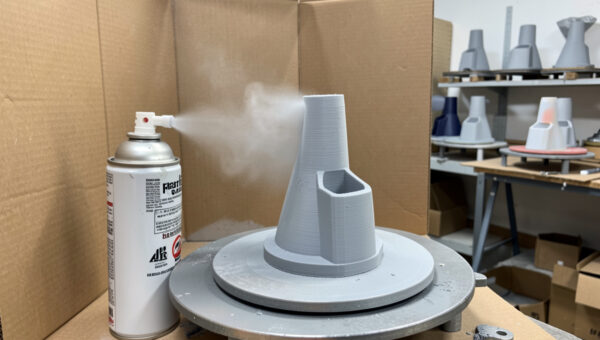
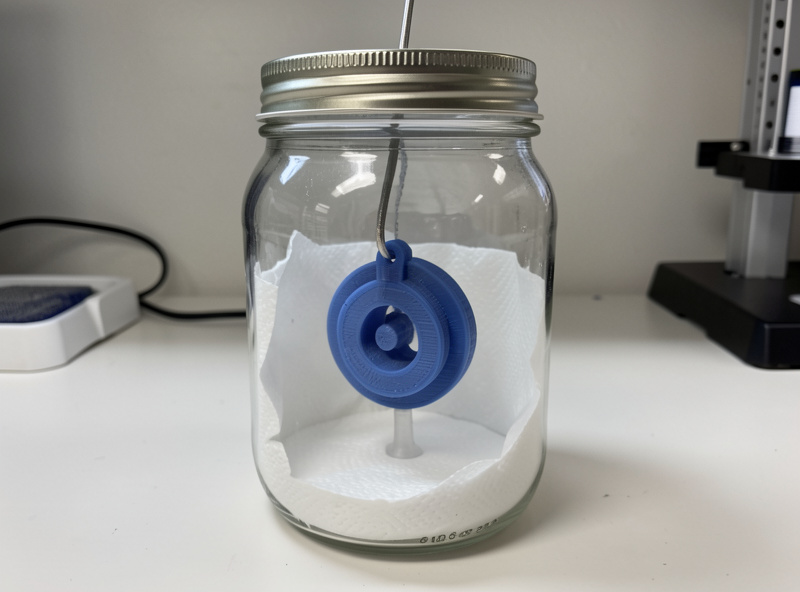
The safest and most controllable approach is cold vapor smoothing. You line the inside of a sealed container — a glass jar or a metal tin large enough for the part — with paper towel dampened with a small amount of acetone. The part sits suspended or raised off the bottom so it doesn’t touch the liquid directly, on a small stand or hung from the lid. Seal the container and let the acetone evaporate naturally at room temperature, filling the space with vapor that slowly works the surface.
Because it’s at room temperature, cold vapor is slow and forgiving — you have a wide window to check progress and pull the part before it over-smooths. That forgiveness is exactly why I recommend it over heated methods for anyone starting out. Patience here is a feature.
Cold versus heated methods
There are warmer, faster variants, but they trade away the safety margin. Here’s the honest comparison:
| Method | Speed | Control | Risk |
|---|---|---|---|
| Cold vapor (room temp) | Slow | Excellent — wide window | Lowest; the one to start with |
| Gently warmed vapor | Faster | Good if heat is controlled | Higher — heat plus solvent demands care |
| Brush or dip in acetone | Fast but crude | Poor — easy to over-dissolve | Messy; can ruin detail fast |
I stay with cold vapor for almost everything. The slight time saving from heating isn’t worth the reduced margin for error or the added risk of warming a flammable solvent. The brush-and-dip approach I avoid entirely — it’s too easy to dissolve detail and leave a gummy, uneven mess. Vapor is what gives the even gloss; direct liquid contact gives you a melted part.
Knowing when to stop
Over-smoothing is the classic mistake. Leave a part in vapor too long and the surface keeps dissolving — fine detail rounds off, edges go soft, and eventually the part starts to slump and lose its shape. The skill is pulling it at the right moment: when the surface has gone glossy and the layer lines have blended, but before detail starts to wash out. Check often, especially your first few times, and remember you can always put it back in for more, but you can’t un-smooth it.
After you pull the part, the surface is soft and still off-gassing acetone. Let it cure in a ventilated spot, untouched, for several hours to a day — handling it while soft leaves fingerprints in the gloss, and the part stays slightly tacky until the solvent fully flashes off. Patience at the end is as important as patience during. A smoothed ABS part that’s been left to cure properly has a finish that’s hard to get any other way, and it’s earned every minute of the wait. If you want color on top, let it cure fully, scuff it lightly, and then prime and paint it as normal.
The kit
As an Amazon Associate I earn from qualifying purchases.
- Pure acetone — get pure acetone, not a nail-polish remover with additives that leave residue.
- Sealable wide-mouth container — a glass or metal vessel large enough to suspend the part without touching the walls.
Frequently asked questions
Can you acetone-smooth PLA?
No. Acetone barely affects PLA, so vapor smoothing does not work on it, and the same is true of PETG. Acetone smoothing only works on ABS and ASA, where the solvent re-flows the surface into a gloss. For PLA and PETG, the route to a smooth finish is mechanical: sanding plus filler primer, or a self-leveling epoxy coat.
Is acetone vapor smoothing dangerous?
It carries real risk because acetone vapor is flammable and should not be breathed in concentration, but it is safe when done sensibly. Work in a well-ventilated space, keep it far from any flame, spark, or heat source, never apply an open flame or heating element to the acetone, and use an organic-vapor respirator near it. Treat it like any flammable solvent.
How long does acetone smoothing take?
With the cold-vapor method at room temperature it is slow, often tens of minutes to over an hour depending on the container size, acetone amount, and how glossy you want the part. That slowness is a feature: it gives a wide window to check progress and pull the part before it over-smooths. Heated methods are faster but harder to control and riskier.
Why did my acetone-smoothed part lose its detail?
It was left in the vapor too long. Acetone keeps dissolving the surface the whole time the part is exposed, so fine detail rounds off and edges soften if you over-smooth. The fix is to check often and pull the part as soon as the surface goes glossy and the layer lines blend, before detail washes out. You can always return it for more, but you cannot reverse over-smoothing.
Do I need to sand ABS before vapor smoothing?
Usually not much. Vapor smoothing blends layer lines on its own, so heavy sanding beforehand is unnecessary. A quick knock-down of support scars or obvious blobs helps, since the vapor smooths the surface but will not remove a large defect, but the fine sanding you would do before painting is not needed here. The vapor does the smoothing work.
Can I smooth a part and then paint it?
Yes. A vapor-smoothed ABS or ASA part takes paint well once it has fully cured and off-gassed the residual acetone, which can take several hours to a day. Let it cure hard first, then scuff lightly for adhesion and prime and paint as normal. Painting before the acetone has fully flashed off risks the paint not adhering to a still-soft surface.