A living hinge is a thin web of plastic that flexes in place of a mechanical pivot, letting a printed lid, clip, or enclosure bend open and closed without any separate parts. Designed well, a 3D printed living hinge survives thousands of flex cycles; designed badly, it cracks on the third bend. The whole difference comes down to material choice, web thickness, and printing the hinge so its layers run the right way relative to the bend.
I lean on living hinges constantly for functional parts — battery box lids, cable clips, hinged covers for the sensor enclosures I print — because they cut part count to one and there is nothing to assemble or lose. They are one of those things FDM does that feels like cheating once you get the geometry right. This guide is the working approach I use on the bench, and it fits into the wider functional printing workflow alongside the other moving-part tricks.
How a Living Hinge Actually Works
A living hinge concentrates bending into a deliberately thin section so the rest of the part stays rigid. When you flex it, that thin web takes all the strain. The trick is that the plastic at the hinge has to tolerate being bent repeatedly without the molecular structure fatiguing and cracking. Some plastics handle that beautifully and some are hopeless at it — which is why material is the first decision, not the geometry.
On an FDM print there is a second layer to the problem: the part is built from stacked layers that are weak between each other. A hinge bent across its layer lines tries to peel those layers apart on every cycle and fails fast. The successful approach orients the hinge so that flexing stretches and compresses solid plastic within the layers rather than pulling the layer bonds apart. Get material and orientation right and the thickness tuning is the easy part.
Material Is the First Decision
Polypropylene is the gold standard for living hinges — it is the material used for the flip-top caps on bottles precisely because it flexes almost endlessly without fatiguing. Protolabs Network’s living-hinge design guide goes deeper on why PP outlasts every other common material at the crease. If you can print PP and your hinge needs to last, it is the right answer, though it is fussier to print and needs good bed adhesion. For most workshop parts, though, PP is more hassle than the job warrants.
PETG is my practical default for living hinges. It is tough, slightly flexible, and tolerates repeated bending far better than PLA while printing on any machine without drama. A PETG hinge will not match PP’s near-infinite life, but for a lid that opens a few times a day it lasts indefinitely. PLA is the material to avoid: it is stiff and brittle, and a PLA living hinge cracks quickly under repeated flex even when the geometry is perfect. TPU goes the other way — it is so flexible the whole part bends, which is great for some designs but not a true hinge. The filament guide covers the full trade-offs, and the TPU settings profile helps if you go the flexible-material route.
Getting the Web Thickness Right
The hinge web has to be thin enough to flex easily but thick enough not to tear. For PETG and PP I aim for a web around 0.3 to 0.5 mm at the thinnest point — one to two layers at a typical layer height. Too thick and the hinge resists bending and stresses the surrounding plastic; too thin and it lacks the material to survive repeated strain. The exact number depends on the material and how much the hinge bends, so I treat the first print as a test and adjust.
The shape of the thin section matters as much as the thickness. A hinge that steps abruptly from thick to thin concentrates stress at the step and cracks there. Blending the transition with a gentle curve or taper spreads the bending over a slightly wider zone and dramatically improves life — the same stress-concentration logic from my designing for strength guide, applied in reverse to a feature you want to flex. A short, gently radiused thin section outlasts a sharp, narrow notch every time.
Orientation: The Make-or-Break Step
This is where most failed living hinges go wrong. The hinge must be printed lying flat, in the plane of the bed, so that the thin web is made of continuous layers stacked in the direction it bends — flexing then stretches plastic along the layers rather than peeling layer bonds apart. Print the same hinge standing up and the bend pulls directly on the weak inter-layer bonds, and it snaps almost immediately. The orientation and anisotropy rules behind this are laid out in Protolabs Network’s FDM design guidelines.
In practice that means the whole part — lid, body, and hinge — usually prints flat on the bed in its open position, then folds closed after printing. Designing the part to be modelled and printed open is the natural way to guarantee the hinge orientation is right. It also keeps the hinge a single uninterrupted run of plastic with no seam, which is exactly what you want for fatigue life. If the part geometry forces an awkward orientation, that is a sign to redesign the part rather than fight the hinge.
Print Settings That Help the Hinge Survive
A few slicer choices make a real difference. Printing the hinge hot, near the top of the material’s range, fuses the thin web more completely so it behaves as solid plastic rather than poorly bonded threads. Slowing the print over the hinge section helps the same way. I also make sure the thin web is an even number of layers and that the slicer is actually laying continuous lines there rather than dropping to a single broken bead — previewing the hinge layer by layer in PrusaSlicer or OrcaSlicer is worth the thirty seconds.
Dry filament matters more than usual here. Moisture degrades layer adhesion, and a living hinge is the most adhesion-dependent feature you can print — a wet spool turns a good design into one that cracks on the first fold. Cooling is a balance: enough to define the thin section cleanly, not so much that the layers chill before they bond. For PETG I run moderate cooling; for PP, minimal. The first fold tells you a lot — a good hinge bends with a slight whitening at the crease that does not progress to a crack, while a doomed one shows an immediate split.
The Break-In Fold and Fatigue Life
There is a counterintuitive step that extends hinge life: working the hinge several times immediately after printing, while it is fresh, aligns the polymer at the crease and toughens it. Folding a new PP or PETG hinge fully back and forth a dozen times right off the bed — the break-in — visibly improves how it flexes and how long it lasts. It is the same principle behind why a bottle cap hinge is exercised at the factory.
Beyond break-in, fatigue life is mostly a function of how far and how often the hinge bends. A lid that opens ninety degrees a few times a day is a gentle duty cycle and will outlast the rest of the part. A clip that snaps fully closed and open dozens of times an hour is brutal, and there PP earns its keep. When a hinge needs to take real abuse or carry load while flexing, I stop fighting it and switch to a different mechanism — a print-in-place pin hinge handles load and heavy cycling that a thin web cannot, and a snap fit handles closures that need to latch rather than fold. Choosing the right mechanism for the duty is half the skill.
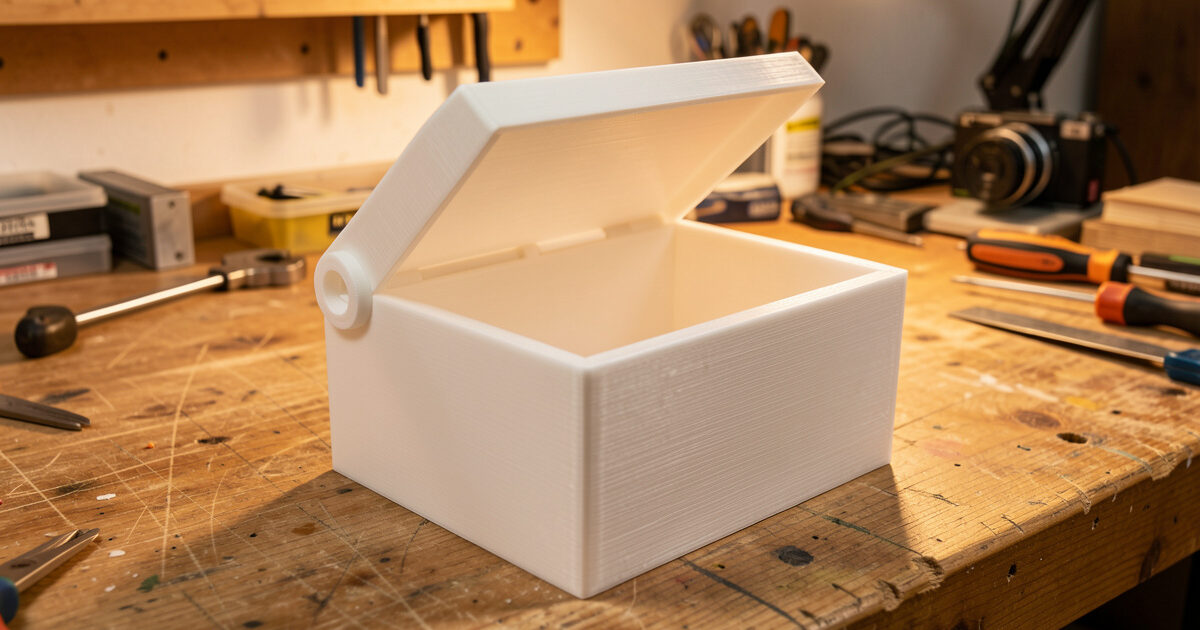
A Living Hinge From My Bench
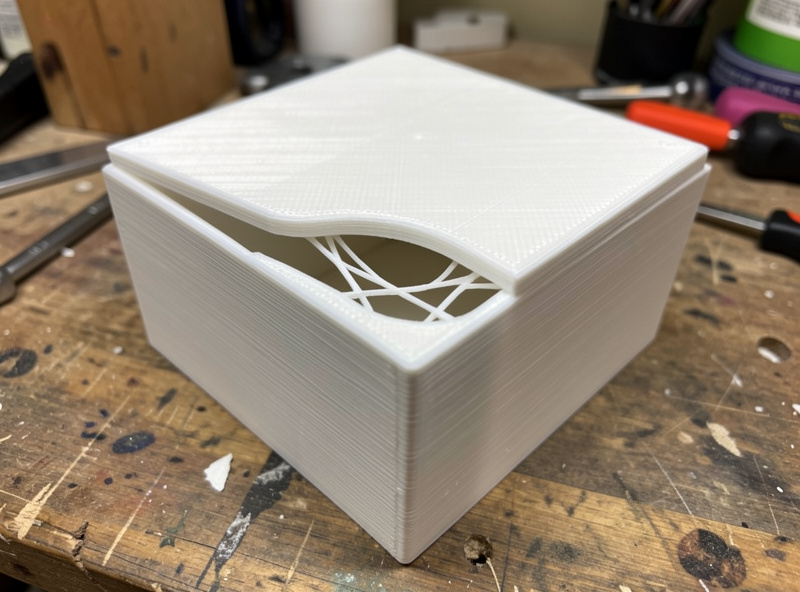
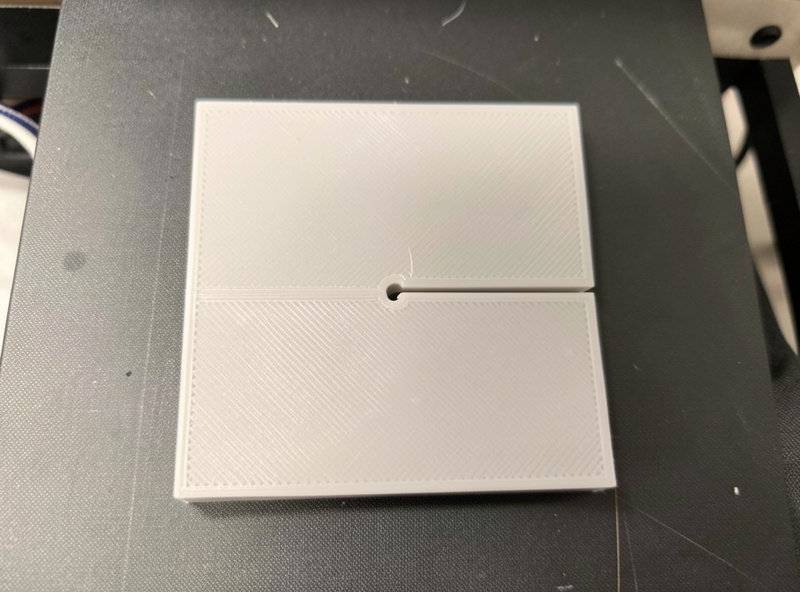
The clearest example I can give is a battery box lid I print for a small electronics project. The first attempt was PLA with a sharp, narrow hinge notch, printed standing up because the box looked better that way on the plate. It cracked the second time I opened it — brittle material, stress-concentrating notch, and the bend pulling straight on the layer bonds. Three mistakes in one part.
The version I run now is PETG, modelled and printed flat in the open position so the hinge layers run with the bend, with a gently radiused 0.4 mm web instead of a notch. I print it hot with moderate cooling, then fold it back and forth a dozen times straight off the bed to break it in. It has opened daily for months with nothing but a faint white crease at the fold. Same box, same idea — the difference was entirely material, geometry, and orientation, which is the whole lesson of this guide in one part.
When to Use a Living Hinge and When Not To
Living hinges shine for light, frequent, low-load folding: enclosure lids, flip covers, cable organizers, small boxes, clips that flex to grip. They are the most elegant option when you want a one-piece print with nothing to assemble. They are the wrong tool when the hinge has to carry weight while bending, take heavy repeated cycling in a brittle-friendly material like PLA, or act as a precise pivot — a thin web is a flex zone, not a bearing, so it has a little slop and a limited bend angle before it strains.
My rule of thumb: if PP or PETG is acceptable, the load is light, and the part can print flat in its open position, a living hinge is the cleanest solution on the bench. If any of those is not true, reach for a print-in-place hinge or a separate printed pin. Matched to the right job, a living hinge is one of the most satisfying things FDM does — a working mechanism that comes off the bed as a single finished part.