HueForge makes full-color images out of just three or four filaments by exploiting one property most color printing ignores: filament is slightly translucent, and how thick a layer is controls how much of the color below shows through. Instead of placing discrete colored regions, HueForge blends colors through layer thickness, so a handful of filaments produces a continuous-tone picture. Paired with a lithophane — a print that resolves into an image when backlit — it is the one corner of multi-color where the heavy purge waste is genuinely worth every gram.
This is a different mindset from the rest of multi-color printing, and it took me a while to stop thinking in solid colors and start thinking in transmission and layer height. This guide is the workflow that actually produces a clean HueForge print on an FDM machine, the filament-profiling step nobody can skip, and how the lithophane crossover works. It sits inside the broader multi-color and multi-material guide as the artistic end of color printing.
How HueForge Actually Works
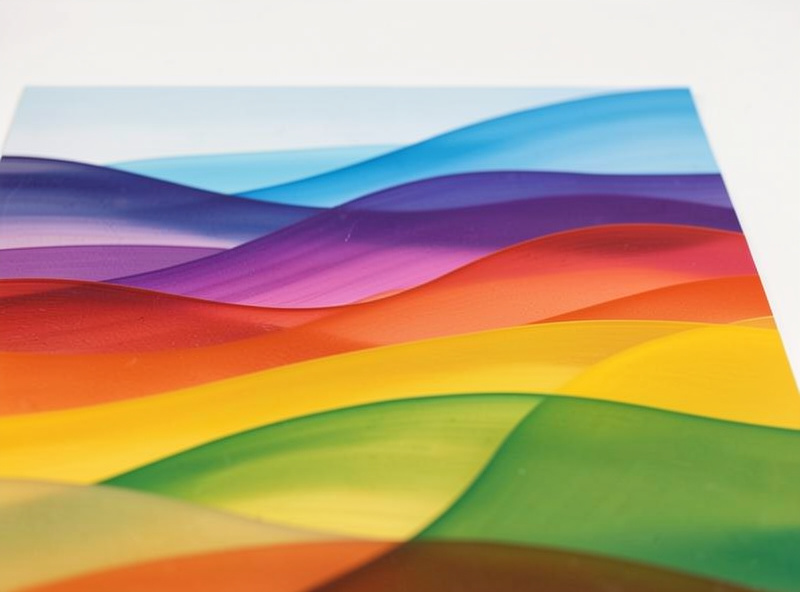
HueForge is software that takes an image and a chosen set of filaments and computes a height map — a print where the thickness of each color at every point produces the target color through layering. Because the plastic is translucent, a thin layer of red over yellow reads as orange, and a thick layer of red over the same yellow reads as deep red. By controlling those thicknesses across the print, three or four filaments cover a surprising range of color. The print is usually flat and shallow, printed face-down, with the color filaments swapped in a fixed order as the height builds up.
The key number is each filament’s Transmission Distance, or TD — how far light penetrates that specific filament before it is blocked. A low-TD filament is opaque and hides what is beneath quickly; a high-TD filament is translucent and lets lower colors show through over a greater thickness. HueForge needs accurate TD values for your actual filaments to predict color correctly, and this is the step that makes or breaks the result. Guess the TD and the printed colors will not match the preview.
Profiling Your Filaments Is Not Optional
Every filament has its own TD, and it varies by brand and even by batch, so the TD value someone else published for “red PLA” will not match your red PLA. The reliable path is to print a TD calibration step — a small wedge that ramps from thin to thick — for each filament you intend to use, then read the thickness at which it goes fully opaque and feed that back into HueForge. It is tedious the first time, but once you have profiled your working filaments those values carry across every project until you change brands. I keep a profiled shelf of the colors I use for HueForge so I am not recalibrating each time.
Translucent and natural filaments deserve special attention here, because their high TD is exactly what makes blends and lithophanes work — and exactly what makes them hard to purge cleanly, as covered in the purge and waste guide. Get the TD profiling right and HueForge’s preview becomes a genuine prediction of the printed result; skip it and you are printing blind.
The Print Workflow on an FDM Machine
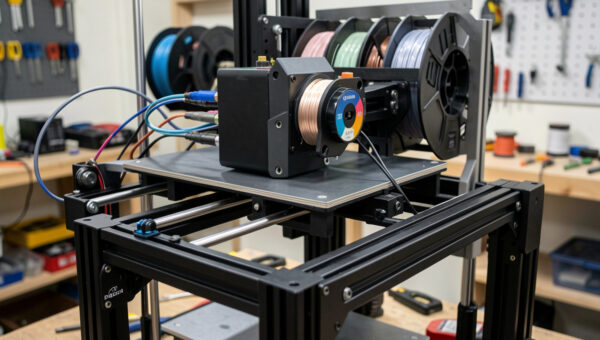
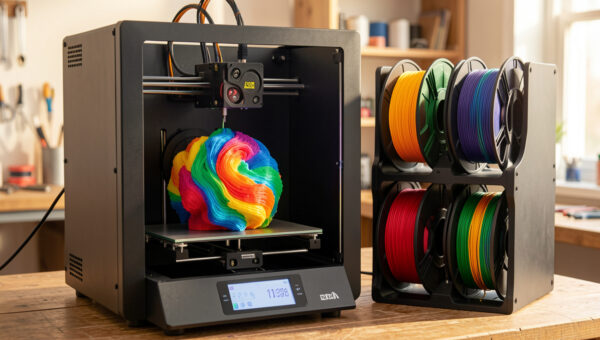
HueForge exports a model and a set of color-change heights that you bring into your slicer. You can run those changes two ways: through an AMS or MMU that swaps automatically, or through manual layer swaps on any single-extruder machine. Because a HueForge print typically uses only a few filaments in a fixed sequence, the manual layer color swap approach works beautifully and costs no purge waste — the printer pauses at each height, you change to the next color, and resume. For a flat HueForge piece with four color changes, I often just do the swaps by hand rather than spin up the AMS.
The print itself runs at a fine layer height, because the color resolution depends on thin layers — the thinner the layer, the finer the control over transmission and the smoother the color blends. I run these slow and fine, accept that they take a while, and dial in a flawless first layer because the face-down surface is the one you will actually look at. A rough first layer on a normal print is a cosmetic annoyance; on a HueForge print it is the visible face of the artwork.
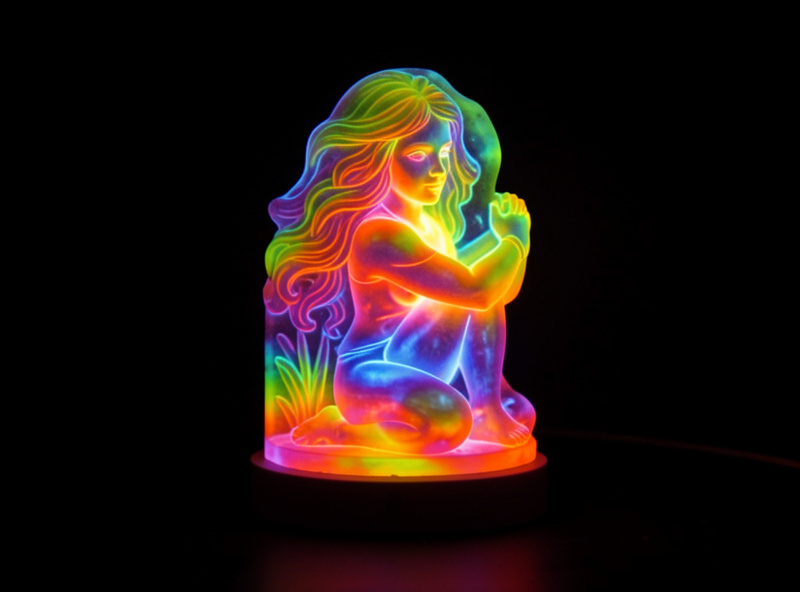
The Lithophane Crossover
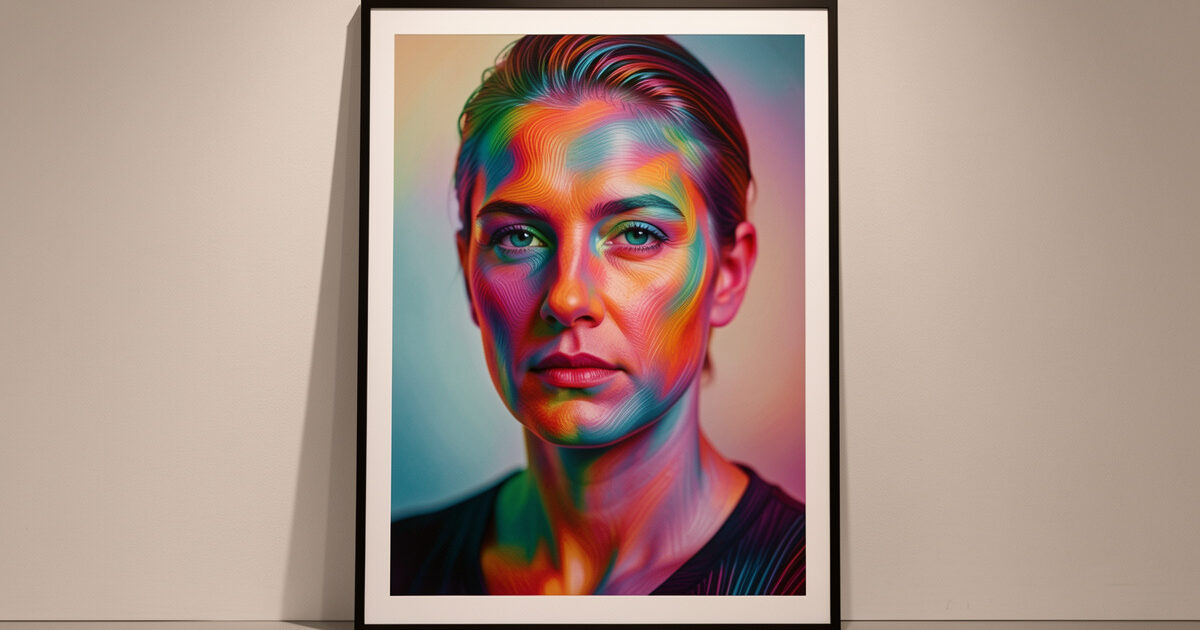
A lithophane is the original translucency trick: a print whose thickness varies so that, when light shines through the back, thick areas block light and read dark while thin areas glow bright, forming an image. Classic lithophanes are single-color and monochrome. Combine the idea with HueForge’s color blending and a translucent or white base, and you get a color lithophane that is flat and unremarkable in reflected light but resolves into a glowing full-color image when backlit. It is genuinely striking, and it is something a single-color print fundamentally cannot do.
The requirements are specific: the print needs enough translucency to transmit light, so it leans on high-TD and white filaments, and it wants a controlled backlight — an LED panel or a window-mounted frame — to come alive. The same TD profiling that makes HueForge accurate is what makes a color lithophane predictable, because you are managing exactly how much light each color lets through. This is the payoff project for everything else in this guide, and the one job where I never resent the purge.
Where People Go Wrong With HueForge
The mistakes I see most are all upstream of the print. The first is skipping filament profiling and trusting published TD numbers, which guarantees the colors drift from the preview. The second is choosing the wrong image — HueForge rewards photos with strong contrast and clear tonal range, and a flat, low-contrast image comes out muddy no matter how well you print it. I pick images the way I would for a black-and-white conversion, because tonal structure matters more than fine detail at these scales.
The third is filament order. HueForge assumes a specific stacking sequence, usually lightest to darkest, and loading the colors in the wrong order scrambles the blending entirely. I label the swap order on a sticky note by the printer before I start, because discovering a reversed sequence three hours into a fine-layer print is a painful way to learn the lesson. Get profiling, image choice, and order right and the print almost takes care of itself.
Is HueForge Worth the Effort?
For functional printing, HueForge is irrelevant — it makes pictures, not parts, and that is fine. But as the artistic end of the multi-color spectrum it is unmatched, and it produces results that genuinely impress people who have seen plenty of ordinary 3D prints. The effort is real: the TD profiling, the fine layers, the long print times, and the purge if you automate the swaps. If you want to make portraits, artwork, or gifts that no single-color print could touch, it is absolutely worth learning, and the manual-swap route keeps the waste near zero. For where it sits among machines that can drive it, the best multi-color printers roundup covers the hardware, and the older slicing walkthrough covers the change setup.
Frequently Asked Questions
What is HueForge?
HueForge is software that creates full-color images from three or four filaments by exploiting filament translucency. It computes a height map where the thickness of each color at every point blends with the colors below to produce a continuous-tone picture.
What is Transmission Distance (TD) in HueForge?
TD is how far light penetrates a specific filament before it is blocked. Low-TD filaments are opaque; high-TD filaments are translucent and let lower colors show through. HueForge needs accurate TD values for your actual filaments to predict printed colors correctly.
Do I need an AMS to print HueForge files?
No. HueForge prints use only a few filaments in a fixed order, so manual layer swaps on any single-extruder printer work perfectly and waste no purge filament. An AMS or MMU only automates the swaps for convenience.
Why do my HueForge colors not match the preview?
Almost always inaccurate TD values. Filament TD varies by brand and batch, so you must profile your own filaments with a calibration print rather than using published numbers. Correct TD profiling makes the preview a real prediction of the result.
What is a color lithophane?
A color lithophane is a print that looks flat in reflected light but resolves into a glowing full-color image when backlit. It combines lithophane thickness variation with HueForge color blending and translucent filament, lit by an LED panel or window.
What layer height should I use for HueForge?
A fine layer height, because color resolution depends on thin layers giving precise control over transmission. Thinner layers produce smoother color blends at the cost of longer print times, and a flawless first layer matters because it is the visible face.