The build plate is the most overlooked buyable upgrade on a 3D printer — a $20–$40 sheet swap, not a new machine. Swap the right surface onto a machine and welded-on PETG, lifting ABS corners, and scarred PLA bottoms mostly disappear. Across the machines I run, the plate decides more first-layer outcomes than the leveling routine does.
I have spent years printing functional parts in Sweden — hydroponic reservoir lids, smart-home sensor mounts, welder shop fixtures, leather edge slickers — and the plate is the one component I have changed on every printer I own. Most reviews treat the bed as a fixed feature of the machine. It is not. A spring steel sheet with the right coating is a $20–$40 consumable category you can stock and rotate by material, and choosing well is the difference between a print that pops off when the bed cools and one you destroy with a scraper. This guide compares every surface type I keep on the bench, what each is genuinely good at, and how I pair plates to filament on my own machines.
What a build plate actually is — and why it is a component, not a feature
A modern build plate is a removable sheet that sits on the heated bed, usually held by a magnetic base. The print sticks to the coating on top, not to the aluminum heater underneath. That separation is the whole point: when a coating wears out or you want a different surface behavior, you buy a new sheet for $20–$40 rather than a new printer.
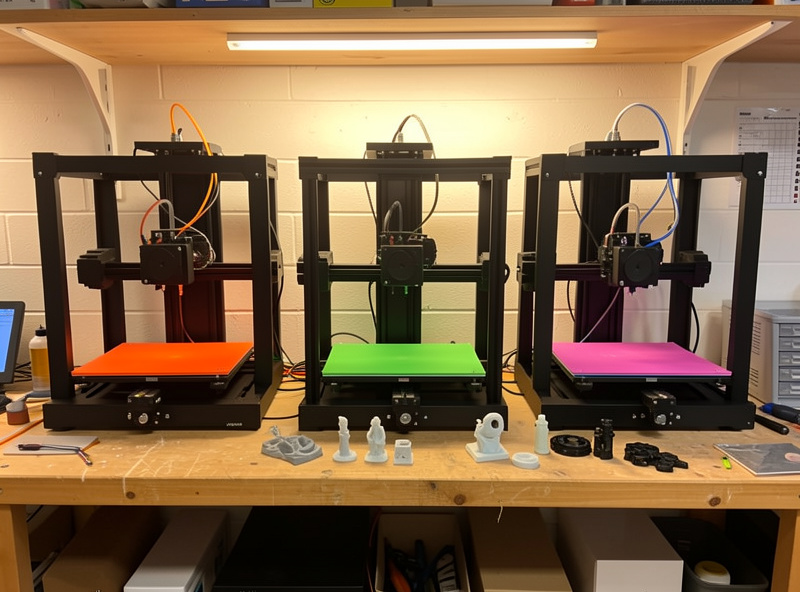
On my Prusa MK4S, my Bambu A1 and P1S, the Creality K1C, and the Anycubic Kobra 3, the bed is a steel spring sheet on a magnetic platform. The coating is what varies — powder-coated PEI, smooth PEI, textured PEX, plain G10/garolite, or glass on the older machines. Once you see the plate as a swappable consumable, the buying decision changes: you stock two or three surfaces, keep one matched to the material you run most, and stop fighting adhesion with glue sticks and hairspray.
That framing — the plate as a per-material component category — is the gap this site fills. The bed-leveling and warping guides treat adhesion as a calibration problem. Half the time it is a surface selection problem.
The build plate surfaces I keep on the bench
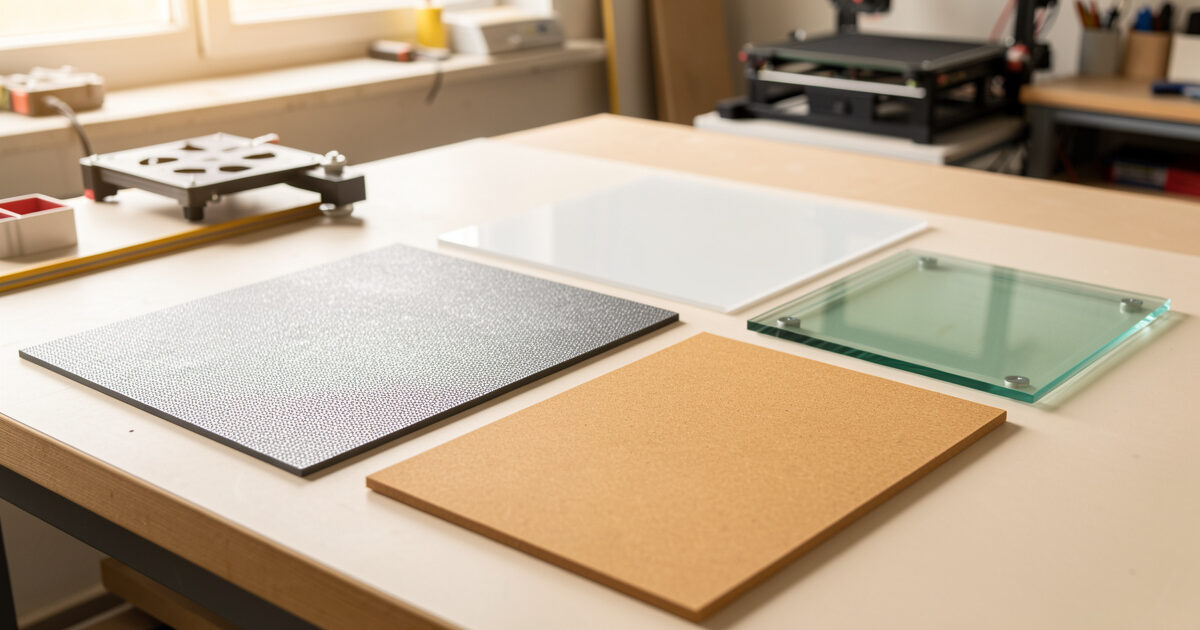
There are really six surface families worth knowing, and most printers ship with one or two of them. Here is the short version of what each is for, drawn from the plates I actually rotate through. The deeper per-material and per-surface decisions get their own guides linked below.
Textured PEI (powder-coated spring steel)
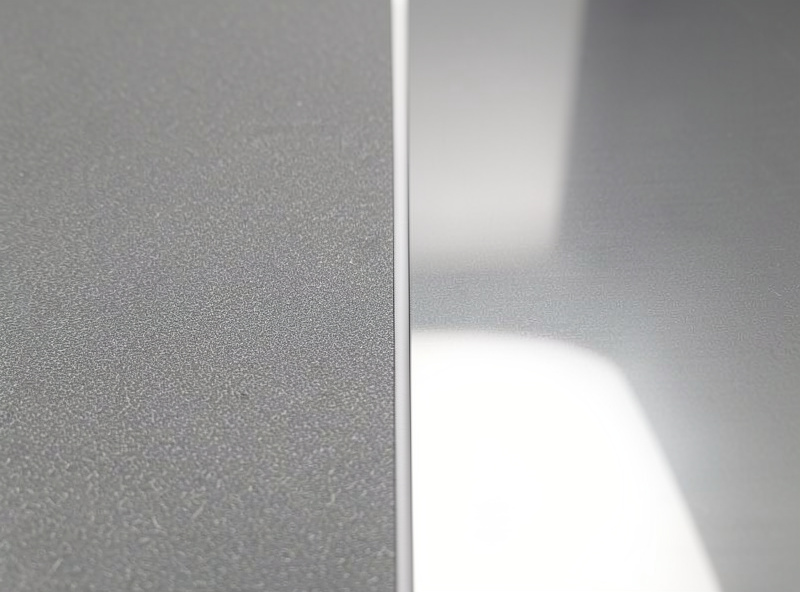
The default I reach for. The powder-coated PEI surface grips PLA and PETG hard when hot, releases cleanly when cool, and leaves a pleasant matte stipple on the part bottom that hides first-layer imperfections. It is forgiving of a slightly-too-high first layer. My textured PEI sheets do the most hours on every machine, and they are the surface I recommend a beginner buy a spare of first.
Smooth PEI
A glossy spring steel sheet that leaves a near-mirror finish on the part bottom. Adhesion is stronger than textured for small-footprint parts, which is both its strength and its trap with PETG. I run smooth PEI when a part’s appearance bottom matters or when tiny parts keep popping loose. The smooth vs textured PEI decision is the single most common build-plate question I get, and it has a real answer per material.
Garolite / G10 (for nylon)
A glass-epoxy laminate that is the one surface nylon and PA actually bonds to reliably. PEI and nylon have a complicated relationship; garolite and PA are made for each other. If you print nylon or PA at all, a garolite plate is not optional.
Glass (borosilicate / mirror tile)
The old reliable: dead flat, cheap, and capable of a glass-smooth part bottom. It needs an adhesion promoter (glue stick, PVP) for most materials and it does not flex, so you wait for it to cool and pry. I still keep a glass bed for parts where flatness matters more than convenience. The full glass bed vs spring steel verdict covers when each still earns a place.
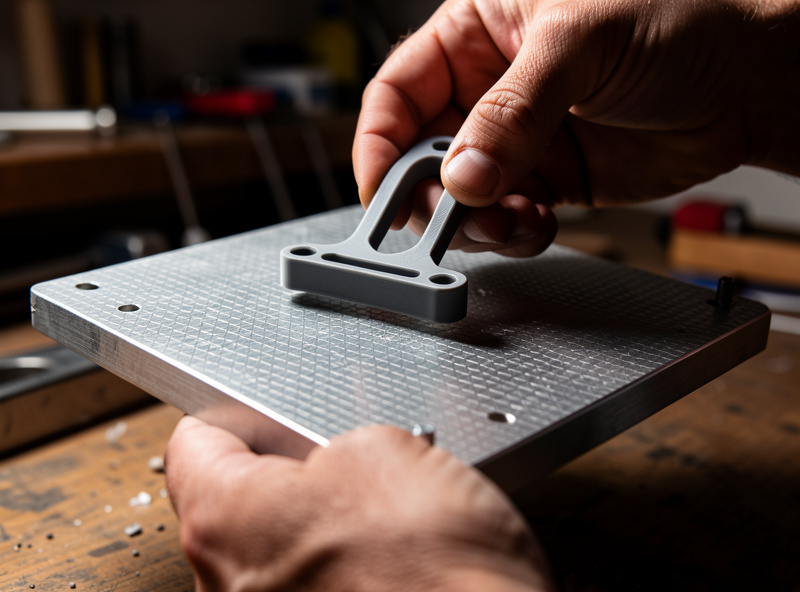
Spring steel flex plate (the system, not the coating)
The flex plate is the magnetic spring-steel carrier that any of the coatings above is bonded to. The reason it transformed desktop printing is removal: flex the sheet and the part pops off, instead of going at the bed with a scraper. Whether the magnetic flex plate is worth it as an upgrade for an older glass-bed machine is a question I tested across four printers.
Specialty surfaces (PC, PEX, engineering coatings)
Polycarbonate-coated and PEX sheets sit between smooth and textured for high-temp materials, and some vendors sell carbon-fiber-friendly or high-adhesion engineering coatings. These matter mostly if you run ABS/ASA, PC, or abrasive composites regularly — see the polycarbonate guide and carbon fiber printing guide.
Build plate types compared at a glance
Here is how the surfaces stack up on the attributes that decide which one I load: adhesion strength, release ease, part-bottom finish, flatness, durability, and what each handles best. Prices are typical spring-steel-sheet replacement costs, not printer prices.
| Surface | Adhesion | Release | Bottom finish | Best for | Typical sheet price |
|---|---|---|---|---|---|
| Textured PEI (powder-coated) | Strong hot, lets go cool | Excellent (flex) | Matte stipple | PLA, PETG, daily driving | $25–$40 |
| Smooth PEI | Very strong, small parts | Good (flex) | Glossy / mirror | Show-bottoms, small footprints | $25–$40 |
| Garolite / G10 | Excellent for nylon only | Good (flex) | Matte | Nylon, PA, PA-CF | $25–$45 |
| Glass (borosilicate) | Needs adhesive promoter | Pry when cool | Glass-smooth | Flatness-critical parts | $15–$30 |
| PC / PEX coated | Strong at high temp | Good (flex) | Semi-matte | ABS, ASA, PC blends | $30–$50 |
| Smooth/textured for TPU | Tunable — too much is the risk | Material-dependent | Varies | Flexibles (see TPU guide) | $25–$40 |
Two things this table cannot show. First, none of these are mutually exclusive — I run two or three at once and swap by job. Second, the “best for” column is a starting point, not a rule; a textured PEI sheet handles 80% of what most makers print, and the specialty surfaces earn their place only when you run their material often.
Matching the plate to the material
This is where build-plate choice actually pays off, and where the most expensive mistakes live. The wrong plate-and-material pairing is what produces welded-on parts you cannot remove and lifted corners you cannot prevent.
PLA is easy — it sticks to nearly everything. Textured PEI is ideal; smooth PEI works but can grip small PLA parts hard enough to chip the coating on removal. Run textured and forget about it.
PETG is the cautionary tale. PETG bonds to bare PEI too well — strongly enough to tear a divot out of the coating when it cools. On smooth PEI especially, PETG can weld permanently. The fix is a release layer (a wipe of glue stick as a barrier, not as adhesion) and textured PEI over smooth. The full best build plate for PETG guide covers the welded-on problem in depth — it is the most common plate-destroying mistake I see.
ABS and ASA want heat and an enclosure more than a special surface; textured PEI or a PC sheet in an enclosed chamber handles them, with the real battle being warping rather than adhesion.
TPU and flexibles are the opposite problem from PETG: getting them off is rarely the issue; holding them down during a long flexible print is. The best build plate for TPU guide covers which surfaces hold flexibles without becoming impossible to release.
Nylon and PA need garolite, full stop — see the dedicated guide. PEI fights nylon.
Flatness, flex, and the removal problem
Before spring steel, removal was the worst part of FDM. You waited, you pried, you gouged the bed or the part, and occasionally you cracked a glass plate. The magnetic flex plate solved that: the sheet lifts off the magnetic base, you bow it, and the part releases along the bond line because the rigid part cannot follow the flexing steel.
The trade is flatness. A glass plate is flatter than any spring steel sheet — borosilicate is ground flat to a tolerance steel cannot match cheaply. For most prints, a properly meshed bed (auto bed leveling compensates for the small dish in a steel sheet) makes the difference invisible. For a large flat part — a lid, a panel, a baseplate — glass can still produce a better bottom. That is the heart of the glass vs spring steel decision, and why I have not thrown my glass bed away.
If your machine still has a fixed glass or aluminum bed, adding a magnetic flex system is the single upgrade that most changes how the printer feels day to day. I ran the same parts on four machines before and after to see whether the flex plate upgrade was worth it on each.
When adhesion goes wrong in both directions
Build-plate problems are not just “the print won’t stick.” Half the support requests I see are the opposite: the print stuck so hard it will not come off, or it tore the coating when it did. Both are surface-selection and surface-condition problems.
Too little adhesion shows up as warping and lifted corners — usually a dirty plate, too low a bed temp, or the wrong surface for the material. The warping and adhesion fix guide walks the whole diagnostic. Too much adhesion shows up as parts welded to the plate, gouged coatings, and the temptation to attack a $35 sheet with a chisel. There are real techniques — thermal cycling, freezer release, the right release agents — covered in when build plate adhesion is too strong. Knowing both ends of the spectrum is what keeps a plate alive for years.
Cleaning and restoring a build plate
A PEI plate that “stopped working” is almost never worn out — it is contaminated. Skin oils from handling the surface are the number-one adhesion killer, and they build up invisibly. My routine is dish soap and warm water between jobs and isopropyl alcohol for a quick wipe, never touching the print area with bare fingers. A glazed, shiny, no-longer-gripping PEI surface can usually be brought back by lightly scuffing with a fine abrasive pad — a genuine restoration, not a replacement. The full method, including how to revive a plate everyone else would throw out, is in how to clean a PEI build plate and restore a dead one.
This is the total-cost-of-ownership angle competitors skip: a build plate is a consumable, but a well-maintained PEI sheet lasts years, while a neglected one “dies” in months and gets needlessly replaced. Cleaning is the cheapest adhesion upgrade there is.
Total cost of ownership: why the plate matters more than the spec sheet
Here is the framing the influencer reviews skip. A build plate is a $20–$45 consumable, but the wrong choices compound. Buy a printer for its bed and you will be disappointed; buy the right sheets for the printer you have and a $200 machine prints like a $600 one for the materials you actually run.
My standing recommendation: own a textured PEI sheet (your daily driver), add a smooth PEI sheet if you print parts where the bottom shows, and add a garolite sheet only if you print nylon. That is most makers’ entire build-plate budget — under $100 — and it covers PLA, PETG, ABS, TPU, and nylon across every machine I have tested. A spare textured PEI sheet for the printer you run most is the best $30 in 3D printing, because it turns a failed-adhesion night into a sheet swap instead of a teardown. You can find replacement textured PEI spring steel sheets and garolite plates for nylon sized to most common bed dimensions. As an Amazon Associate I earn from qualifying purchases.
How I would choose, by machine and use
If you run a Bambu, Prusa, Creality, or Anycubic flex-plate machine, you are already on spring steel — your decision is which coatings to stock. Run textured PEI as the default, keep a smooth sheet for show-bottom parts, and add garolite if nylon is in your future. If you run an older fixed-bed machine, the highest-impact buy is a magnetic flex base plus a textured PEI sheet, which modernizes removal in one purchase. And whatever you run, treat the plate as a maintenance item: clean it, scuff it when it glazes, and match it to the material rather than fighting the wrong surface with adhesives.
The deeper guides below take each of these decisions further. Start with the smooth-vs-textured question if you are buying your first spare, or the per-material guides if you already know what you print most.
Bed temperature, the plate, and the first layer
The plate does not work in isolation — it works with bed temperature and first-layer height, and getting the surface right while ignoring the other two is why people blame a good plate. PEI’s grip is temperature-dependent: it bonds hard in a window and lets go below it. PLA wants roughly 55–60°C, PETG 70–80°C, ABS/ASA 90–110°C in an enclosure. Run a textured PEI sheet too cool for the material and you get the lifted corners people mistake for a worn-out plate.
First-layer height is the other half. Textured PEI is forgiving of a slightly high first layer because the part keys into the stipple; smooth PEI and glass are not, and want a first layer squished enough to wet out across the surface. When I move a profile from a textured sheet to a smooth one, I re-check the Z-offset every time — the same offset that looks perfect on stipple will read as poor adhesion on glass. This is exactly where the first layer tuning and bed leveling work pays back: a clean plate, the right temp, and a dialed first layer are one system, not three separate fixes. Treat them together and most adhesion complaints disappear before you ever reach for glue.
One last habit worth building: keep a short test log. When I qualify a new sheet I print the same 40×40 mm first-layer patch and a tall single-wall tower, note the bed temp and Z-offset that worked, and tape that to the sheet’s storage sleeve. It takes ten minutes and means swapping plates mid-week is a known-good profile load instead of a re-calibration. Across the machines I run, that one log has saved more failed prints than any firmware update.
Frequently Asked Questions
What is the best all-around 3D printer build plate?
Textured (powder-coated) PEI on a magnetic spring steel sheet is the best all-around build plate. It grips PLA and PETG when hot, releases cleanly when cool, hides first-layer flaws with a matte stipple, and handles roughly 80 percent of what most makers print without any adhesive.
Why does my PETG stick too hard and tear the build plate?
PETG forms a strong chemical bond with bare PEI, especially smooth PEI, and can weld permanently, tearing a divot from the coating on removal. Use a glue-stick layer as a release barrier, switch to textured PEI, and let the bed fully cool before flexing the sheet.
Do I need a special build plate for nylon?
Yes. Nylon and PA bond poorly to PEI but adhere reliably to garolite (G10) glass-epoxy laminate. A garolite sheet is effectively mandatory for nylon and PA-CF printing; it is the one surface PA actually sticks to consistently.
Is glass or spring steel better for 3D printing?
Spring steel wins on convenience because you flex it to release parts instead of prying. Glass is flatter and gives a glass-smooth bottom, which still matters for large flat parts. Most makers are better served by spring steel, with glass kept for flatness-critical work.
How often do build plates need replacing?
A well-maintained PEI sheet lasts years. Most plates that stop working are contaminated with skin oils, not worn out, and are revived by washing with dish soap and lightly scuffing a glazed surface. Replace only when the coating is physically gouged or delaminating.
Can I use one build plate for every filament?
A textured PEI sheet covers PLA, PETG, ABS, ASA, and TPU adequately. The exceptions are nylon, which needs garolite, and show-bottom parts, which benefit from smooth PEI. Most makers do well with textured PEI as a daily plate plus one or two specialty sheets.
Related Guides
This hub anchors a full set of build-plate guides — each one goes deeper on a decision touched on above:
- Smooth vs Textured PEI: Which Build Plate Finish to Run
- Best Build Plate for PETG: Stop the Welded-On Mess
- Garolite Plates for Nylon: The Surface PA Actually Sticks To
- Glass Bed vs Spring Steel Sheet: A Maker’s Verdict
- How to Clean a PEI Build Plate and Restore a Dead One
- When Build Plate Adhesion Is Too Strong: Releasing Stuck Prints
- Is a Magnetic Flex Plate Worth It? Tested Across Four Machines
- Best Build Plate for TPU: Surfaces That Hold Flexibles Down
For the surrounding fundamentals, see the bed leveling and tramming guide, the first layer tuning guide, and the printer maintenance routine — adhesion lives at the intersection of plate, level, and first layer.